Do you have a question about the Otter Pro XT Lodge and is the answer not in the manual?
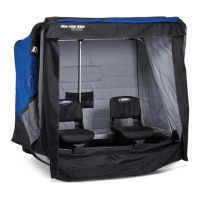
Detailed list of all components included in the Otter Pro XT Lodge package with item numbers.
List of necessary tools for the installation and set-up of the fish house.
Attaching seat slide brackets to the seat swivel using screws and nuts, leaving them loose.
Sliding and adjusting the swivel assembly onto the plastic base and tightening securely.
Connecting the assembled swivel mechanism to the bottom of the seat with fasteners.
Drilling pre-marked holes in the sled using a 5/16" bit for seat rail bracket installation.
Securing the metal brackets to the seat rail using 5/16" bolts and nuts.
Bolting seat rails into place and attaching plastic end caps with self-tapping screws.
Attaching main frame brackets to the sled using pre-drilled holes and appropriate fasteners.
Constructing the back, center, and front main frame bar assemblies by connecting various components.
Attaching the assembled main frame sections (back, center, front, bottom) to the sled brackets.
Erecting the main frame bars and installing the wind support bars for the tent structure.
Placing the tent fabric over the assembled main frame bar structure.
Fastening velcro straps and installing plastic trim locks to secure the tent to the sled.
Snapping the plastic trim seal onto the sled lip for a complete and sealed tent attachment.
Instructions on protecting the fish house fabric from damage, wear, and improper handling.