%&'"()*+,,-,,.".
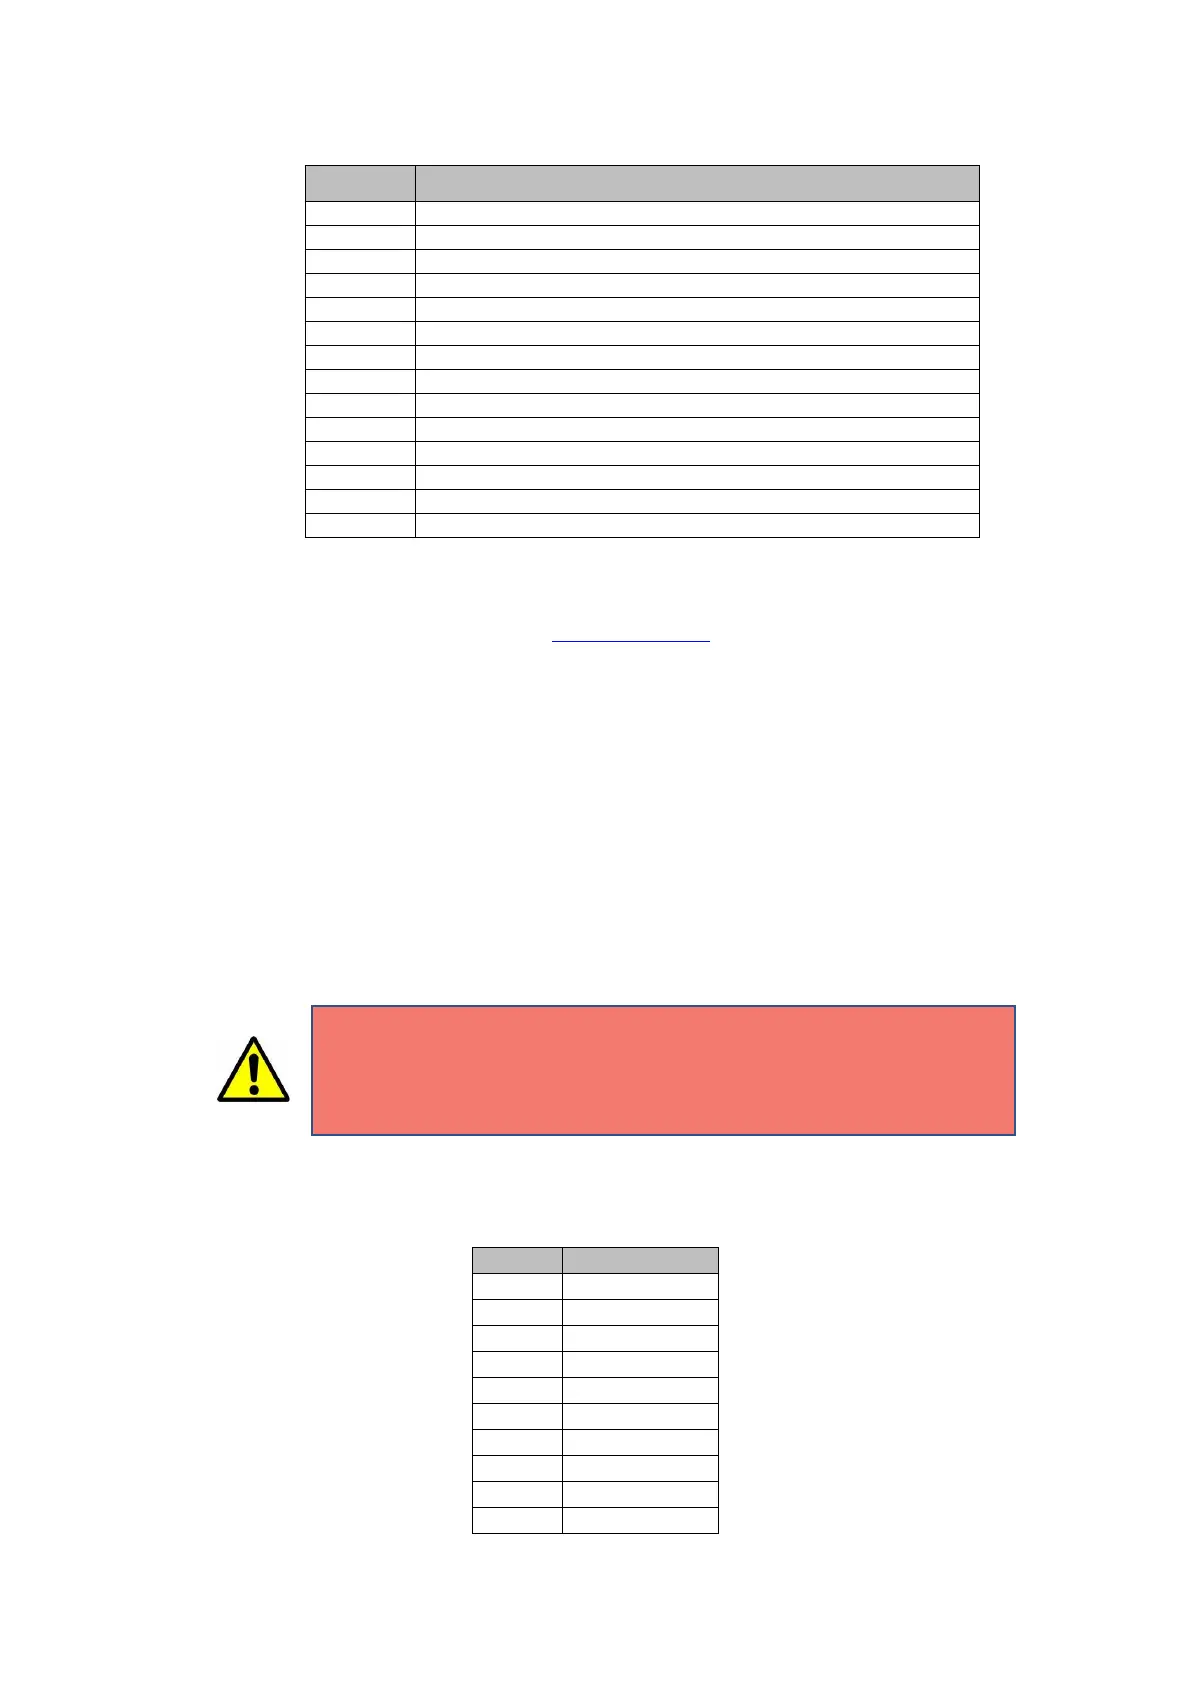
Number Connector
J1 Connector for audio and analog inputs from owa4x
J2 Connector for digital inputs from owa4x
J3 Connector for digital outputs from owa4x
J4 Connector for CAN KLINE and RS485 from owa4x
J5 Connector for power, and RS232 interfaces from owa4x
X3 Jack for DC power supply, 12V or 24V.
J6 DB9 for main uart, UART4
J7 Connector for external devices
J8 Connector for external devices
J9 Connector for external devices
J10 Connector for external devices
J11 Connector for external devices
J12 Jack speaker
J13 Jack microphone
3.1 Connectors of developer kit
In the developers zone of www.owasys.com there is available to download the
schematics of the DK board in pdf format, which has better quality than the
image on this document.
Power may be connected to either X3 or J7. The power input range is 9V – 48V
or 9V – 36V for HW R4 or newer, and a fuse F1 is mounted in the DK board to
prevent damages to other components in case of over-voltage.
Connectors J1 to J5 are used to connect the necessary signals to the owa4X.
All the signals are available in the connectors mounted in the front in case they
have to be connected to external devices.
In order to test the analog inputs, potentiometers are provided. The switch may
select the potentiometer or leave the signal open for an external signal source
to be connected.
Digital inputs have switches to change the default status, in order to test the
behaviour of all them.
Digital outputs have led indicators, to indicate when they have been activated.
Pin Signal
J1-1 MICN
J1-2 MICP
J1-3 GND
J1-4 SPKN
J1-5 SPKP
J1-6 GND
J1-7 AIN-3
J1-8 AIN-2
J1-9 AIN-1
J1-10 AIN-0
+2
Be careful when connecting the DIO cables to the DIN J2 connector. If
instead of using them as inputs, are activated the outputs that are
multiplexed on them, the unit may be damaged. Have special care with DIO8
and DIO9, activating their output while connected to the J2 connector and
closed switch, will damage the device.
 Loading...