d. Place the probe on the shim over the bare part.
e. Enter the thickness of the shim, lift the probe at least 3 inches (76
mm) away from the part, and press the ENTER key. Once a
numerical key has been pressed, the probe can be lifted from the
shim without affecting the calibration.
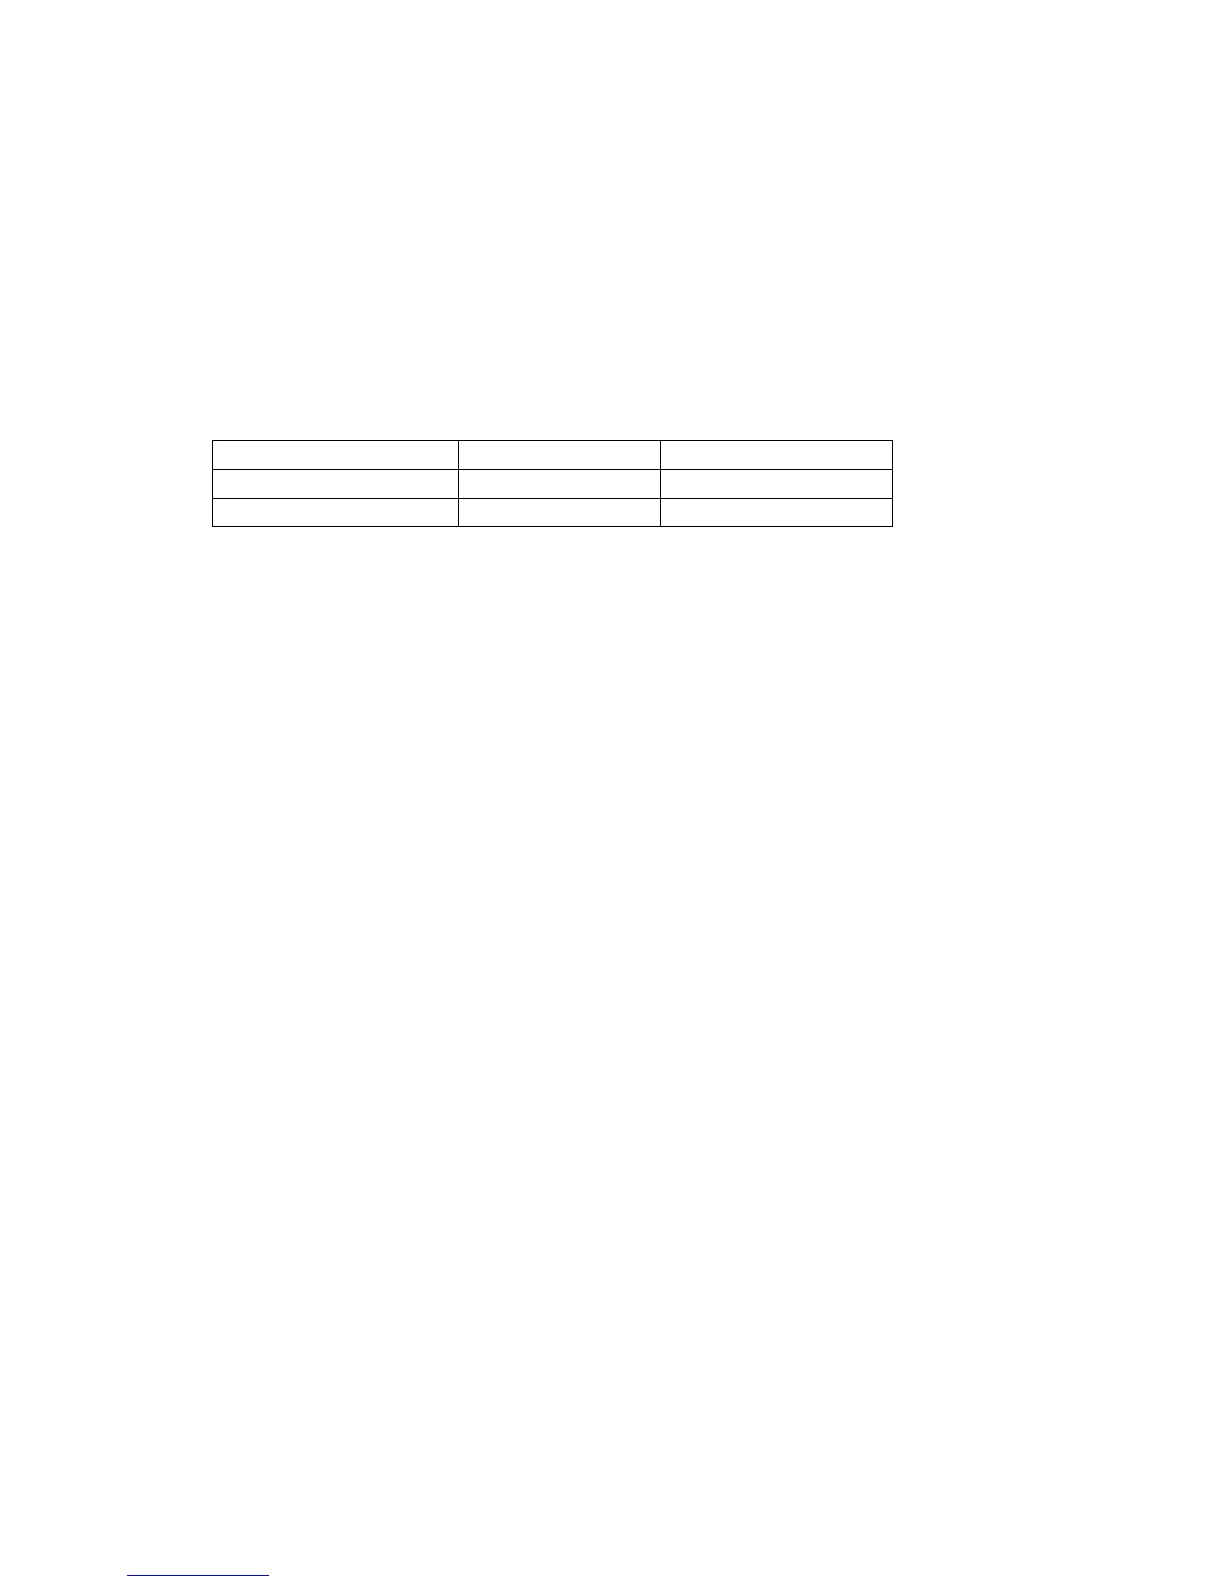
Two Point Calibration
The two point calibration is performed with two shims according to the expected
measurement range. See table below. For ranges greater than 10 mils (254
um), consult Oxford Instruments Technical Support for shim size information.
NOTE: After a Zero Calibration, 0.00 will appear on the display. After a
thickness calibration, the value entered will appear on the display. Neither of
these readings will affect the statistics.
CAUTION: When a calibration (or a re-calibration) is made while in location 1, or
location 51, the new calibration will overwrite all calibrations assigned to the
universal calibration. See Calibrations – How to Assign Universal Calibration
Locations.
1. Select the memory location for the calibration as described in Memory
Management: How to Select a Memory Location.
2. Press the CAL key. The word CAL will appear on the right of the display
and “C” will appear in the upper left.
3. Place the probe on the bare part and press the ZERO/UNITS key.
4. Lift the probe off the bare part and wait for the beep.
5. Press the “٭” key and the press the CAL key. The word CAL will appear
on the right side of the display and “C1” will appear in the upper left.
6. Place the first shim on the bare part and place the probe over the shim.
7. A thickness will be displayed on the unit. Enter the thickness of the shim
using the numerical keys, even if the displayed value is correct. Once a
numerical key has been pressed, the probe can be lifted from the shim
without affecting the calibrations.
8. Check the display. If incorrect, press the CLEAR key and re-enter the
number. When finished, lift the probe at least 3 inches (76 mm) away
from the part and press the ENTER key. The display will now show “C2”
in the upper left corner.
9. Place the second shim on the bare part and place the probe over the
shim.
10. A thickness will be displayed on the unit. Enter the thickness of the shim
using the numerical keys, even if the displayed value is correct. Once a
numerical key has been pressed, the probe can be lifted from the shim
without affecting the calibration.
Oxford Instruments Contact Measurement Page 8 of 24
233 USER GUIDE
The information in this document is private and confidential and must not be copied.
Oxford Instruments plc