3
ONLINE MANUAL
Scan this QR Code with your
mobile device to take you to
the online manual.
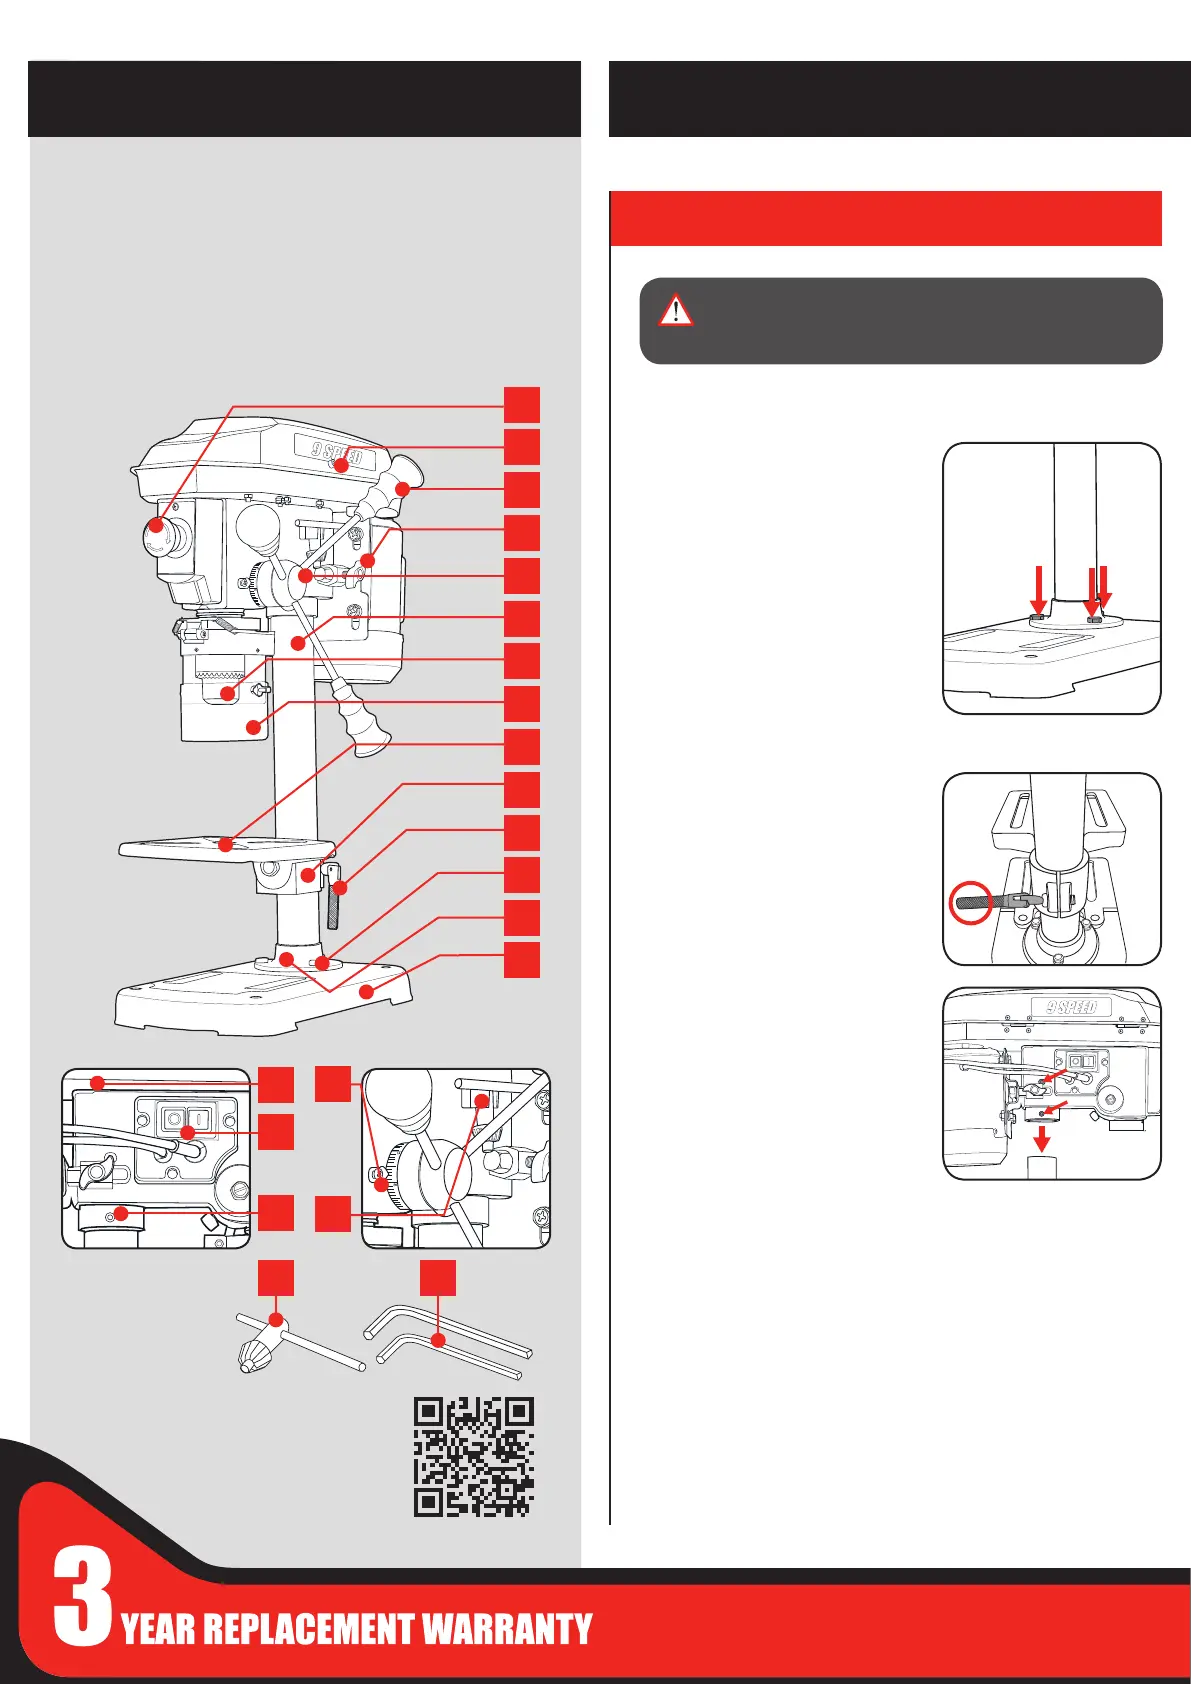
Assembling the drill press
1. Carefully remove contents from the packaging.
2. Select a rm, level surface on which
to assemble the drill press.
3. Place the base and align the column
over the large hole. Align the holes
in the column support with those
in the base and secure in place
using the 3 column support bolts
(supplied). Using a 14mm spanner
securely tighten all
3 column support bolts.
4. Slide the table support over the
column. Using the table support
lock, secure the table into the
desired position.
5. Lift the head assembly and slide it
down onto the column as far as it
will go. Rotate the head so that is
aligned with the base.
To secure in position install the 2
head lock screws. Tighten using
the 4mm Hex key, rotating in a
clockwise direction.
DRILL PRESS
KNOW YOUR PRODUCT
2120
1. ASSEMBLY
SETUP & PREPARATION
WARNING! DURING ASSEMBLY ENSURE THE
DRILL PRESS IS DISCONNECTED FROM THE
POWER SUPPLY.
ACCESSORIES
20. Chuck key
21. 4mm & 12mm
Hex key
1. Stop/O Button
2. Pulley cover screw
3. Feed wheel handles
4. Belt tension knob
5. Feed wheel hub
6. Column
7. 13mm Keyed chuck
8. Eye Shield
9. Table
10. Table support
11. Table support lock
12. Column support bolts x 3
13. Column support
14. Base
15. Head assembly
16. Depth indicator
17. ON/OFF Switch
18. Head lock screw
19. Chuck Key Holder
1
2
4
3
5
6
7
10
11
13
14
15
9
12
17
18
8
16
19