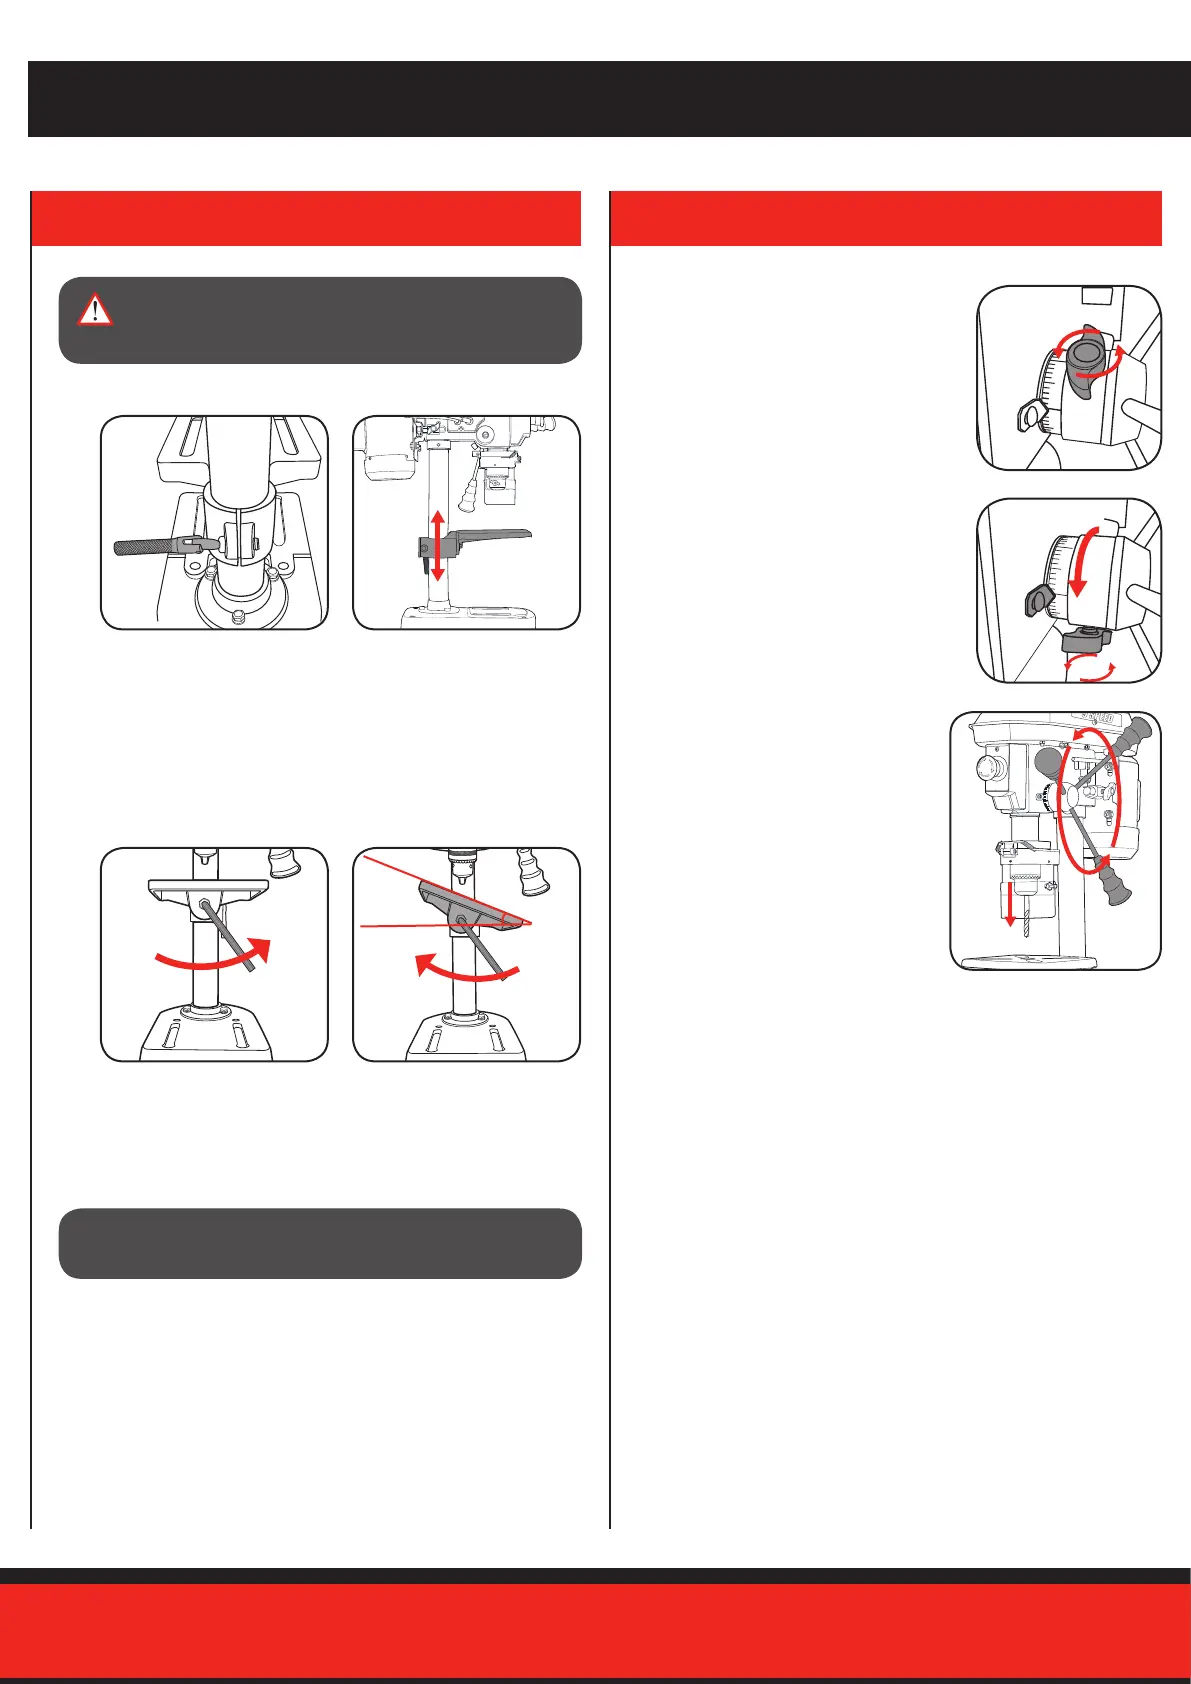
Adjusting the table height
1. Loosen the table support
lock.
Adjusting the table angle
The table can be adjusted up to 45° to the left or right.
1. Loosen the table support
angle bolt (located below
the table) by rotating anti-
clockwise using the hex key.
2. HEIGHT & ANGLE ADJUSTMENTS 3. DEPTH ADJUSTMENTS
ADJUSTMENTS
WARNING! BEFORE MAKING ANY ADJUSTMENTS,
ENSURE THE DRILL PRESS IS DISCONNECTED
FROM THE MAINS POWER.
CAUTION! WHEN THE TABLE IS ANGLED/TILTED, ENSURE
THE WORKPIECE IS CLAMPED TO THE TABLE.
Pre-setting the drilling depth
1. Loosen the depth adjustment lock nut by
turning in an anti-clockwise direction.
2. Rotate the depth adjustment ring until
the desired drilling depth aligns with
the point indicator. Tighten the depth
adjustment lock nut to secure this
position.
3. Ensure the drill bit is secured in the
chuck and then proceed to operate
the drill press.
Once the drill lowers to the selected
depth, the stop will engage to
prevent drilling any lower.
4. To disable the depth lock, loosen the depth adjustment lock nut and
reset to the desired position. Having it in the highest position on the
depth rod will provide maximum drilling capacity.
2. Set the desired table height and
tighten the table support lock to
secure the table in position.
2. Align and set the desired angle.
Tighten the table support angle
bolt by rotating in a clockwise
direction to secure the table in
position.