DESCRIPTION OF SYMBOLS
CARING FOR THE ENVIRONMENT
Power tools that are no longer usable should not be disposed of
with household waste but in an environmentally friendly way. Please
recycle where facilities exist. Check with your local council authority
for recycling advice.
Recyclingpackagingreducestheneedforlandllandrawmaterials.
Reuse of recycled material decreases pollution in the environment.
Please recycle packaging where facilities exist. Check with your
local council authority for recycling advice.
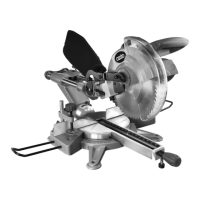
254mmsawbladethattthisunitarereadilyavailableatyour
local Bunnings Warehouse. When purchasing a blade, ensure it
canbettedtotheboresizeofthistool.
Spare parts can be ordered from the Special Orders Desk at
your local Bunnings Warehouse.
For further information, or any parts not listed here, visit
www.ozito.com.au or contact Ozito Customer Service:
Australia 1800 069 486
New Zealand 0508 069 486
E-mail: enquires@ozito.com.au
SPARE PARTS
ADDITIONAL INFORMATION
IMPORTANT! NOTE THE RUNNING DIRECTION. THE
CUTTING ANGLE OF THE TEETH MUST POINT IN
RUNNING DIRECTION, I.E. FORWARDS (SEE THE
ARROW ON THE BLADE GUARD).
Operating mode S6 40%: Continuous operation with idling
(cycle time 10 minutes). To ensure that the motor does not
become excessively hot it may only be operated for 40% of
the cycle at the specied rating and must then be allowed
to idle for 60% of the cycle.
V Volts Hz
~ Alternating current W
/min Revolutions or
reciprocation per minute
Regulator compliance mark
no
Warning
Danger! Keep hands away
from blades
Read instruction manual
Wear eye protection
Wear hearing protection
Wear safety gloves
Wear breathing protection
Hertz
Watts
No load speed
Double insulated
6 Cleanthebladeangethoroughlybeforettingthenewblade.
7 Mount and fasten the new saw blade following the previous steps
reverse order. Ensure the blade direction matches the arrow
direction indicated on the housing.
8 Retandsettherivingknife,tableinsertandthebladeguard.
9 Check to make sure that all safety devices are properly mounted
and in good working condition before you begin working with the
saw again.
8. TABLE INSERT
1 To prevent increased likelihood
of injury the table insert should
be changed whenever it is
worn or damaged.
2 Remove the blade guard by
loosening the bolt.
Changing the table insert
3 Remove the 2 countersunk
screw.
4 Take out the worn table insert.
5 Totthereplacementtable
insert, proceed in reverse
order.