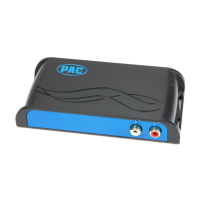
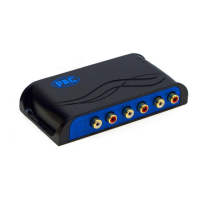
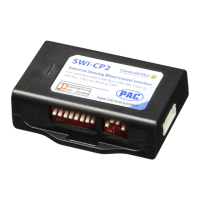
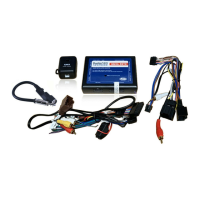
The APSUB-GM61 is an advanced subwoofer amplifier interface designed for use with select General Motors vehicles. Its primary function is to provide a 2-channel non-fading output, enabling the integration of an aftermarket amplifier and subwoofer into the vehicle's existing audio system. This interface leverages the full-range, fixed-level output from the factory head unit, combined with MOST (Media Oriented Systems Transport) data, to deliver a versatile 5V RMS pre-amp output. This output includes bass equalization and level control capabilities, ensuring a customized audio experience. A key feature of the APSUB-GM61 is its integrated 350Hz / 24dB Linkwitz-Riley low-pass filter, which optimizes the signal for subwoofer performance. Additionally, the module provides a data-controlled remote amplifier turn-on wire, simplifying the installation and power management of aftermarket components.
Usage Features:
The APSUB-GM61 is compatible with GM vehicles equipped with 104, 105, or 106 model radios, regardless of whether they originally came with a Bose audio system. This broad compatibility makes it a flexible solution for many GM owners looking to upgrade their audio.
One notable usage feature addresses a potential issue in some non-Bose radios where audio might be absent from the left channel when using AM, FM, or XM sources. The APSUB-GM61 offers a workaround by routing the right channel audio through both the left and right channels for these specific sources, ensuring continuous sound. For all other audio sources, the module maintains proper left and right channel separation.
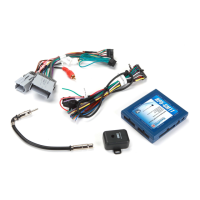
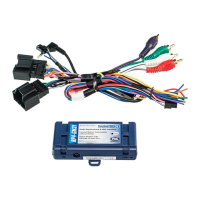
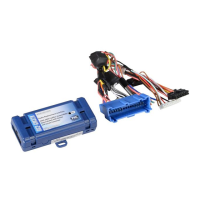
Installation requires the factory amplifier to remain connected in the vehicle after the APSUB-GM61 is installed, if the vehicle was originally equipped with one. This ensures proper system functionality and integration. The remote output provided by the interface is rated at 2A of current, which is sufficient for most aftermarket amplifiers. However, if more current is required, an external relay can be easily integrated.
The device includes a bass level control knob, which is crucial for adjusting the output level. If this knob is not connected, the output level will default to 100%. The knob is also essential for manually adjusting the minimum volume settings, providing granular control over the audio experience. The minimum volume level is set to a default value, but users have the option to adjust it if the default does not meet their specific needs.
The APSUB-GM61 also offers a solution for vehicles equipped with Active Noise Cancellation (ANC). The ANC system, designed to cancel out unwanted noise, can interfere with aftermarket subwoofers by attempting to cancel out bass frequencies, leading to undesirable "noise" from the factory speakers. The included ANC-GM03 harness allows users to disable the ANC system, ensuring optimal performance of the aftermarket subwoofer without interference.
The interface's functionality can be further customized through its DIP switches. These switches allow users to activate or deactivate specific features, such as setting the RCA output voltage to either 5V (default) or 4V. This flexibility enables users to tailor the module's performance to their specific amplifier requirements.
For advanced configuration and firmware updates, the APSUB-GM61 is supported by the AmpPRO PC app. This application allows users to:
- Configure user interface options, including minimum volume level.
- Enable or disable factory EQ.
- Set bass center frequencies and Q Factor, providing precise control over bass response.
- Update the product firmware, ensuring the module stays current with the latest enhancements and bug fixes.
- View firmware and hardware versions for diagnostic purposes.
The AmpPRO PC app offers a comprehensive suite of tools for fine-tuning the APSUB-GM61, making it a highly adaptable solution for audio enthusiasts. Adjustments made via the app can be performed with the module installed in the vehicle and the factory radio on, allowing for real-time auditory feedback.
Maintenance Features:
The APSUB-GM61 is designed for ease of maintenance and troubleshooting. If the module becomes unresponsive or fails to power up, it can be reset. This can be done by turning the key to the ignition position and then pressing and holding the Power button on the factory radio for 12 seconds, or by pressing and holding the reset button on the side of the APSUB module for 10 seconds until the LEDs alternate flashing red. This simple reset procedure helps resolve most common issues.
The device features LED indicators (LED 1 and LED 2) that provide visual feedback on its operational status and various modes. For instance, a solid red LED 1 indicates the module is active, while a solid amber LED 1 signifies the minimum volume adjustment mode. Rapid blinking of any color LED indicates DSP activity, and a blinking amber LED 2 confirms a USB connection. If both LEDs alternate blinking red, it indicates a memory reset is in progress. These LED cues are invaluable for quick diagnostics and understanding the module's current state.
Restoring the interface to factory default settings is also straightforward. By pressing and holding the programming button on the side of the module for 10 seconds until the status LEDs start blinking red, users can revert all settings to their original factory configuration. This includes the minimum volume level, factory EQ settings (enable/disable, frequency, and Q factor), and radio tuner settings. This feature is particularly useful for troubleshooting or when a user wishes to start fresh with the module's configuration.
Firmware updates, facilitated by the AmpPRO PC app, are a key maintenance feature. Users can easily download new firmware from the PAC-Audio website and apply it to the interface. This ensures that the APSUB-GM61 benefits from ongoing improvements, bug fixes, and compatibility updates, extending its lifespan and enhancing its performance over time. The app provides a clear process for selecting and applying firmware files, making the update procedure user-friendly.
The APSUB-GM61 also addresses specific audio issues, such as the absence of left channel audio in AM, FM, or XM bands in some non-Bose applications. This can be resolved by flipping DIP switch 3 down (on) on the APSUB-GM61, or by pressing and holding the Home button on the radio control panel for 12 seconds. This feature demonstrates the module's built-in diagnostic and corrective capabilities, ensuring a consistent audio experience across different sources.
Overall, the APSUB-GM61 is a robust and adaptable interface that not only enhances the audio capabilities of GM vehicles but also provides comprehensive features for installation, customization, and maintenance, ensuring a reliable and high-quality subwoofer integration.