EasyManua.ls Logo

PAC AP4-CH31 - User Manual

PAC AP4-CH31
4 pages
Print Icon
To Next Page IconTo Next Page
Loading...
PAC
®
| Ph. 866-931-8021 | support@pac-audio.com
©2017 PAC | PAC is a Power Brand of AAMP Global
www.pac-audio.com
Rev. 020717
Page 1
P ifi A C ti
$GYDQFHG$PSOL¿HU,QWHUIDFHIRU
6HOHFW&KU\VOHU'RGJH9HKLFOHV
AP4-CH31
The AP4-CH31 provides a 6-channel pre-amp output for use with aftermarket audio equipment. Using the full range,
¿[HGOHYHOKHDGXQLWRXWSXWLQFRQMXQFWLRQZLWK&$1PHVVDJHVWKH$3&+GHOLYHUVDYDULDEOHY506SUHDPS
RXWSXWZLWKIDGLQJEDODQFHHTXDOL]DWLRQDQGOHYHOFRQWUROFDSDELOLWLHV7KHPRGXOHDOVRUHWDLQVDOODXGLRIURP
RWKHUYHKLFOHIHDWXUHVVXFKDVIDFWRU\1DYLJDWLRQ3URPSWV%OXHWRRWKX&RQQHFWDQGSDUNLQJVHQVRUFKLPHV
A data
FRQWUROOHGUHPRWHDPSOL¿HUWXUQRQZLUHLVDOVRSURYLGHGE\WKH$3&+:KHQXVHGLQFRQMXQFWLRQZLWKWKH$3$
726VROGVHSDUDWHO\WKHPRGXOHFDQSURYLGHDYDULDEOHFKDQQHO¿EHURSWLFGLJLWDODXGLRRXWSXW726/,1.
Introduction and Features
Important Notes
1. This interface is only compatible in vehicles equipped with a data-bus controlled premium sound system. To verify
compatibility, look for an Alpine, Beats, or Harmon Kardon badge on the door speakers, center speaker, or factory sub
woofer. If none of these brands are shown, check for the presence of a center speaker or sub woofer.
2. 7KHIDFWRU\DPSOL¿HUPXVWUHPDLQFRQQHFWHGDQGLQWKHYHKLFOHDIWHUWKH$PS352KDVEHHQLQVWDOOHG
3. The remote output is rated at 2A of current. If more current is needed an external relay must be used.
4. Channels 5 and 6 are non-fading outputs. The output level of channels 5 and 6 can be controlled using the supplied level
control knob.
5. The minimum volume level is set to 0 dB by default. If you are happy with this level in your particular application then
additional adjustment is not required. The level control knob must be connected in order to manually adjust the minimum
volume setting.
6. No adjustments can be made manually using the programming button, or the factory SWC when the module is connected to
D3&
Wiring Connection Chart
To Aftermarket
Amplier
Non-FadingRearFront
1(L) 2(R) 4(R) 5(L) 6(R)3(L)
Remote Turn On Output
2A Max Output
AP4-CH31-HAR
To Radio
To Vehicle
Harness
Non-Fading
Level Control
Knob
Module Layout
Interface Connector 1
Expansion Port
Programming Button
Feature Select
DIP switches
Non-Fading Level Control
Knob Connection
USB Connection
LED 1
TOSLINK Output
(APA-TOS1 sold separately)
Front Output
Ch. 1(L) and 2(R)
Rear Output
Ch. 3(L) and 4(R)
Non-Fading Output
Ch. 5(L) and 6(R)
LED 2
Question and Answer IconNeed help?

Do you have a question about the PAC AP4-CH31 and is the answer not in the manual?

Summary

Introduction and Features

Important Notes

Installation and Setup

Feature DIP Switch Configuration

Configure DIP switches for rear chime path, RCA output voltage, and unused functions.

Manual Minimum Volume Setting

Adjust minimum volume using programming button or factory radio buttons.

AmpPRO PC App Configuration

User Interface Options

Configure minimum volume, EQ, frequencies, Q factors, and update firmware.

Available Frequencies and Q Factors

Reference table for selectable bass, mid, and treble frequencies and Q factors.

Firmware Updates and Troubleshooting

Firmware Updates

Procedure to update the interface with new firmware via PC.

Restoring Factory Settings

Reset the interface to default settings by holding the programming button.

Troubleshooting Common Issues

Addresses hiss, audio prompts, low volume, and unresponsive module.

LED Legend

Explanation of LED indicator colors and their meanings during operation.

Overview

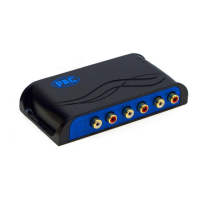
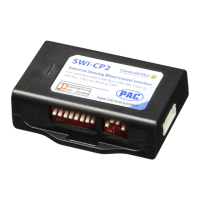
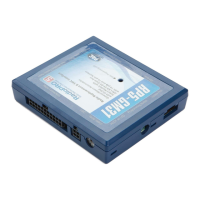
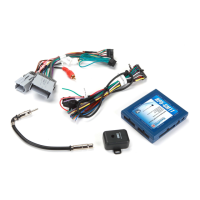
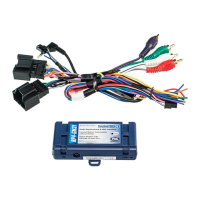
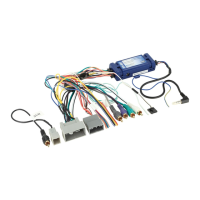
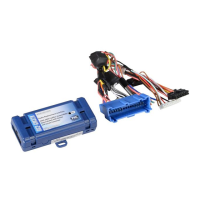
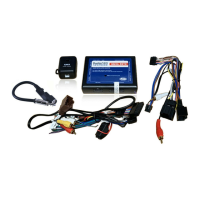
The AP4-CH31 is an advanced amplifier interface designed for select Chrysler and Dodge vehicles, providing a 6-channel pre-amp output for use with aftermarket audio equipment. It leverages the full-range, fixed-level head unit output and CAN bus messages to deliver a variable 5V RMS pre-amp output. This output includes capabilities for fading, balance, equalization, and level control. A key feature of the AP4-CH31 is its ability to retain all audio from other vehicle features, such as factory navigation prompts, Bluetooth, uConnect, and parking sensor chimes, ensuring a seamless integration with the vehicle's existing systems. Additionally, the module provides a data-controlled remote amplifier turn-on wire. When paired with the APA-TOS1 (sold separately), the AP4-CH31 can also provide a variable 2-channel fiber optic digital audio output (TOSLINK).

Compatibility and Installation:

This interface is specifically compatible with vehicles equipped with a data-bus controlled premium sound system. Users can verify compatibility by looking for an Alpine, Beats, or Harmon Kardon badge on the door speakers, center speaker, or factory subwoofer. If these brands are not present, checking for a center speaker or subwoofer is recommended. The factory amplifier must remain connected and in the vehicle after the AmpPRO has been installed.

Installation involves several steps:

  1. Removing the factory radio.
  2. Disconnecting the main 22-pin factory harness from the radio.
  3. Connecting the AmpPRO harness to both the vehicle harness and the factory radio.
  4. Setting any feature DIP switches that apply to the installation.
    • DIP switch 1 (down) routes all rear parking sensor chimes through the front channel, useful when using the TOSLINK output or running all cabin speakers off the front outputs.
    • DIP switch 2 (down) lowers the RCA output voltage to 4V; leaving it off (up) keeps the output at 5V.
    • DIP switches 3 and 4 are not used.
  5. If using the APA-TOS1, its instructions should be followed.
  6. Connecting the AmpPRO harness to the module.
  7. Connecting the level control knob to the module and installing it in an accessible location.
  8. Connecting the signal cables and remote input from the aftermarket amplifier.

Technical Specifications and Features:

  • Output: 6-channel pre-amp output (variable 5V RMS).
  • Remote Output: Rated at 2A; an external relay is needed for higher current requirements.
  • Non-Fading Outputs: Channels 5 and 6 are non-fading, with their output level controllable via the supplied level control knob.
  • Minimum Volume Level: Default is 0 dB. Adjustable manually via the level control knob, programming button, or factory SWC.
  • DIP Switches:
    • DIP 1: Rear Chime Path (ON for front channel routing).
    • DIP 2: 5V/4V Preout (ON for 4V output, OFF for 5V output).
    • DIP 3 & 4: No Function.
  • LED Indicators:
    • LED 1: Solid Red (Module Active), Solid Green (Chime Volume Adjustment Mode), Solid Amber (Minimum Volume Adjustment Mode), Rapid Blink Any Color (DSP Activity).
    • LED 2: Blink Amber (USB Connection Detected).
    • Both LEDs: Alternate Blinking Red (Performing Memory Reset).
  • Connectivity: USB connection for PC app, expansion port, interface connector.

Usage and Configuration:

After installation, the ignition should be turned on, which will activate LED 1 and the +12V remote output.

  1. Setting Amp Gains: Set the amplifier gain(s) to the desired level. Using an oscilloscope and test tones is recommended for precision.
  2. Checking Settings: Verify volume, balance, fade, and EQ settings.
  3. Adjusting Minimum Volume: If the factory radio's minimum volume (level 1) is too loud, it can be adjusted manually or via the AmpPRO PC app. The level control knob must be connected for manual adjustments.
    • Using Programming Button: Turn the level control knob fully counter-clockwise, set amp gains, set factory radio volume to 1, press the programming button once (LED 1 turns amber, chimes beep), turn the level control knob clockwise to reach the desired minimum volume, then press the programming button again or wait ten seconds to exit.
    • Using Factory Buttons: Turn the level control knob fully counter-clockwise, set amp gains, set factory radio volume to 1, press and hold the Enter/Browse button on the factory radio for ten seconds (LED 1 turns amber, chimes beep), turn the level control knob clockwise to reach the desired minimum volume, then press the programming button or wait ten seconds to exit.

AmpPRO PC App:

The AmpPRO PC app offers comprehensive configuration and maintenance features:

  • User Interface Options:
    • Minimum Volume Level adjustment.
    • Enable/Disable factory EQ.
    • Set Bass/Mid/Treble center frequencies and Q factor.
  • Firmware Updates: Allows updating the device firmware.
  • Version Information: Read firmware and hardware versions. The app can be downloaded from http://aampglobal.com/appdownloads. It is recommended to make adjustments with the module installed and the factory radio on to hear the changes in real-time.

Troubleshooting:

  • Hiss at High Amp Gain: Set DIP switch 2 to ON (down) for 4V output. If hiss persists, lower amp gains.
  • Cannot Hear uConnect or Nav Voice: Use the volume knob while these prompts are active to adjust their volume.
  • Low Volume Setting Too Loud: Adjust minimum volume using the setup process or the AmpPRO app.
  • Unresponsive Module/No Power: Turn the key to the ignition position, then press and hold the Power button on the factory radio for 12 seconds until a tone is heard to reset the interface.

Maintenance and Restoration:

  • Firmware Updates: The AmpPRO app facilitates firmware updates. Users should visit www.pac-audio.com or contact tech support for available updates. To update, connect the interface to a PC, select "Firmware," then "Update Firmware," choose "Select File," browse to the saved file, and select it.
  • Restoring Factory Settings: Press and hold the programming button on the side of the module until the status LEDs start blinking red. Releasing the button will restore the minimum volume level, factory EQ enable/disable, factory EQ frequency, and factory EQ Q factor to their default settings.

PAC AP4-CH31 Specifications

General IconGeneral
BrandPAC
ModelAP4-CH31
CategoryRecording Equipment
LanguageEnglish

Related product manuals