Do you have a question about the PAC RP4-GM31 and is the answer not in the manual?
Key instructions and warnings for installation and operation of the RP4-GM31 interface.
Guide for setting the rotary switch to match the vehicle's radio brand.
Pre-programmed SWC button functions for various radio brands.
Procedure for re-assigning SWC functions using short or long press.
Assigning two SWC functions (short/long press) to a single button.
Detailed, step-by-step guide for programming steering wheel controls.
Procedures to confirm proper installation and SWC functionality.
Information on integrating the interface with overhead screens and headrest monitors.
Contact information and website for firmware updates and assistance.
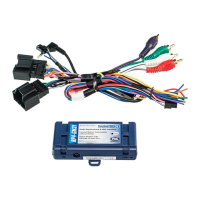
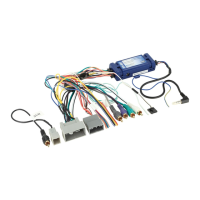
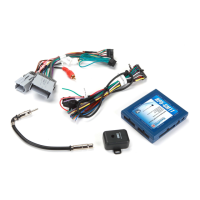
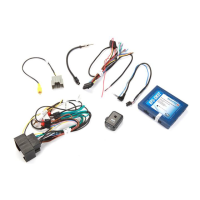
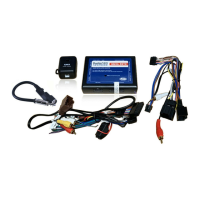
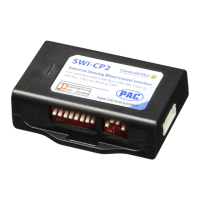
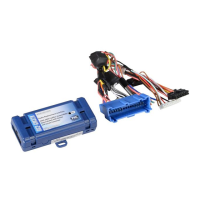
The RP4-GM31 is an interface designed to facilitate the replacement of a factory radio in select General Motors vehicles equipped with 29-bit LAN radios. Its primary function is to ensure the retention of various factory features that would otherwise be lost when the original radio is removed. These retained features include steering wheel controls (SWC), warning chimes, rear seat controls (RSC), and the BOSE amplifier system.
One of the key usage features of the RP4-GM31 is its ability to allow users to program two radio functions to each SWC button. This is achieved through a "short press / long press" dual command functionality, offering enhanced control and customization. Beyond retaining existing features, the interface also provides data bus driven outputs for several essential vehicle functions. These include retained accessory power (RAP), which keeps the radio on for a period after the ignition is turned off, a vehicle speed sensor (VSS) signal, illumination output, a reverse trigger, and a parking brake signal. These outputs are crucial for the proper operation and integration of an aftermarket radio.
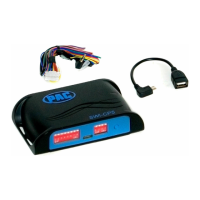
Before installation, it's important to note that the RP4-GM31 instructions apply specifically to revisions R.1.2.3a.8 or later, identifiable by a small white sticker on the interface and its packaging. A critical first step in the installation process is to adjust the radio select rotary switch on the side of the interface to the proper radio setting for the aftermarket unit being installed. A chart is provided in the manual to guide this selection, covering various radio brands like Alpine, JVC, Kenwood, Clarion, Pioneer, Sony, and Fusion, as well as "Other" brands such as Dual, Axxera, Jensen, and Rockford Fosgate. This adjustment must be made before plugging the interface into the vehicle.
The interface comes pre-programmed with all of the vehicle's factory SWC functions by default, meaning that no additional programming is required unless the user wishes to re-assign these functions or utilize the dual command functionality. If customization is desired, the programming instructions outlined in the manual must be followed. However, if at any point the user wishes to revert to the default SWC settings, this can be easily done by pressing and releasing the program button on the side of the interface once and waiting for 7 seconds until the LED flashes 4 times, indicating a successful reset.
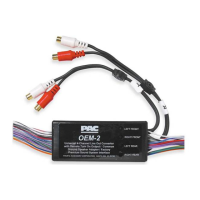
For vehicles equipped with a Bose system, special attention is required during wiring. If the aftermarket radio does not have low-level outputs, it is recommended to use a 4-channel or two 2-channel Line Output Converters (LOCs) to match the input voltage, preventing over-driven audio. The manual specifically suggests LP5-4 or LP5-2 LOCs. Conversely, if there is no Bose audio system, the RCA inputs should be cut off, and the aftermarket radio's speaker outputs connected to the remaining wires as per the wiring chart. To prevent ground loop or engine noise, especially when aftermarket radios use a common ground on RCA outputs, a pair of ground loop isolators (e.g., SNI-1 or LPGL-2) is recommended. A helpful visual cue during operation is that the LED on the interface will flash whenever an SWC button is pressed, confirming signal reception.
The programming process for SWC assignments involves a specific sequence. First, the key is turned to the ignition position. Then, the programming button on the side of the interface is pressed and released. Within 7 seconds, the desired button on the steering wheel is pressed. The LED on the interface will turn off when the button is pressed. At this point, the user has two options: for short press functionality, the button is released within 1.5 seconds, and the LED will turn back on. For long press functionality, the button is held until the LED starts blinking, then released, and the LED will go back to solid. This allows for the assignment of two distinct commands to a single SWC button. If more buttons need to be programmed, this step is repeated for each additional audio function. If a function in the programming chart is not available on the steering wheel, or if the user does not wish to program it, the program button on the side of the interface can be pressed and released to skip that function. The LED will flash off and on, confirming the skip. Once all desired programming is complete, the user waits seven seconds, and the LED will flash three times, signaling the end of the programming sequence. Finally, the interface should be tested for proper functionality, observing the LED blink with each SWC press.
Testing and verification steps ensure proper installation. After turning the ignition on, the LED on the interface should illuminate, and the +12V accessory wire should activate. The radio should be turned on, and balance and fade checked. It's important to note that premium factory amplified systems will not fade, as neither the aftermarket radio nor the RP interface controls the amplifier's fader. Verification includes confirming the factory subwoofer (if present) is playing and that all SWC functions operate correctly. When the vehicle is turned off and the key removed, RAP should remain active, keeping the radio on for 10 minutes or until the driver's door is opened. The LED and radio should then turn off when RAP deactivates or the driver's door is opened.
For vehicles equipped with Rear Seat Entertainment (RSE), the RP4-GM31 handles different configurations. In vehicles with only an overhead screen, the GMRVD (a separate component) is required to feed A/V from the aftermarket head unit to the factory screen. Audio will be heard through headphones, and the GMRVD will also pass auxiliary inputs from the center console to the aftermarket head unit. For vehicles with both an overhead screen and headrest monitors, the headrest monitors will function independently, and neither video nor audio can be passed to or from them. The overhead monitor will function as described for overhead-screen-only setups.
For maintenance and updates, the RP4-GM31 can be updated with new firmware as it becomes available. This is done using the PAC-UP interface updater, which is sold separately. Users are directed to the PAC-audio.com/firmware website for available updates. Technical support is also provided via email and phone for any issues or questions that may arise during installation or use.
| Amplifier Turn-On | Yes |
|---|---|
| Retained Accessory Power (RAP) | Yes |
| Product Type | Interface |
| Type | Radio Replacement |
| Functionality | Retains factory features |
| Input | Factory radio harness |
| Output | Aftermarket radio |
| Features | Retains OnStar |