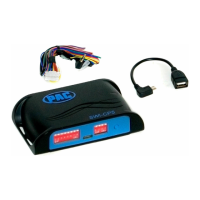
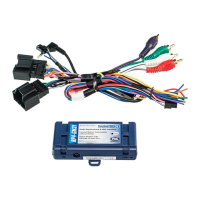
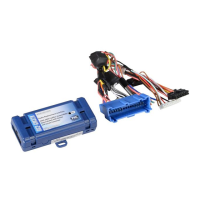
The AP4-CH41 is an amplifier integration interface designed for Chrysler, Dodge, Jeep, and RAM vehicles. Its primary function is to provide a 6-channel pre-amp output for use with aftermarket audio equipment. This module takes the full-range, fixed-level headunit output and, in conjunction with CAN messages, delivers a variable 5V RMS (max) pre-amp output. This output includes capabilities for fading, balance, equalization, and level control, allowing for a highly customizable audio experience with aftermarket amplifiers.
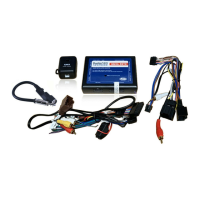
A key feature of the AP4-CH41 is its ability to retain all audio from other vehicle features. This includes factory Bluetooth, uConnect, and parking sensors, ensuring that essential vehicle sounds are not lost when upgrading the audio system. Additionally, the module provides a data-controlled remote turn-on wire, simplifying the integration of aftermarket amplifiers. For those seeking advanced digital audio options, the AP4-CH41 can be used with the APA-TOS1 (sold separately) to provide a variable 2-channel digital audio output, supporting both TOSLINK and S/PDIF formats.
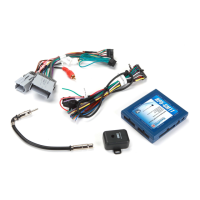
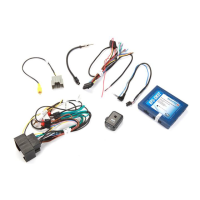
Installation of the AP4-CH41 involves a straightforward process. First, the factory radio is removed, and the main 52-pin factory harness is disconnected. The AmpPRO harness is then connected to both the vehicle harness and the factory radio. Before connecting the AmpPRO harness to the module, any applicable feature DIP switches should be set. For instance, DIP switch 1 can be set to "on" (down) to route all rear parking sensor chimes through the front channel, which is useful when the vehicle has rear parking sensors and the user is utilizing the TOSLINK output or running all cabin speakers off the front outputs of the AP4. DIP switch 2 can be set to "on" (down) to lower the RCA output voltage to 4V; leaving it "off" (up) maintains the 5V output. DIP switches 3 and 4 are not currently used. If the APA-TOS1 is being used, its specific installation instructions should be followed. Finally, the AmpPRO harness is connected to the module, the level control knob is installed in an accessible location, and the signal cables and remote input from the aftermarket amplifier are connected.
Once installed, the AP4-CH41 requires a simple setup and configuration. Upon turning the ignition on, LED 1 on the interface will illuminate, and the +12V remote output will activate. The next step is to set the amplifier gain(s) to the desired level. It is recommended to use an oscilloscope and test tones for this process, especially for those unfamiliar with MECP Advanced study guide (p. 360) procedures. After setting the gains, users should check the volume, balance, fade, and EQ settings.
A significant usage feature is the ability to adjust the chime volume and minimum volume. If the default levels are satisfactory, no adjustments are necessary. However, if adjustments are desired, they can be made manually using either the programming button on the side of the interface or the factory SWC. It's important to note that the level control knob must be connected to the module for either of these manual methods to work.
To manually set the chime volume using the programming button, first turn the level control knob all the way down (counter-clockwise). Then, press the programming button on the side of the interface. LED 1 will turn green, and the chimes will begin continuously beeping. The user can then turn the level control knob clockwise until the desired chime level is reached. To exit the settings, either press the programming button twice or wait ten seconds.
Alternatively, to set the chime volume using the factory SWC, start with the level control knob turned all the way down. Press and hold the track down button on the factory SWC (back left of the steering wheel) for approximately ten seconds. During this process, the radio will respond to SWC commands, which is normal and does not affect AP4 operation. LED 1 will turn green, and the chimes will begin continuously beeping. Turn the level control knob clockwise until the desired chime level is reached. To exit, press the programming button twice or wait ten seconds.
The AP4-CH41 also allows for manual adjustment of the minimum volume. If the radio's minimum volume (level 1) is too loud, this can be set using either the programming button or the factory SWC. For the programming button method, turn the level control knob all the way down, set the amp gains, and set the factory radio volume to 1. Press the programming button twice. LED 1 will turn amber, and the chimes will beep every five seconds. Turn the level control knob clockwise until the desired minimum volume is reached. Exit by pressing the programming button once or waiting ten seconds.
For the factory SWC method, turn the level control knob all the way down, set the amp gains, and set the factory radio volume to 1. Press and hold the track up button on the factory SWC (back left of the steering wheel) for approximately ten seconds. LED 1 will turn amber, and the chimes will beep every five seconds. Turn the level control knob clockwise until the desired minimum volume is reached. Exit by pressing the programming button once or waiting ten seconds.
Maintenance features primarily involve restoring factory settings and firmware updates. To restore the interface to its factory default settings, press and hold the programming button on the side of the module until the status LEDs start blinking red. Releasing the button will reset the chime volume level, enable/disable factory chimes, minimum volume level, enable/disable factory EQ, factory EQ frequency, and factory EQ Q factor to their defaults.
The AmpPRO App is a powerful tool for configuring user interface options and performing firmware updates. Through the app, users can adjust the minimum volume level, chime volume level, enable/disable AP4 chimes, enable/disable factory EQ, and customize bass, mid, and treble boost frequencies and Q factors. The app also allows users to update the product firmware and read firmware/hardware versions. These settings can be adjusted with the module installed in the vehicle or on a bench, though it's recommended to make adjustments with the module installed and the factory radio on to hear the changes.
The Minimum Volume Level setting in the app allows users to set the minimum volume level of the factory radio (volume level 1). Chime Volume Level controls the volume of AP4 chimes, such as park sensors. Front/Rear Chimes Enabled allows for enabling or disabling AP4 chimes, useful when mixing factory and aftermarket speakers. 3 Band EQ Enabled enables or disables the 3-band factory EQ. Bass/Mid/Treble Freq/Q Factor settings allow users to set the center frequency and Q factor for each frequency. The Q factor determines how many adjacent frequencies will be affected by the adjustment; a lower Q factor affects more frequencies.
Firmware updates are crucial for maintaining optimal performance and accessing new features. The AmpPRO app facilitates these updates. Users should visit the PAC audio website or contact tech support for information on available firmware. To update, connect the interface to a PC, select "Firmware" in the app, then "Update Firmware." Browse to the saved firmware file, select it, and the updating process will begin. Once complete, disconnect the interface from the PC to resume normal operation.
Troubleshooting common issues is also covered. If hiss is heard at high amp gain, setting DIP switch 2 to "on" (down) lowers the output voltage to 4V, which may resolve the hiss. If hiss persists, lowering amp gains is recommended. If uConnect or navigation voice cannot be heard, adjust the voice volume using the volume knob while these prompts are active. Ensure the 10-pin connector is plugged in behind the radio. If chimes cannot be heard, adjust the chime volume using the outlined processes or the AmpPRO application. Also, verify that the remote output from the AP4 is used to turn on the aftermarket amplifier. If the low volume setting on the radio is too loud, adjust the minimum volume using the outlined processes or the AmpPRO application.
The LED indicators provide useful status information. LED 1 solid red indicates the module is active. Solid green signifies chime volume adjustment mode. Solid amber indicates minimum volume adjustment mode. Rapid blinking of any color on LED 1 indicates DSP activity. LED 2 blinking amber signifies a USB connection is detected.