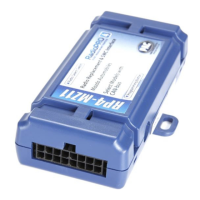
RP4-MZ11
Radio Replacement & Steering Wheel Control Interface
for MazdaVehicles
3DFL¿F$FFHVVRU\&RUSRUDWLRQ
®
| Clearwater, FL 33760 | Ph. 866-931-8021 | support@pac-audio.com
3DFL¿F$FFHVVRU\&RUSRUDWLRQ
www.pac-audio.com
Rev. 012615
Page 1
Introduction & Features
Important Notes
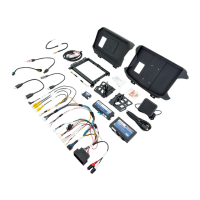
The RP4-MZ11 interface allows the replacement of a factory radio in select Mazda vehicles with MS-CAN radios. Using
this interface will retain factory features such as steering wheel controls (SWC), programming of the clock on the OEM
/&'VFUHHQYHKLFOHLQIRUPDWLRQRQWKH2(0/&'VFUHHQDQGWKH%26(DPSOL¿HUZKHQWKHRULJLQDOUDGLRLVUHPRYHG8VH
of this interface also allows you to program two radio functions to each SWC button by using short press long press dual
command functionality. The RP4-MZ11 also provides data bus driven outputs such as retained accessory power (RAP),
vehicle speed sensor (VSS), illumination, reverse trigger and parking brake.
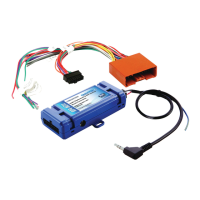
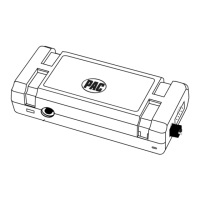
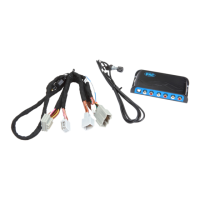
1. 7KHUDGLRVHOHFWURWDU\VZLWFKRQWKHVLGHRIWKHLQWHUIDFHPXVWEHDGMXVWHGWRWKHSURSHUUDGLRVHWWLQJEHIRUHSOXJJLQJWKHLQWHUIDFHLQWRWKH
vehicle (see next page for setting chart).
2. 7KH/('ZLOOÀDVKZKHQHYHUD6:&EXWWRQLVSUHVVHG
3. 7KHLQWHUIDFHFRPHVSUHSURJUDPPHGIRUDOORIWKHYHKLFOHVIDFWRU\6:&IXQFWLRQVDQGGRHVQRWUHTXLUHSURJUDPPLQJXQOHVV\RXZLVK
WRUHDVVLJQWKH6:&IXQFWLRQVRUXWLOL]HVKRUWSUHVVORQJSUHVVGXDOFRPPDQGIXQFWLRQDOLW\7KH6:&FDQDOZD\VEHUHVWRUHGWRGHIDXOW
VHWWLQJVE\SUHVVLQJDQGUHOHDVLQJWKHSURJUDPEXWWRQRQWKHVLGHRIWKHLQWHUIDFHRQFHDQGZDLWLQJVHFRQGVIRUWKH/('WRÀDVKWLPHV
7KHVHWWLQJVPHQXFDQQRWEHDFFHVVHGLQWKH0D]GDZLWKQDYLJDWLRQ
5. ,IXVLQJWKLVLQWHUIDFHLQD0D]GD&;RU0D]GDDOOYHKLFOHVHWWLQJVPXVWEH¿QDOL]HGEHIRUHUHPRYLQJWKHIDFWRU\UDGLR
6. ,IXVLQJLQDYHKLFOH
HTXLSSHGZLWKDIDFWRU\%26(V\VWHPLWPD\EHQHFHVVDU\WRXVHD/LQH2XWSXW&RQYHUWHURUFRQQHFW5&$VWRWKH
speaker wire and use the aftermarket radio’s low level outputs.
7. 7KHIROORZLQJYHKLFOHVZLOOQRWSURYLGHD966VLJQDODVWKLVLQIRUPDWLRQLVQRWRQWKHGDWDEXV5;&;ZQRQQDYUDGLR
0LDWD0D]GD
8. 7KHIROORZLQJYHKLFOHVZLOOQRWSURYLGHDUHYHUVHRXWSXWDVWKLVLQIRUPDWLRQLVQRWRQWKHGDWDEXV5;&;0D]GD
0LDWD0D]GD0D]GD
9. 7KHIROORZLQJYHKLFOHVZLOOQRWSURYLGHDSDUNLQJEUDNHRXWSXWDVWKLVLQIRUPDWLRQLVQRWRQWKHGDWDEXV5;0LDWD0D]GD
10. 7KHIROORZLQJYHKLFOHVKDYHDVSHHGEDVHGSDUNLQJEUDNHZLUHWKDWZLOOSURYLGHDQHJDWLYHWULJJHUXQWLOWKHYHKLFOHLVJRLQJDWOHDVWPSK
2007-2009 CX-9, 2007-2009 CX-7
Wiring Connection Chart
5HG:KLWH 3DUNLQJ%UDNH
2XWSXW
3XUSOH:KLWH Vehicle Speed
2XWSXW
Red $FFHVVRU\2XWSXW
(1 amp)
*UHHQ:KLWH 2nd SWC Input
(See Installation
steps on next
page for proper
connection)
2UDQJH:KLWH ,OOXPLQDWLRQ2XWSXW
Green 5HYHUVH2XWSXW
Interface Connector
Yellow %DWWHU\Y
%ODFN Ground
%OXH $QWHQQD2Q
,QSXWQG6:&
output (See
Installation steps on
next page for proper
connection)
%OXH:KLWH $PS7XUQ2Q,QSXW
2UDQJH:KLWH Illumination
White )URQW/LQSXW
:KLWH%ODFN Front L - input
*UH\ )URQW5LQSXW
*UH\%ODFN Front R - input
Green 5HDU/LQSXW
*UHHQ%ODFN Rear L - input
Purple 5HDU5LQSXW
3XUSOH%ODFN Rear R - input
Vehicle Connector
SWC Connector
%OX<HO Kenwwod, Newer
JVC,
3.5mm Jack $OSLQH-9&
Clarion, Pioneer,
6RQ\)XVLRQ%R\R
Dual, Lightning
$XGLR9LVWHRQRU
$GYHQW