Do you have a question about the Panasonic AG-DVX100B and is the answer not in the manual?
| Sensor Type | 3CCD |
|---|---|
| Lens | Leica Dicomar |
| Optical Zoom | 10x |
| Maximum Aperture | f/1.6 |
| Filter Diameter | 72 mm |
| Video Signal | NTSC |
| Display | LCD |
| Image Sensor | 1/3-inch |
| Gain | 0dB, +3dB, +6dB, +9dB, +12dB |
| Recording Format | MiniDV |
| Audio Recording | 48kHz/16-bit, 32kHz/12-bit |
| Audio | Built-in Stereo Microphone |
| Viewfinder | Color |
| LCD Screen | Color LCD |
| LCD Screen Size | 3.5 inches |
| Input/Output | S-Video, Composite |
| Battery | Lithium-ion |
Covers reading instructions, retaining them, heeding warnings, and following all operating procedures.
Guidelines on cleaning, attachments, water/moisture exposure, and ventilation for safe operation.
Instructions regarding accessories, power sources, and grounding or polarization.
Ensures power cord protection and proper grounding type usage.
Details on grounding antenna or cable systems for surge protection.
Protection measures against lightning and avoiding overhead power lines.
Prevents overloading outlets and warns against objects/liquids near the unit.
Guidelines on servicing, damage requiring service, replacement parts, and safety checks.
Lists and illustrates all included accessories and optional items.
Warns against using the camera in rain, snow, or near water.
Advises keeping the camera away from equipment generating magnetic fields.
Warns against operating near radio transmitters or high-voltage equipment.
Advises preventing sand and dust from entering the camera.
Provides precautions for AC adapter use and battery charging/handling.
Instructions on removing the battery to prevent over-discharge.
Guidance on proper disposal and recycling of used batteries.
Advice on keeping battery terminals clean and undamaged.
Information on LCD screen care, including burn-in and condensation.
Instruction to keep protective caps on unused connectors.
Guidance on mounting the camera-recorder safely onto a tripod.
Lists essential items needed before operating the camera.
Step-by-step guide for connecting the AC power supply cord.
Instructions on how to properly insert a Mini DV cassette tape.
Guidance on using the viewfinder for initial shooting setup.
Steps to turn on the camera and enter shooting standby mode.
How to review recently recorded footage.
Procedure for safely ejecting the cassette tape.
Explanation of the camera's automatic power saving features.
Instructions on using the SAVE tab to protect recordings.
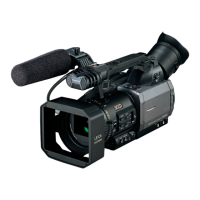
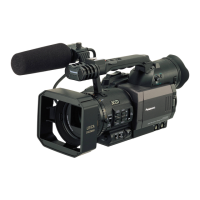
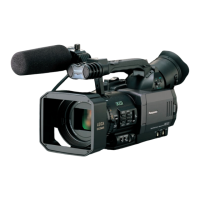
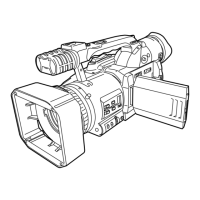
Identifies and labels the main parts of the camera-recorder.
Lists functions available only via remote control.
Categorizes remote buttons for shooting and volume functions.
Procedure for installing the battery into the remote control.
Instructions for setting up the remote for VCR1 or VCR2.
Steps for fully charging the battery using the AC adapter.
Advice on battery life, temperature effects, and storage.
Instructions for attaching the eye cup to the viewfinder.
Guidance on adjusting and using the viewfinder for shooting.
How to use the EVF DTL/END SEARCH function for focus.
Procedure to select either the viewfinder or LCD for adjustment.
Adjusting color level, brightness, and contrast of the display.
Steps to set the camera's internal calendar date and time.
Ensuring equipment readiness before attempting to shoot.
Guide to using the camera's automatic shooting functions.
How to review recorded footage using REC CHECK.
Using search functions to locate specific recorded scenes.
Instructions on using the zoom button, ring, and switch.
Explains how to switch between and use auto and manual focus.
How to temporarily switch to auto focus from manual.
Procedure for manually adjusting and saving white balance.
Explains error messages that may appear during white balance adjustment.
How to manually adjust the lens aperture.
Procedure for increasing gain to brighten the display.
Using the ND filter switch to control light intensity.
How to select the internal microphone for audio input.
Connecting and selecting external microphones or audio equipment.
Using the audio control knob to set recording levels.
Explanation of the scene file dial and its stored files.
Procedure for editing and saving scene file names and settings.
General overview of playback controls.
How to control playback functions using the OPERATION lever.
How to control playback functions using the remote control.
How to perform slow motion and frame-by-frame playback.
Instructions for fast-forwarding and rewinding playback.
How to search for recorded index signals on the tape.
How to find unrecorded parts or the end of the last scene shot.
How to display and reset the counter value.
Using memory stop mode to return to a specific tape position.
Synchronizing time codes between cameras using DV input.
How to connect headphones for audio monitoring.
Instructions for connecting external microphones.
Choosing between 32K (12bit) and 48K (16bit) for audio recording.
Steps for adding background music or narration to recorded images.
Copying S-VHS or VHS cassettes to DV cassettes.
Converting analog input signals to digital for output.
Explains various indicators displayed on screen in different modes.
Overview of the camera mode menu options.
Overview of the VCR mode menu options.
Details of settings available within the SCENE FILE menu.
Diagnosing and resolving power supply related issues.
Addressing problems with battery life and charging.
Resolving issues with recording video and tape handling.
Troubleshooting focus, audio dubbing, and tape issues.
Resolving problems with time code and tape remaining display.
Addressing issues with tape playback, mosaic noise, and image clarity.
Resolving issues with no sound, dual sound, or erased audio.
Troubleshooting cassette removal, remote control, and rattling sounds.