40
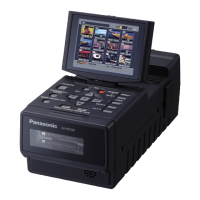
Main Mode: Thumbnail Screen
Use the following procedure to delete unnecessary clips from
a P2 card.
1 Select the clip to delete.
2 Use the cursor buttons to align the cursor with the
“DELETE” (➝ page 82) menu item and press the
[SET] button.
3 Align the cursor with “YES” in the confirmation mes-
sage and press the [SET] button.
All of the selected clips are deleted.
Note:
• When “DELETE” is assigned to a [USER] button, you can
also perform the delete operation by pressing the [USER]
button instead of making a menu selection.
• To stop deletion, press the [SET] or [CANCEL] button to
cancel the operation. Partially deleted clips cannot be re-
stored by canceling.
The bad indicator (yellow ) is displayed for any clip with a prob-
lem caused by, for example, a sudden power outage during re-
cording. Use the following procedure to repair clips with problems.
1 Select the bad clip to repair.
2 Use the cursor buttons to align the cursor with the
“REPAIR” (➝ page 83) menu item and press the
[SET] button.
3 Align the cursor with “YES” in the confirmation mes-
sage and press the [SET] button.
Select “NO” to not repair the clip.
Note:
Some clips are so badly damaged they cannot be repaired.
Such clips are indicated by a red indicator ( ).
A clip that is recorded on multiple P2 cards may become an
incomplete clip ( indicator) due to not being recognized as
a continuous clip. When this happens, you can use the recon-
nection function to reconnect the continuous clip segments to
restore the original clip.
Note:
• Incomplete clips occur under the following conditions.
- When the segments of a continuous clip that are recorded on
multiple P2 cards are copied separately for each P2 card.
- When the segments of a continuous clip that are recorded on
multiple cards are copied separately for each card to a stor-
age device and then written back to the P2 cards.
1 Select the incomplete clips to reconnect.
Note:
Normally, the thumbnails with the incomplete clip indicator
( ) are grouped together.
2
Use the cursor buttons to align the cursor with the “RE-
CONNECT” (
➝
page 83) menu item and press the
[SET] button.
3 Align the cursor with “YES” in the confirmation mes-
sage and press the [SET] button.
Select “NO” to not reconnect the clip segments.
Note:
When some but not all the clip segments in a clip that consists
of three or more clip segments are reconnected, the incom-
plete clip indicator ( ) will remain displayed.
Deleting Clips Repairing and Reconnecting Clips
Repairing bad clips
Reconnecting incomplete clips
 Loading...