EasyManua.ls Logo

Panasonic CQ-DF201U - O Installation Guide

Panasonic CQ-DF201U
72 pages
Print Icon
To Next Page IconTo Next Page
To Previous Page IconTo Previous Page
Loading...
O
OPM)
18
installation
Guide
JX
WARNING
This
installation
information
is
designed
for
experienced
installers
and
is
not
in-
tended
for
non-technical
individuals.
It
does
not
contain
warnings
or
cautions
of
po-
tential
dangers
involved
in
attempting
to
install
this
product.
Any
attempt
to
install
this
product
in
a
motor
car
by
anyone
other
than
qualified
in-
Staller
could
cause
damage
to
the
electrical
system
and
could
result
in
serious
per-
sonal
injury
or
death.
O
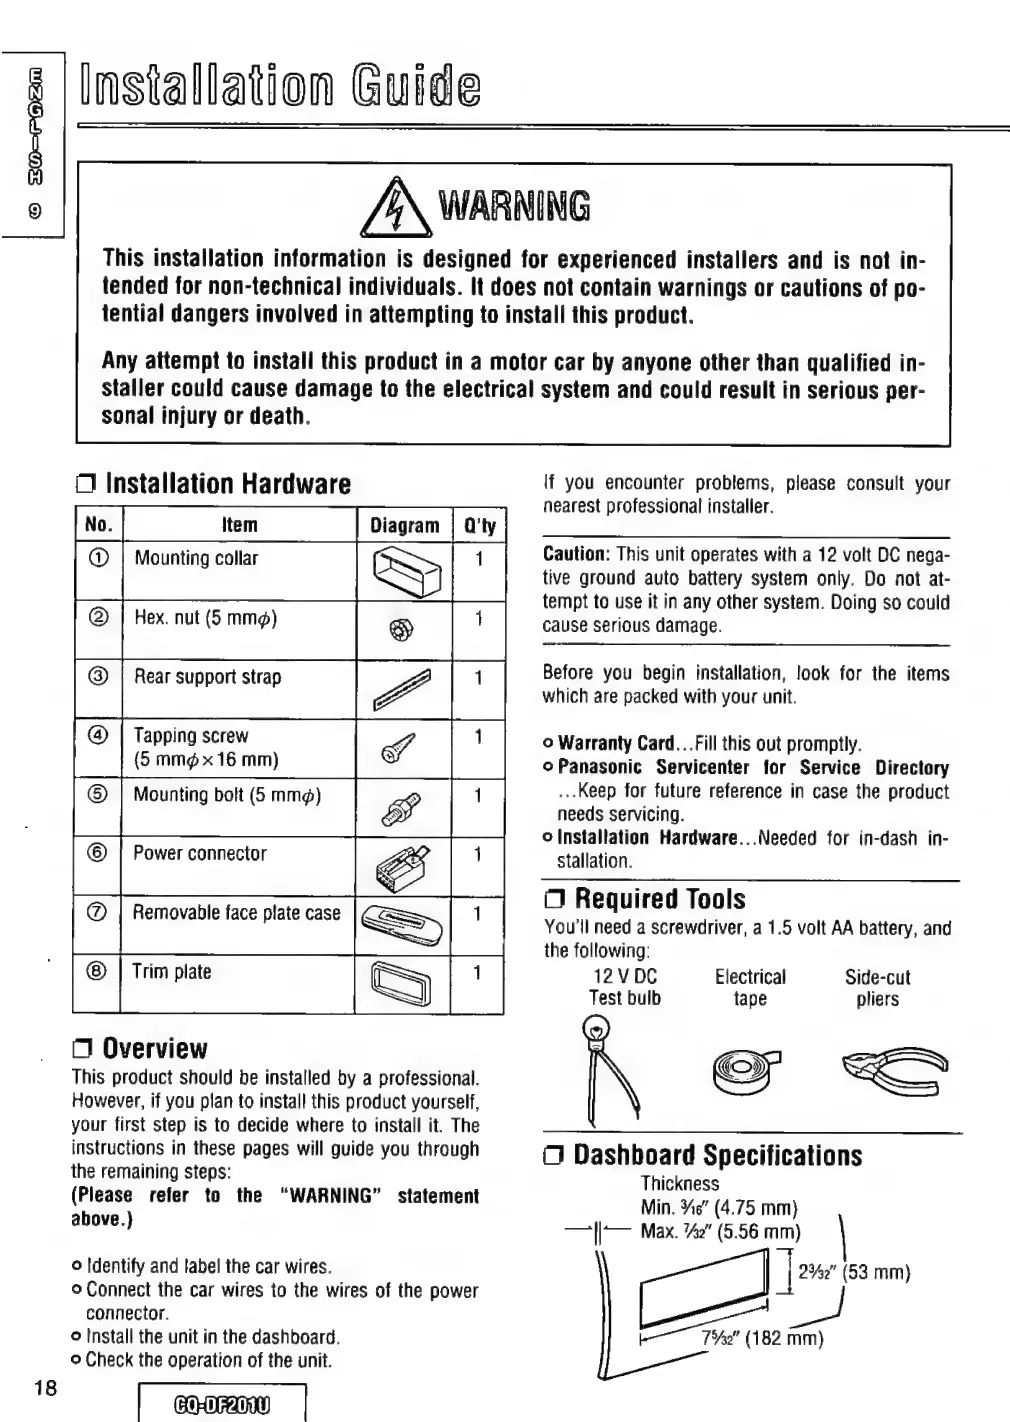
Installation
Hardware
fio]
tem
ET
|
©
|
Hex.
nut
(5
mmg)
O
Overview
This
product
should
be
installed
by
a
professional.
However,
if
you
plan
to
install
this
product
yourself,
your
first
step
is
to
decide
where
to
install
it.
The
instructions
in
these
pages
will
guide
you
through
the
remaining
steps:
(Please
refer
to
the
“WARNING”
statement
above.}
o
Identify
and
label
the
car
wires.
o
Connect
the
car
wires
to
the
wires
of
the
power
connector.
©
Install
the
unit
in
the
dashboard.
o
Check
the
operation
of
the
unit.
|
comam
|
a
Mounting
collar
Sp
Rear
support
strap
(4)
|
Tapping
screw
1
Si
{5
mm
x16
mm)
S
Si
Mounting
bolt
(5
mm)
AN
AA
€07
ala
Removable
face
plate
case
=
lf
you
encounter
problems,
please
consult
your
nearest
professional!
installer.
Caution:
This
unit
operates
with
a
12
volt
DC
nega-
tive
ground
auto
battery
system
only.
Do
not
at-
tempt
to
use
it
in
any
other
system.
Doing
so
could
Cause
serious
damage.
Before
you
begin
installation,
look
for
the
items
which
are
packed
with
your
unit.
o
Warranty
Card...Fill
this
out
promptly.
o
Panasonic
Servicenter
for
Service
Directory
..
Keep
for
future
reference
in
case
the
product
needs
servicing.
o
Installation
Hardware...Needed
for
in-dash
in-
stallation.
O
Required
Tools
You'll
need
a
screwdriver,
a
1.5
volt
AA
battery,
and
the
following:
12V
DC
Electrical
Side-cut
Test
bulb
tape
pliers
Ñ
e
=
O
Dashboard
Specifications
Thickness
Min.
Ae”
(4.75
mm)
—||—
Max.
742°
(5.56
LIL
e
a
2%32"
|,
mm)
E
(182
A

Table of Contents