67
E
N
G
L
I
S
H
52
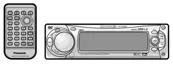
CQ-DVR592U
66
Installation Guide (continued)
CQ-DVR592U
E
N
G
L
I
S
H
51
6 Power connector
Mounting tabs
❐ Installation Procedures
Secure the rear of the unit.
After fixing
5
mounting bolt and
6
power connector,
fix the rear of the unit to the car body by either method (a)
or (b) shown below.
2
Insert trim plate 8.
3
After installation, reconnect the negative -
battery terminal.
4
Insert 1 mounting collar into the dashboard, and
bend the mounting tabs out with a screwdriver.
1
Remove the removable face plate.
1 Press [OPEN]. The removable face plate
will be opened.
2 Push the face plate to the left.
3 Pull it out toward you.
Remove the Unit
Remove the 8 trim plate with a screwdriver.
1 Inset the 9 lock cancel plates along
the grooves on both sides of the main
unit until “click” is heard.
2 Pull out the unit while pushing the
plates further inside.
Remove the unit pulling with both hands.
1
2
3
4
Switch off the power of the unit.
[OPEN]
(a) Using 3 the rear support strap
4 Tapping screw
(5 mm·a16 mm)
2 Hex. nut
(5 mm·)
3 Rear support
strap
5 Mounting bolt
(5 mm·)
1 Mounting collar
Fire wall of car
3 mm·
(b) Using the rubber cushion (option)
5 Mounting bolt
(5 mm·)
1 Mounting collar
Rear support bracket
(provided on the car)
Rubber cushion (option)
5 Mounting bolt (5 mm·)
Fastening the mounting collar
The tabs to be bent vary depending on the
car. Bend them with a screwdriver to
fasten the
1
mounting collar securely in
the dashboard.
1 Open
2 Push
Contact
Main unit
3 Pull out
Screwdriver
8 Trim plate
9 Lock cancel plate
“Click”
1 Insert
2 Pull out
First complete the electrical connections, and
then check them for correctness. (➡ page 68)
The included 1 mounting collar is designed
specially for this unit. Do not use it to attach
any other model.
Note:
≥
To securely install the unit, fully bend a
number of the tabs so that there is no
rattling.
≥
Be sure to fasten the unit securely when
joining it with the
1
mounting collar.
Insert the tab
end in the
outer groove.
 Loading...