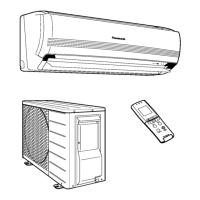
OPEN
The below operations will be performed by pressing the “AUTO” switch.
1. AUTO OPERATION MODE
1. The Auto operation will be activated
immediately once the Auto Switch is pressed.
2. TEST RUN OPERATION (FOR PUMP
DOWN/SERVICING PURPOSE)
The Test Run operation will be activated if
the Auto Switch is pressed continuously for
more than 5 sec. to below 8 sec..
1. A “pep” sound will occur at the fifth sec., in
order to identify the starting of Test Run
operation.
• When installing two air conditioners in one room, each air conditioner can be
synchronized to the remote control.
In order to operate separately, open the rear cover of one of the remote control and set
to “B”.
Setting the air conditioner unit to “B”
1. Press the “AUTO” switch for about 11 to 15 seconds. When you hear three short beeps
“pep, pep, pep”, release the switch.
1. Note: you will hear one beep “pep” in about 5 seconds, and then two beeps “pep, pep” in
about 8 seconds.
2. Press again the “AUTO” switch within 60 seconds. Every press the “AUTO” switch, you
will hear a short beep “pep”. When you hear eventually a long beep “peep”, stop
pressing the “AUTO” switch , which achieves “B” setting.
1. If you stop pressing the “AUTO” switch midway at the short beep “pep”, this will achieve
“A” setting.
3. After 60 seconds or longer of the above setting, use the “B” set remote control to confirm
successful operation.
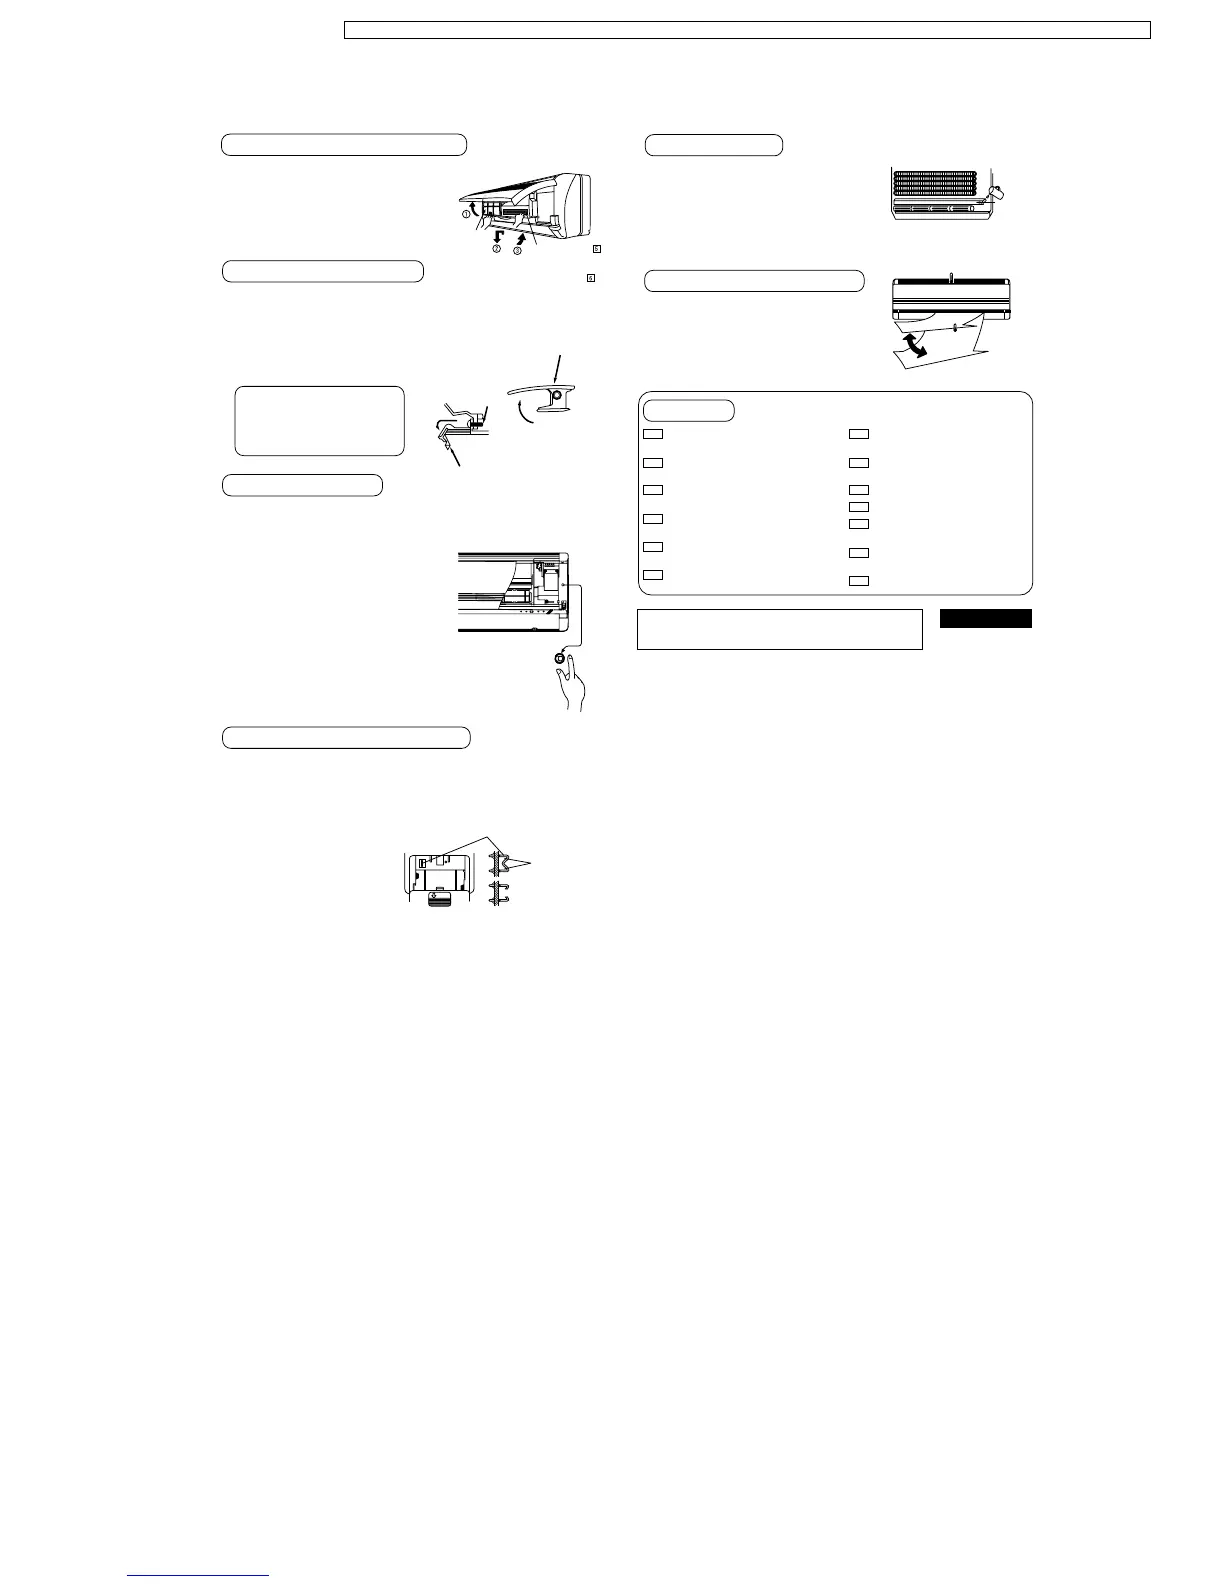
INSTALLATION OF AIR PURIFYING FILTERS
Cap
Vertical airflow
deflection louver
(Move the vertical
vane to horizontal)
Remote controller
Give two cuts.
Side view of jumper
The disconnected jumper
wire is “B” setting.
Jumper wire
Screw
HOW TO TAKE OUT FRONT GRILLE
AUTO SWITCH OPERATION
Changing the remote control transmission code
Air filter
1. Open the front panel.
2. Remove the air filters.
3. Put air purifying filter (left) and solar refreshing
deodorizing filter (right) into place as shown in
illustration at right.
Set “B” on the remote control.
This can be achieved by cutting
the jumper wire of the remote
control with a cutter.
Please follow the steps below to take out front grille if necessary such as when servicing.
1. Set the vertical airflow direction louver to the horizontal position.
2. Slide down the two caps on the front grille as shown in the illustration
at right, and then remove the two mounting screws.
3. Pull the lower section of the front grille towards you to remove the
front grille.
When reinstalling the front grille, first
set the vertical airflow direction louver
to the horizontal position and then
carry out above steps 2 - 3 in the
reverse order.
Air purifying filter
or
Solar refreshing
deodrizing filter
Is there any gas leakage at flare nut
connections?
Is the indoor unit properly hooked
to the installation plate?
Is the power supply voltage
complied with rated value?
Is there any abnormal sound?
Is the cooling operation normal?
Is the thermostat operation
normal?
Is the remote control’s LCD
operation normal?
Is the air purifying filter installed?
Has the heat insulation been carried out
at flare nut connection?
Is the connecting cable being fixed to
terminal board firmly?
Is the connecting cable being clamped
firmly?
Is the drainage ok?
(Refer to “Check the drainage” section)
Is the earth wire connection properly
done?
ENGLISH
MATSUSHITA ELECTRIC INDUSTRIAL CO., LTD.
Web Site : http://www.panasonic.co.jp/global/
F612315
PRINTED IN JAPAN
CHECK ITEMS
Discharge air
Drain tray-
styrofoam
EVALUATION OF THE PERFORMANCE
CHECK THE DRAINAGE
• Open front panel and remove air filters.
(Drainage checking can be carried out without
removing the front grille.)
• Pour a glass of water into the drain tray-styrofoam.
• Ensure that water flows out from drain hose of the
indoor unit.
• Operate the unit at cooling operation mode for
fifteen minutes or more.
• Measure the temperature of the intake and
discharge air.
• Ensure the difference between the intake
temperature and the discharge is more than 8 C.
°
69
CS-ME7CKPG / CS-ME10CKPG / CS-ME12CKPG / CS-ME14CKPG / CS-ME18CKPG / CU-2E15CBPG / CU-2E18CBPG / CU-3E23CBPG / CU-4E27CBPG
 Loading...