1.5 m ~
1.7 m
O
P
E
N
C
L
O
S
E
FILTER
CLEANING
OFF
MAX
- 18 -
2.0
m
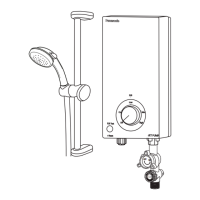
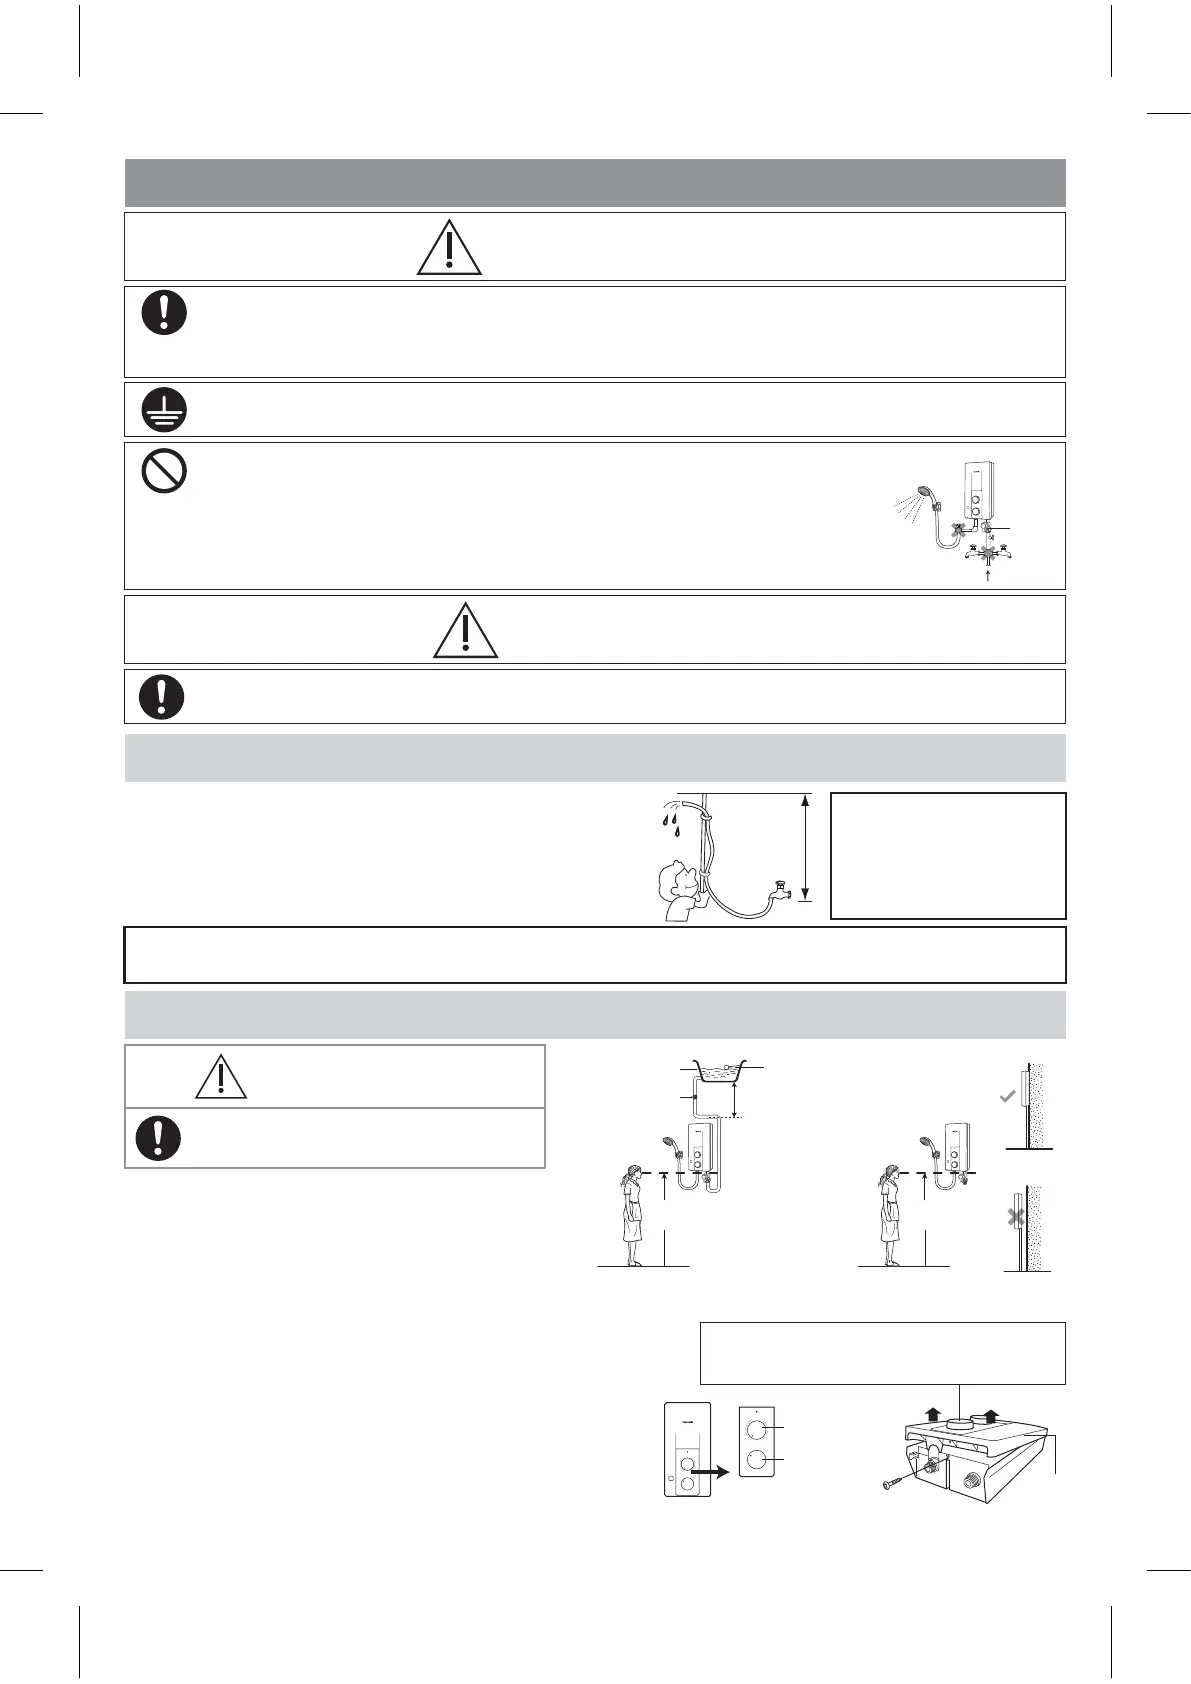
(1) Make sure the water flow pressure.
Min. water pressure 9.8 kPa / 0.1 kgf/cm² / 1.42 psi (DH-3RL1)
4.9 kPa / 0.05 kgf/cm² / 0.71 psi (DH-3RP1)
Max. water pressure 380 kPa / 3.87 kgf/cm² / 55 psi
• How to measure the water pressure as illustrated. Water should
flow out of the Hose 2.0 m above the Main Water Valve.
Note (model DH-3RP1)
Ensure that the water feeding
into the inlet connection is
drawn from the household
gravity water storage tank and
not from the main water supply.
1. BEFORE INSTALLATION
Note: When removing the Unit from package, some water may be found inside.
This is normal as the Unit is tested during the manufacturing process.
HOW TO INSTALL ELECTRIC HOME SHOWER
Flexible Cord must enter the Unit thru designated point only (do not make additional holes).
• Proper size of the Flexible Cord and electric wiring must be installed to avoid smoke emission and fire hazards.
• Make sure to turn off electric and water supply during installation process.
• The Home Shower must be permanently connected to the electric supply through the ON/OFF DP (double
pole) Switch having a contact separation of at least 3 mm in all poles incorporated in the fixed wiring. This
switch must be clearly identifiable but out of reach of a person using a fixed bath or shower.
The Unit must be earthed.
Improper grounding could cause electric shock.
• Never install the Filter Body Assembly at the outlet, inlet water cannot be filtered and allows
foreign particles to enter the Unit. It will cause the Heater Unit and the Shower Head to clog up.
• Do not install, remove and reinstall the Unit by yourself.
Improper installation will cause leakage, electric shock or fire. Installation and wiring must be
done by competent personnel.
• Do not share the inlet and outlet pipe of the Home Shower Unit with other outlets.
The pressure may drop due to water being drawn off at other point. The shower temperature
may become very hot.
WARNING
CAUTION
Water Inlet
Water
Outlet
Water
Volume
Knob
2. HOW TO INSTALL
Make sure to turn off electric and water
supply during installation process.
WARNING
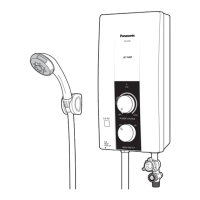
• Be sure to install the Unit on the wall as illustrated in
Figure 1 (vertical position with the water fittings pointing
downward).
• Do not install the Unit away from wall surface as shown
in Figure 2.
• The Unit must be installed at 1.5
m ~ 1.7
m above the
floor.
1. Where to install the unit.
Note:
Main Switch Knob and Power Control Knob are attached to
Front Plate. Do not remove the Main Switch Knob and the Power
knob from the Front Plate.
Main Switch
Knob
Power
Control Knob
2. How to remove the Front Plate
① Make sure the Main Switch Knob and Power Control Knob
are at “Off” condition.
② Remove the screw at the bottom of the Unit.
③ Lift up the Main Switch Knob and Power Control Knob to
make it free (Main Switch Knob and Power Control Knob
are attached to Rotary Shaft and VR Shaft inside the Unit).
Make sure the Main Switch Knob and Power Control Knob
are not detached from the Front Plate.
④ Remove the Front Plate by lifting up the bottom side and
then unhook the top side.
Main Switch Knob
and Power Control Knob
Figure 1
Figure 2
For DH-3RP1 For DH-3RL1
Main Pipe Rising Level
* Maximum total length
of feeding pipe should
be below 10 meter.
* The feeding pipe
should be 1/2 inch.
33 ft (10 meters) maximum
recommended height between
bottom of cold water tank and
top of Home Shower Unit.
Cold Water
Tank
Service Valve
ELB
DH-3RL1
Off High
Off
ELBTest
ELBReset
PushUp
On
P
o
w
e
r
C
o
n
t
r
o
l
M
a
i
n
S
w
i
t
c
h
ELB
Off High
Off On
P
o
w
e
r
C
o
n
t
r
o
l
M
a
i
n
S
w
i
t
c
h
①
Screw
Front
Plate
Lift up
②
④
③
O
P
E
N
C
L
O
S
E
FILTER
CLEANING
OFF
MAX
1.5 m ~
1.7 m
O
P
E
N
C
L
O
S
E
FILTER
CLEANING
OFF
MAX
ELBTest
ELBReset
PushUp
DH-3RL1
ELB
Off
Off
On
High
P
o
w
e
r
C
o
n
t
r
o
l
M
a
i
n
S
w
i
t
c
h
ELBTest
ELBReset
PushUp
DH-3RL1
ELB
Off
Off
On
High
P
o
w
e
r
C
o
n
t
r
o
l
M
a
i
n
S
w
i
t
c
h
ELBTest
ELBReset
PushUp
DH-3RL1
ELB
Off
Off
On
High
P
o
w
e
r
C
o
n
t
r
o
l
M
a
i
n
S
w
i
t
c
h