35
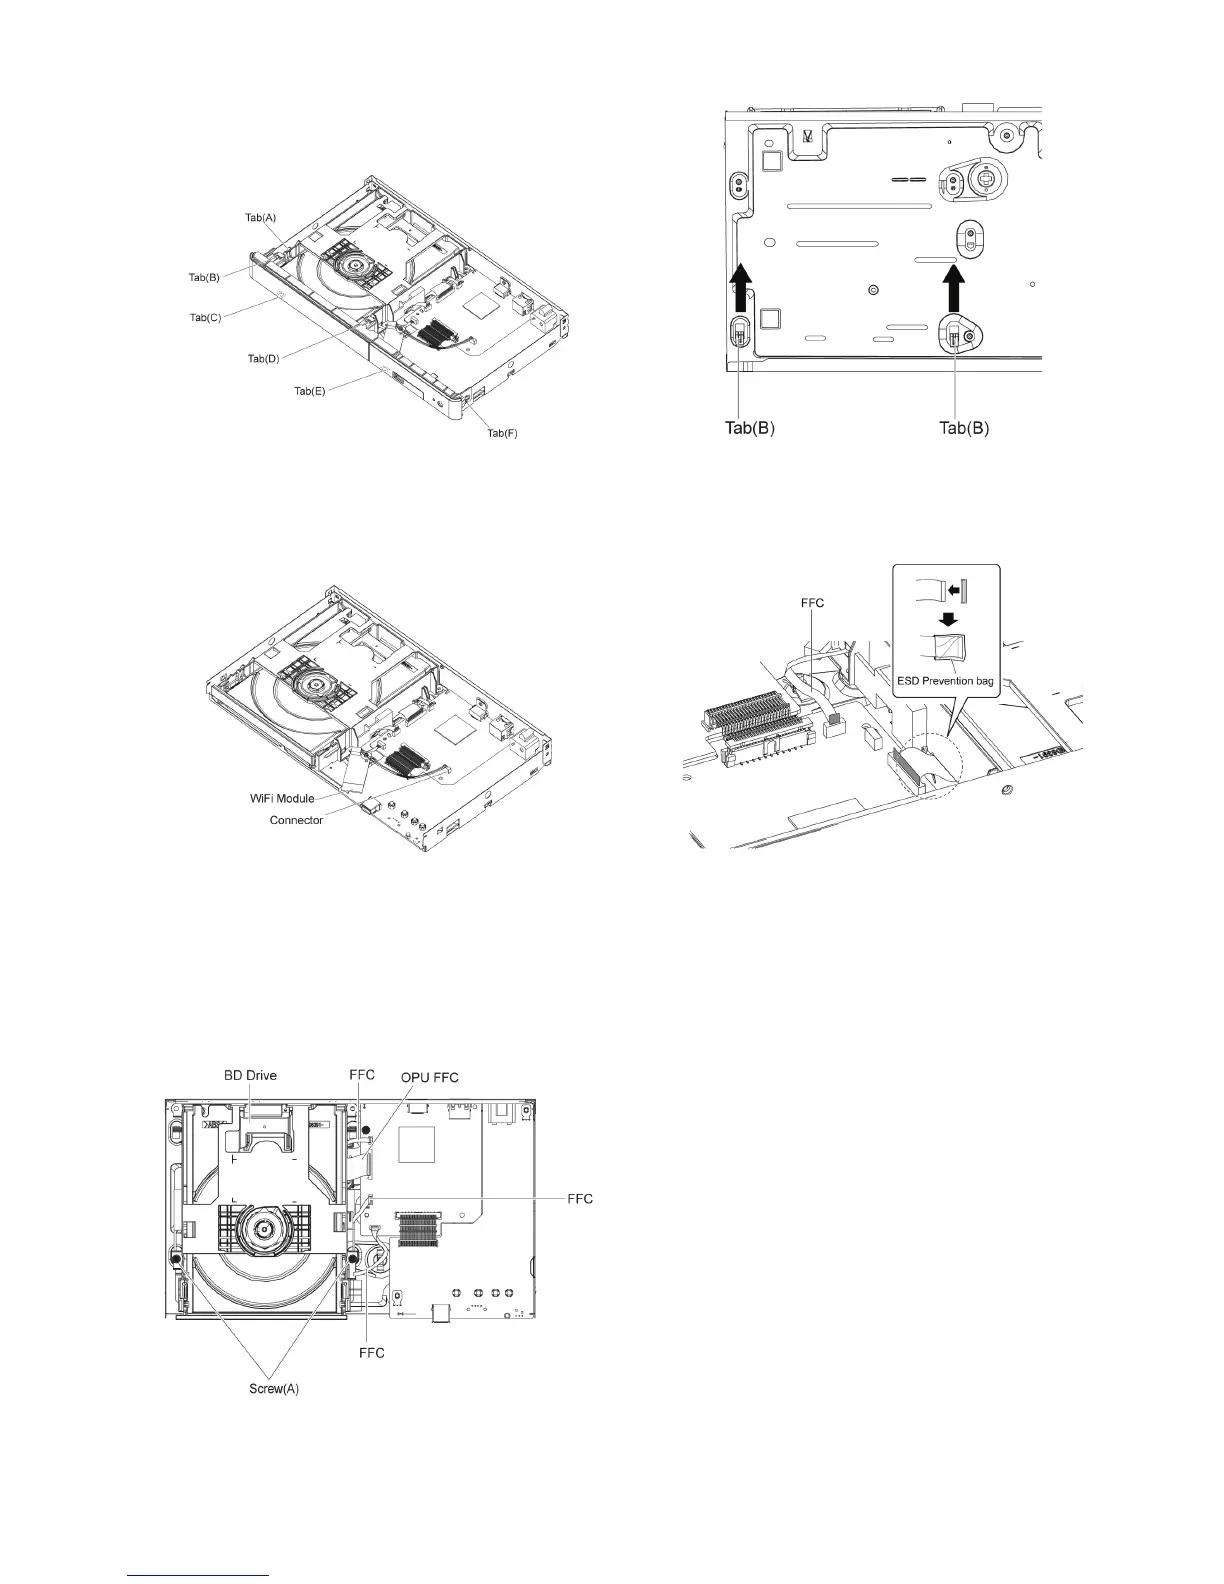
9.1.4.2. Front Panel
1. Unlock 6 tabs (A)-(F) turn. Pull with the Front Panel in the
direction of your side.
9.1.5. WiFi Module
(BD91GN only)
1. Remove the connector.
2. Remove the WiFi Module from the Spacer.
9.1.6. BD Drive
1. Remove the OPU FFC, and isolate it with an ESD pre-
vention bag (RPFC0114) to prevent the laser diode from
the ESD damage.
2. Remove the 3 FFCs.
3. Remove the 2 Screws (A ), remove 2 tabs (B) of BD Drive
in the direction of the arrow, to remove BD Drive.
NOTE:
The metal side of the FFC should be inserted in the direc-
tion of the Front Panel during installation as shown.