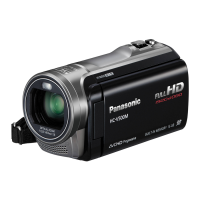
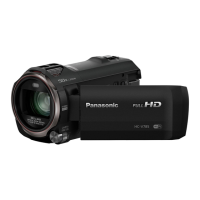
Why [Home Cam] cannot be used on my Panasonic HC-V550 Camcorder?
- WWesley HortonSep 9, 2025
Ensure that the wireless access point is connected to the Internet and that the wireless access point and the camcorder are properly connected.
Why [Home Cam] cannot be used on my Panasonic HC-V550 Camcorder?
Ensure that the wireless access point is connected to the Internet and that the wireless access point and the camcorder are properly connected.
What to do if my Panasonic Camcorder cannot be operated even though it is turned on?
Remove the battery or AC adapter, wait for about a minute, and then reconnect it. Wait another minute, and then turn the unit on again. Note that doing this while the media is being accessed may damage the data on the media. If normal operation is not restored, detach the power connected, and consult the dealer who you purchased this unit from.
What to do if the Panasonic Camcorder displays “ERROR OCCURRED. PLEASE TURN UNIT OFF, THEN TURN ON AGAIN.”?
The unit has detected an error. Turn the unit off and then on again to restart it. The unit will turn off automatically in about 1 minute if you don't turn it off and on. If the error message appears repeatedly after restarting, detach the power connected, and consult the dealer who you purchased this unit from. Do not attempt to repair the unit by yourself.
What to do if SD card is not recognised in Panasonic Camcorder?
If the SD card is not recognized by your Panasonic Camcorder, and it was formatted on a PC, use the camcorder to format the SD card.
I have forgotten the password for the Wi-Fi on my Panasonic Camcorder, what to do?
Perform [Reset Wi-Fi Settings] from the Setup menu. This will restore the Wi-Fi setting to its original state, allowing you to reconfigure the Wi-Fi settings.
How to delete scenes on Panasonic Camcorder?
To delete scenes on your Panasonic Camcorder, first release the protect setting. If scenes/still pictures where the thumbnails are displayed as cannot be deleted, and the scenes/still pictures are unnecessary, format the media to erase the data. Be aware that formatting will erase all data, so back up important data to a PC or disc.
Why does the color or brightness change, or show horizontal bars on my Panasonic HC-V550?
Changes in color or brightness, or horizontal bars, can occur when recording under fluorescent, mercury, or sodium lighting. This is not a malfunction. When recording motion pictures, use Intelligent Auto Mode/Intelligent Auto Plus Mode or set the shutter speed to 1/60 in areas with a 60 Hz power supply, or 1/100 in areas with a 50 Hz supply. This issue does not affect still picture recording.
How to fix Panasonic HC-V550 Camcorder when Auto Focus function does not work?
Switch to Intelligent Auto Mode or Intelligent Auto Plus Mode. If you are recording a scene that is difficult to focus on in Auto Focus Mode, use Manual Focus Mode to manually adjust the focus.
How to reset Wi-Fi password on Panasonic HC-V550?
If you've forgotten the Wi-Fi password for your Panasonic Camcorder, perform [Reset Wi-Fi Settings] from the Setup menu. This will restore the Wi-Fi settings to their original state at the time of purchase, allowing you to access the Wi-Fi setting menu again. Note that this will delete all Wi-Fi settings, including the “LUMIX CLUB” Login ID and registered wireless access points.
What to do if my Panasonic HC-V550 SD card is not recognized in another device?
Ensure that the other device supports the capacity and type of SD card you are using (SD Memory Card/SDHC Memory Card/SDXC Memory Card). Consult the device's operating instructions for compatibility details.
Identifies and describes the physical buttons and ports of the video camera.
Details battery types, charging procedures, and battery life indications.
Explains SD card compatibility, capacity, insertion, and formatting.
Guides on powering the camcorder on and off using the power button or LCD monitor.
Covers switching between recording and playback modes, and between motion/still picture modes.
Explains basic touch operations, gestures, and icons on the LCD monitor.
Provides instructions for setting the camera's internal clock and world time.
Offers guidance on camera positioning, basic motion picture recording, and self-recording.
Details how to choose between built-in memory and SD card for recording.
Explains the process of starting, pausing, and stopping video recording.
Guides on capturing still photographs using the camera.
Covers selecting media and format for playback of recorded content.
Explains how to access and navigate through the camera's main menu system.
Details system settings like display, clock, and world time configuration.
Explains how to use the zoom lever and the zoom ratio settings.
Describes the function that automatically corrects horizontal tilt for stable recording.
Details how to activate and change modes for optical image stabilization.
Explains how to switch between modes like Intelligent Auto, Manual, and Scene Mode.
Covers manual adjustment of focus, white balance, shutter speed, and iris.
Details using touch screen icons for functions like Image Stabilizer and AF/AE tracking.
Explains how to add and use quick access icons for features like Fade and Self-timer.
Introduces the camera's wireless capabilities and usage precautions.
Guides on connecting the camera to wireless access points or smartphones.
Explains simplified connection methods using NFC or QR codes.
Details the process of connecting to a wireless network using WPS or manual settings.
Covers direct connection methods to smartphones via WPS or QR code.
Explains how to easily re-establish previous Wi-Fi connections.
Details various settings within the Wi-Fi setup menu for managing connections.
Lists and explains common confirmation and error messages displayed on the screen.
Describes procedures for data recovery and potential issues with management information.
Provides solutions for common problems related to power, operation, and errors.
Offers important warnings and guidelines for safe and proper use of the unit.

