Do you have a question about the Panasonic HDC-SD20 and is the answer not in the manual?
Safety precautions regarding the AC power cord and plug.
Step-by-step instructions for replacing the fuse in the power plug.
Crucial warnings to prevent fire, electric shock, or damage to the unit.
Information regarding the unit's compliance with EMC standards.
Instructions for environmentally responsible disposal of electronic equipment and batteries.
Notices regarding recording content indemnity and copyright law observance.
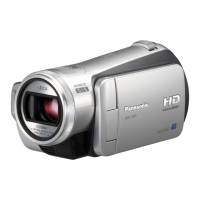
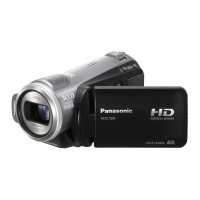
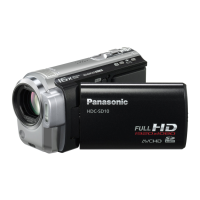
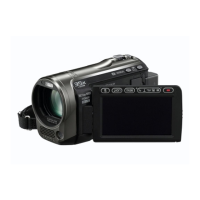
Details on the camera's ability to record high-definition images.
Explanation of the AVCHD format for recording high-definition images and audio.
Specific guidance for managing the built-in memory of the HDC-TM20 model.
Information on batteries compatible with the unit and recommendations for usage.
Detailed steps for safely inserting and removing the camera's battery.
Tables detailing charging and recording times for different battery models and camera types.
Explanation of the battery indicator and important notes on battery performance.
Procedure for connecting the unit to an AC power source for operation.
List of compatible SD and SDHC memory cards for motion and still picture recording.
Step-by-step instructions for inserting and removing SD cards from the unit.
Methods for powering the camera on and off using the mode switch or dial.
Using the LCD monitor position to control the camera's power state.
Explanation of touch screen interaction, icons, and navigation methods.
Steps for selecting the display language and an overview of available menu items.
Details on settings within the PICTURE and SETUP menus, including display and economy modes.
Configuration of alert sounds, LCD settings, initial setup, and demonstration mode.
Overview of menu options related to playback, scene editing, copying, and disc setup.
Step-by-step guide to setting the current date and time on the unit.
How to change the date display format (Y/M/D, M/D/Y, D/M/Y).
Configuring world time settings to display and record time at travel destinations.
Methods for adjusting the brightness and color levels of the LCD monitor.
Procedure for calibrating the touch screen for accurate input.
Settings for dynamic or normal picture quality on the LCD monitor.
Overview of the buttons on the remote control and their respective functions.
How to navigate menus and confirm selections using the remote control's directional buttons.
Guidance on holding the camera and maintaining a stable posture for optimal recording.
Details on automatic scene selection and effect adjustments in Intelligent Auto mode.
How to enter and exit Quick Start standby mode for faster camera readiness.
Steps to select the recording media (Built-in Memory, SD Card, or HDD).
How to start, pause, and stop motion picture recording, and understanding recording indicators.
Details on different recording modes (HA, HG, HX, HE) and their approximate recordable times.
Using the PRE-REC function to capture moments before the recording button is pressed.
Utilizing the shooting guide message for rapid movement recording.
Steps for taking still pictures using the camera's photo button.
Understanding focus indicators and setting picture quality for still images.
Recording still pictures during motion recording and understanding picture capacity.
Operating the zoom lever and understanding digital zoom effects on image quality.
How to set and lock a target frame on a subject for continuous tracking.
How to select and apply effects like backlight compensation and soft skin mode.
Descriptions of effects like fade, tele macro, and color night view, and how to select fade color.
Choosing scene modes (Sports, Portrait, Low Light, etc.) for optimal recording in different situations.
Using guide lines for composition and the digital cinema mode for movie-like visuals.
Features for continuous recording and stabilizing the unit during shooting.
Using face framing for automatic focus and digital cinema color for vivid visuals.
Adjusting audio settings to reduce wind noise and configure microphone directivity.
Controlling and adjusting the microphone input level, including auto gain control.
How to enter manual recording mode and access adjustment icons.
Steps for setting white balance manually for accurate color reproduction.
Adjusting shutter speed for motion and iris for exposure manually.
Focusing manually and adjusting picture settings like sharpness and color.
Choosing the source media (SD card, built-in memory, HDD) for playback.
Using playback icons for play/pause, fast forward, rewind, skip, and slow motion.
Playing back motion pictures frame by frame and using direct playback features.
Saving a single frame from motion footage as a still picture.
Navigating scenes using a highlight and time frame index for quick access.
Viewing motion pictures by date and using intelligent scene selection to skip unwanted parts.
Creating highlight playback sequences and setting scenes or dates for playback.
Configuring playback time, selecting background music, and enabling repeat playback.
Choosing the source media (SD card, built-in memory, HDD) for still picture playback.
Customizing slide show playback interval and music selection.
Information on still picture compatibility and viewing pictures organized by date.
How to delete multiple scenes or pictures using the thumbnail view.
Managing deletion operations, including cancelling midway and handling un-deletable content.
How to mark a point in a scene to divide it for targeted deletion.
Methods to protect individual scenes or still pictures from being deleted.
Selecting pictures and number of prints for printing via DPOF.
How to check the available capacity on the destination media before copying.
Step-by-step process for copying motion pictures and still pictures between storage media.
Instructions for combining scenes recorded via relay recording.
Steps to format storage media, erasing all recorded data.
Steps for connecting the camera to various TV input terminals using different cables.
Choosing the correct video input on the TV and troubleshooting common connection issues.
Adjusting aspect ratio settings for viewing 16:9 content on 4:3 TVs.
Controlling the display of on-screen information (icons, time code) on the TV.
Guidance on connecting the unit using an HDMI mini cable for high-quality output.
Connecting for 5.1 channel audio and using the component cable for output.
Steps to enable VIERA Link and connect the unit to a compatible Panasonic TV.
Controlling TV playback operations using the camera's remote control via VIERA Link.
Managing power linking, input switching, and troubleshooting VIERA Link issues.
Information on compatible disc types and preparing for copying/playing back discs.
Steps for connecting the unit to a DVD burner and initiating disc operations.
Choosing the source media and the method (High Definition, Standard) for copying.
Choosing specific scenes or dates and initiating the disc copying process.
Estimates for the time required to copy motion pictures and still pictures to discs.
Steps to play back motion pictures and still pictures from copied discs.
Procedures for formatting discs and enabling auto-protection for copied content.
Steps for connecting the unit to video devices and starting the dubbing process.
Steps for connecting the unit to a printer and initiating the printing process.
Choosing the media source and setting the number of prints for PictBridge printing.
Configuring paper size, page layout, and starting the printing job.
Instructions for copying motion and still pictures to a PC using HD Writer AE 1.0.
Playing back motion pictures on a PC and important notices regarding data transfer.
Detailed specifications for PC hardware and software needed for HD Writer AE 1.0.
System requirements for using the unit as a card reader, including necessary software.
Instructions for installing the software, including creating shortcuts and selecting region.
Procedure for removing the HD Writer AE 1.0 software from the PC.
Steps for establishing a USB connection between the camera and the computer.
Resolving driver recognition issues and safely disconnecting the USB cable.
Viewing PC display structure and copying still pictures to the PC.
Steps to launch the HD Writer AE 1.0 software on the computer.
Instructions for copying still pictures to a Macintosh using drag-and-drop.
Interpreting icons related to motion and still picture recording status.
Understanding indicators for white balance, scene modes, zoom, and other functions.
Interpreting playback status indicators and PC connection status icons.
Understanding battery status, SD card status, and DVD burner disc indications.
Messages related to data backup recommendations and HDD errors, with corrective actions.
Information on data recovery procedures and error messages like data errors and scene repair needs.
Identifying functions that are disabled when specific other functions are active.
Troubleshooting steps for the unit not turning on, short battery life, and automatic power off.
Resolving problems with recording start, touch screen accuracy, and remote control functionality.
Troubleshooting focus, color balance, skipped playback, and TV display problems.
Addressing image changes, object warping, and VIERA Link connectivity problems.
Resolving issues with PC detection via USB and problems copying SD card content.
Addressing issues related to scene deletion, copying between media, and mode changes.
Guidelines on avoiding electromagnetic interference, dust, sand, and physical impact.
Advice on storing the unit, physically formatting memory/HDD, and battery maintenance.
Important notes regarding the AC adaptor's operation and LCD monitor care.
Understanding condensation causes and procedures to prevent and manage it.
Information on power source, signal system, image sensor, lens, and filter diameter.
Details on HDMI, USB, flash range, dimensions, mass, and operating conditions.
Specifications for recording media, compression formats, and picture sizes for motion and still pictures.
Technical details regarding the AC adaptor's power source, consumption, and output.
| Filter size | 43 mm |
|---|---|
| Digital zoom | 1000 x |
| Optical zoom | 16 x |
| Image stabilizer | Yes |
| Focal length range | 2.95 - 47.2 mm |
| Focal length (35mm film equivalent) | 44.1 - 706 mm |
| Sensor type | MOS |
| Total megapixels | 1.17 MP |
| Optical sensor size | 1/6 \ |
| Video out | 1 |
| Power requirements | DC7.2V / 9.3V |
| Power consumption (typical) | 5.6 W |
| Display diagonal | 2.7 \ |
| Maximum video resolution | 1920 x 1080 pixels |
| Still image resolution(s) | 1920 x 1080 |
| Camera shutter speed | 1/25 - 1/8000 s |
| Minimum illumination | 9 lx |
| USB 2.0 ports quantity | USB 2.0 ports have a data transmission speed of 480 Mbps, and are backwards compatible with USB 1.1 ports. You can connect all kinds of peripheral devices to them. |
| Product color | Red |
| Bundled software | HD Writer AE 1.0 |
| Depth | 127 mm |
|---|---|
| Width | 64 mm |
| Height | 67 mm |
| Weight | 270 g |