Do you have a question about the Panasonic HDC-SD5 and is the answer not in the manual?
Safety precautions for installation and ventilation to prevent hazards.
Warnings to reduce risk of fire, electric shock, or product damage.
Information about the EMC compatibility symbol (CE) on the rating plate.
Use only specified AV and USB cables for safety and performance.
Details on wire colours and terminal connections for safe AC plug use.
Instructions on fuse replacement and safe plug handling.
Step-by-step guide to replacing the fuse in the AC plug.
Proper disposal of WEEE to protect resources and health.
Contact dealer or supplier for disposal of business EEE in the EU.
Contact local authorities for proper disposal methods outside the EU.
Manufacturer not liable for recording loss due to unit malfunction.
Observe copyright laws when recording material for private use.
Information on using SD Memory Cards and SDHC Memory Cards.
Explains high-definition images (1920x1080) vs. standard images (720x576).
AVCHD format for HD images using MPEG-4 AVC/H.264 codec.
SDHC card compatibility with other devices and vice versa.
Motion picture compatibility with AVCHD devices and potential issues.
How to connect for HD viewing via HDMI cable.
Using TV remote for playback via VIERA Link connection.
Explanation of Panasonic's VIERA Link HDMI control function.
Features like turning off power and automatic input switching via VIERA Link.
Connecting unit to optional DVD burner via USB cable.
Notes on disc types and AVCHD format compatibility for copied discs.
Using HD Writer for copying, editing, and converting data.
Using optional SD Media Storage for portable data backup.
Contact numbers and email for customer service and AV software support.
Information on ordering accessories and products online or by phone.
List of items supplied with the video camera.
List of optional items to enhance camera functionality.
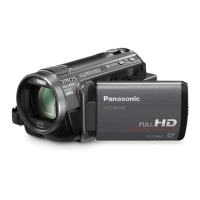
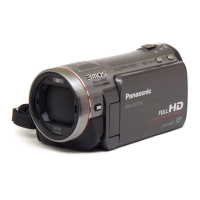
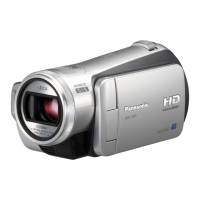
Identification of controls and ports on the front and side of the unit.
Identification of controls and ports on the rear and bottom of the unit.
Importance of not covering fan inlets/outlets for proper ventilation.
How to adjust the grip belt for comfortable and secure handling.
Instructions for fitting and removing the lens hood.
How to attach the lens cap to protect the lens surface.
Using the tripod receptacle for stable camera mounting.
How to open and view images on the LCD monitor.
How to adjust the LCD monitor's viewing angle for better visibility.
Identification and function of all remote control buttons.
Step-by-step guide to install the battery in the remote control.
Usable distance and angle for effective remote control operation.
Table showing SD and SDHC card compatibility for recording.
Precautions for handling SD cards to prevent damage and data loss.
SD Speed Class Ratings and specific Panasonic cards for motion recording.
Importance of proper formatting and using the write-protect switch.
Steps to connect the battery to the AC adaptor for charging.
Explanation of the charging lamp indicators (charging, completed, flashing).
Steps to insert the battery correctly into the unit.
Steps to remove the battery safely from the unit.
List of compatible Panasonic battery models and their voltage/capacity.
Shows charging times and recordable times for batteries.
How the battery capacity is displayed in minutes and its limitations.
Connecting the AC adaptor, DC cable, and unit for power.
Usage of the optional VW-VH04 battery pack holder kit.
Switching between recording, playback, and OFF modes using the dial.
Using the LCD monitor to turn the unit on and off.
Steps to enable the Quick Start mode for faster resume.
Steps to disable the Quick Start mode.
Step-by-step guide for SD card handling.
Warnings about touching terminals and data safety.
Meaning of the card access lamp indicating SD card activity.
Navigating menus and selecting items with the cursor button.
Using cursor button for various recording controls.
Using cursor button for various playback controls.
Explanation of icons displayed in recording mode.
How to use the AUTO/MANUAL/FOCUS switch for settings.
Icons used for controlling motion picture playback.
Icons used for controlling still picture playback.
Explains how to use the help mode for understanding icons.
How to select the language for menus and displays.
How to access and navigate the main menu structure.
Steps to select and confirm menu items and submenus.
How to go back to previous screens or exit the menu.
How to set the camera's date and time accurately.
How to use the remote control for menu navigation.
Changing how date and time are displayed on screen.
Recharging the internal battery for clock settings.
Adjusting brightness and colour level of the LCD monitor.
Increasing LCD brightness for better visibility in bright conditions.
Adjusting picture quality (DYNAMIC/NORMAL) on the LCD monitor.
Steps to prepare for recording, including SD card formatting.
How to hold the camera and avoid obstructing key components.
Using auto settings for white balance, focus, and exposure.
Function to prevent unintentional recording when unit is tilted.
How to turn the AGS function on or off via the menu.
Step-by-step guide to start and stop recording motion pictures.
Explanation of icons and information displayed during recording.
Reasons for sudden recording stops and solutions.
Capturing moments before pressing record start using PRE-REC.
Situations where PRE-REC is automatically cancelled.
Changing picture quality and recordable time (HG, HN, HE).
Shows recordable times based on SD card size and recording mode.
Steps to capture still images using the PHOTO SHOT button.
Explanation of the different focus indication symbols.
Advice for improving clarity in still picture shots.
Screen indicators when the PHOTO SHOT button is pressed halfway.
Details on focus indication and the focusing area.
How to turn the shutter sound on or off for still pictures.
How to take still pictures while recording video.
Selecting high or normal picture quality for still images.
Table showing picture count based on card size and quality.
Using the zoom lever for optical and digital zoom control.
Selecting digital zoom levels (25x, 700x) for extended magnification.
How the microphone output adjusts based on zoom rate.
How to record yourself by rotating the LCD monitor.
Adjusting contrast for better detail in bright and dark scenes.
Adding gradual appearance/disappearance effects to video.
Recording in dark locations with enhanced colour visibility.
Turning off the colour night view mode.
Softening skin tones for a more attractive appearance in portraits.
Adjusting exposure to compensate for backlit subjects.
Using the timer for delayed still picture recording (10s or 2s).
Turning the flash on, off, or setting to auto mode.
Notes on flash range, charging, and when not to use it.
Reducing red eyes in flash photos by activating the feature.
Setting the flash brightness level for optimal exposure.
Focusing on subjects that are close to the lens.
Reducing camera shake during recording for clearer shots.
Displaying grid lines for better composition and leveling.
Minimizing wind noise in audio recordings by reducing wind impact.
Setting the recording level for the built-in microphones.
Returning microphone level to automatic setting.
Highlighting overexposed areas with diagonal lines.
Showing colour bars for TV/monitor calibration.
Slowing shutter speed for better low-light recording.
Overview of manual recording settings like scene modes.
Selecting preset modes for different shooting situations.
Details on Sports, Portrait, Low Light, Spotlight, Surf & Snow modes.
How to manually adjust focus when auto focus is difficult.
Adjusting white balance for natural colours under different lighting.
Enlarging the screen center for easier manual focus adjustment.
Steps to manually set white balance using a white subject.
Function of the white balance sensor in detecting light sources.
Automatic adjustment for black balance in manual white balance mode.
Manual control of shutter speed and iris/gain for exposure.
Steps to play back recorded motion pictures.
Notes on AVCHD format and playback compatibility with other devices.
Controlling playback speed for fast forward and rewind.
Skipping scenes and playing back video in slow motion.
Using the remote control for various playback operations.
Advancing playback one frame at a time.
Using the volume lever to control audio output level.
Viewing recorded scenes grouped by date.
Setting playback to repeat automatically.
Continuing playback from where it was stopped.
Viewing still images recorded on the SD card.
Using cursor buttons for still picture playback operations.
Information on supported JPEG file formats.
Removing individual scenes from the SD card.
Deleting multiple scenes from the thumbnail view.
Splitting a scene to delete unwanted portions.
Finalizing scene editing operations.
Preventing accidental deletion of scenes.
Removing all scene division points.
Removing individual still picture files.
Deleting multiple still pictures from the thumbnail view.
Erasing still picture files not compatible with this unit.
Preventing accidental deletion of still picture files.
Explanation of Digital Print Order Format.
Configuring print settings for SD cards.
Initializing SD cards, which erases all data.
Connecting the unit to a TV for playback.
Showing playback info on TV using EXT DISPLAY button.
Connecting the unit to a TV using an HDMI cable.
Explanation of the HDMI interface for digital devices.
Switching output methods (AUTO, 1080i, 576p).
Explaining 1080i, 576p, and 576i video signals.
Steps for connecting the unit to a TV via component and AV cables.
Adjusting component output for 576i or 1080i compatibility.
Steps for connecting the unit to a TV using an AV cable.
Checks to perform if image or audio is not outputting to TV.
Adjusting aspect ratio for display on 4:3 TVs.
Checks for image/audio output problems and aspect ratio settings.
Connecting and activating VIERA Link for linked operations.
Using the TV remote to control playback on the unit.
Steps to disable VIERA Link functionality.
Connecting unit to optional DVD burner for copying motion data.
Factors affecting copy time and disc compatibility.
Detailed steps for connecting the unit to the DVD burner.
Using the DISC COPY button to copy all scenes.
Choosing specific scenes to copy to a single disc.
Ensure copied data is correct before deleting SD card.
Important reminders about copying process and disc usage.
Connecting the unit to the DVD burner to play discs.
Steps for selecting and playing back motion pictures from a disc.
Initializing DVD-RAM and DVD-RW discs.
Protecting discs from accidental formatting.
Viewing details about the inserted disc (scenes, space, finalization).
Transferring images to a DVD recorder or video device.
Connecting the camera directly to a PictBridge-compatible printer.
Choosing files and configuring print settings.
Adjusting number of prints, date print, paper size, layout.
Initiating print job and stopping printing midway.
Prerequisites for connecting the unit to a PC.
What can be done with the camera via computer (copying, editing).
List of applications provided on the CD-ROM.
Capabilities of HD Writer software (copy, edit, playback).
Requirement for DirectX for HD Writer operation.
Legal terms and conditions for using the provided software.
Basic requirements for installing software applications.
Specific OS, CPU, RAM, Display, Disk Space for HD Writer.
System requirements for using the unit as a card reader.
Step-by-step guide to install the HD Writer software.
Steps to remove software from the computer.
How to find and read the software's PDF manual.
Connecting the unit and ensuring it's recognized by the PC.
How the unit appears on the computer (e.g., Removable Disk).
Transferring photos from SD card to computer using Explorer.
Procedures to safely remove the USB cable from the computer.
Checking if the computer recognizes the unit correctly.
Troubleshooting issues with driver recognition.
Steps for copying data from SD card using HD Writer.
How to start playback using HD Writer software.
Choosing media and scenes to play back.
Converting copied data to MPEG2 for DVD creation.
Formatting discs using the HD Writer software.
Steps to create a DVD-Video from copied data.
System requirements for Mac OS X for card reader function.
Transferring photos from SD card to Mac using drag-and-drop.
Listing of menu categories (BASIC, VIDEO, PICTURE, ADVANCED) and sub-items.
Options under PLAY SETUP, EDIT SCENE, DISC COPY.
Options under PLAY SETUP for still pictures.
Options under DISC SETUP for disc management.
REC LAMP, DISPLAY, POWER SAVE, BEEP SOUND, INITIAL SET, DEMO MODE.
Icons and information displayed during motion picture recording.
Icons and information displayed during still picture recording.
Icons and messages shown during playback.
Indications when the unit is connected to a computer.
Warning/alarm indications and DVD burner status.
List of messages and their meanings (e.g., CANNOT RECORD, CARD FULL).
Messages related to data recovery and battery status.
Messages like AGS mode, Reset Switch, Cannot Set, Device Check.
Table showing functions disabled by other active functions.
Solutions if the unit fails to power on.
Reasons for automatic power off and VIERA Link impact.
Issues with battery not staying charged or running down quickly.
Why the battery capacity display may be inaccurate.
Problems with unit operation, remote, and screen indications.
Problems preventing recording or auto focus function.
Issues with picture clarity, sound, and TV display.
Problems with deleting scenes, SD card appearance, and recognition.
Issues when SD card is not recognized by other devices.
What to do if the screen freezes or the reset switch is needed.
Problems with VIERA Link and arbitrary power off.
Unit not recognized by PC, USB disconnection errors, PDF access.
Why scenes may not transition smoothly on other devices.
How PRE-REC affects scene transitions.
Scene transitions when changing recording modes.
How deleting scenes affects playback smoothness.
Why scenes might momentarily stop after copying to disc.
Scene transitions when using HD Writer for editing.
Precautions regarding heat, dust, water, and chemicals.
Avoiding interference from electronic equipment and cell phones.
Proper use, storage, and lifespan of the battery.
Safe use of the AC adaptor, including placement and disconnection.
SD card memory indication and slight heating during use.
Proper use of miniSD cards with a dedicated adaptor.
Cleaning and maintaining the LCD monitor screen.
Understanding and preventing lens fogging.
How auto white balance works and its limitations.
Adjusting white balance under various lighting conditions.
How auto focus works and scenarios where it may fail.
Details on image sensor, lens, filter, zoom, and monitor.
Details on microphone, speaker, output levels, USB, and flash.
Dimensions, mass, temperature, humidity, battery time.
Media, compression, recording modes, picture size, audio.
Media, compression, and picture size for still images.
Power source, consumption, output, dimensions, mass.
Voltage and capacitance of the battery pack.
| power supply | DC 7.2/9.3 V |
|---|---|
| power consumption | 6.7 W |
| battery capacity | 1320 mAh |
| optical zoom | 10x |
|---|---|
| effective pixels | 520k x 3 |
| focal length | 3.0—30.0 mm |
| video compression | MPEG-4 AVC/H.264 |
|---|---|
| recording formats | AVCHD (Motion Image) / JPEG (Still Image) |
| recording modes | HG (13 Mbps / CBR), HN (9 Mbps / VBR), HE (6 Mbps / VBR) |
| weight without battery | 340 g |
|---|---|
| dimensions | 65 x 67 x 135 mm |
| power supply | DC 7.2/9.3 V |
|---|---|
| power consumption | 10.2 W |
| battery capacity | 2640 mAh |
| optical zoom | 10x |
|---|---|
| effective pixels | 520k x 3 |
| focal length | 3.0—30.0 mm |
| video compression | HD : MPEG-4 AVC/H.264, STD : MPEG-2 |
|---|---|
| recording formats | HD : AVCHD / STD : DVD Video Recording, DVD Video (Motion Image) / JPEG (Still Image) |
| recording modes | HG (13 Mbps / CBR), HN (9 Mbps / VBR), HE (6 Mbps / VBR) |
| weight without battery | 540 g |
|---|---|
| dimensions | 83.5 x 93.5 x 151.5 mm |