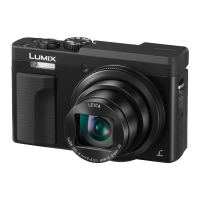
11
DVQX1246 (ENG)
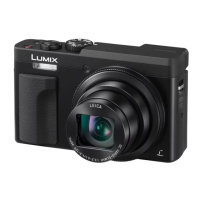
Preparations
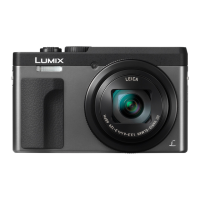
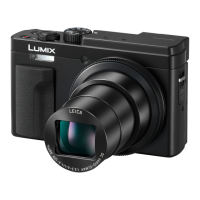
1 Shutter button (→17)
2
Zoom lever (→18)
3
Motion picture button (→34)
4
Camera [ON/OFF] button (→15)
5
Mode dial (→19)
6
Stereo microphone (→16)
7
Viewfinder (→16, 50)
8
Diopter adjustment dial
• Rotate the diopter adjustment dial
to adjust until you are able to clearly
see the characters displayed in the
viewfinder.
9
Eye sensor (→16)
10
Strap eyelet
• To prevent dropping, be sure to
attach the supplied strap and fit it to
your wrist.
11
Speaker (→16)
12
Control ring (→21)
13
Lens barrel
14
Lens
15
Self-timer indicator /
AF Assist Lamp (→16)
16
Flash (→16)
17
[LVF] button (→16) / [Fn4] button (→22)
18
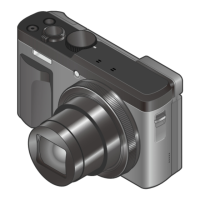
Charging lamp (→14) /
Wi-Fi
®
connection lamp
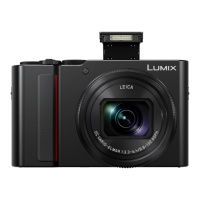
19
[ ] ([Post Focus]) button (→31) /
[Fn2] button (→22)
20
Control dial (→21)
21
[Q.MENU/
] (Cancel) button /
[
] (Delete) button (→38) /
[Fn3] button (→22)
• You can easily call some of the menu
items and set them during recording.
22
[
] (4K photo mode) button (→28) /
[Fn1] button (→22)
23
[ ] (Playback) button (→38)
24
Cursor button (→20)
25
[MENU/SET] button
• Confirmation of setting contents, etc.,
is performed.
26
[DISP.] button
• Use this to change display.
27
[HDMI] socket
• You can view pictures on a TV screen
by connecting your camera to your TV
with the HDMI micro cable.
28
[USB/CHARGE] socket (→13)
29
Card/Battery door (→12)
30
Release lever (→12)
31
DC coupler cover (→59)
32
Tripod mount
• Do not attach this unit to tripods that
have screws with a length of 5.5 mm
(0.22 inch) or more. Doing so may
damage this unit or the unit may not be
secured properly on the tripod.
33
Touch screen (→22) / monitor (→16, 50)
●
Always use a genuine Panasonic AC
adaptor (DMW-AC10G: optional).
(→59)
When using an AC adaptor (DMW-
AC10G: optional), ensure that the
Panasonic DC coupler (DMW-
DCC11: optional) and AC adaptor
(DMW-AC10G: optional) are used.
●
[Fn5] to [Fn9] (→22) are touch icons.
They are displayed by touching the
[
] tab on the recording screen.
 Loading...