Advanced-Shooting
- 73 -
Auto White Balance (AWB)
Depending on the conditions prevailing when pictures are taken, the pictures may take on a
reddish or bluish tinge. Furthermore, when a multiple number of light sources are being used or
there is nothing with a color close to white, Auto White Balance may not function properly. In a
case like this, set the white balance to a mode other than [AWB].
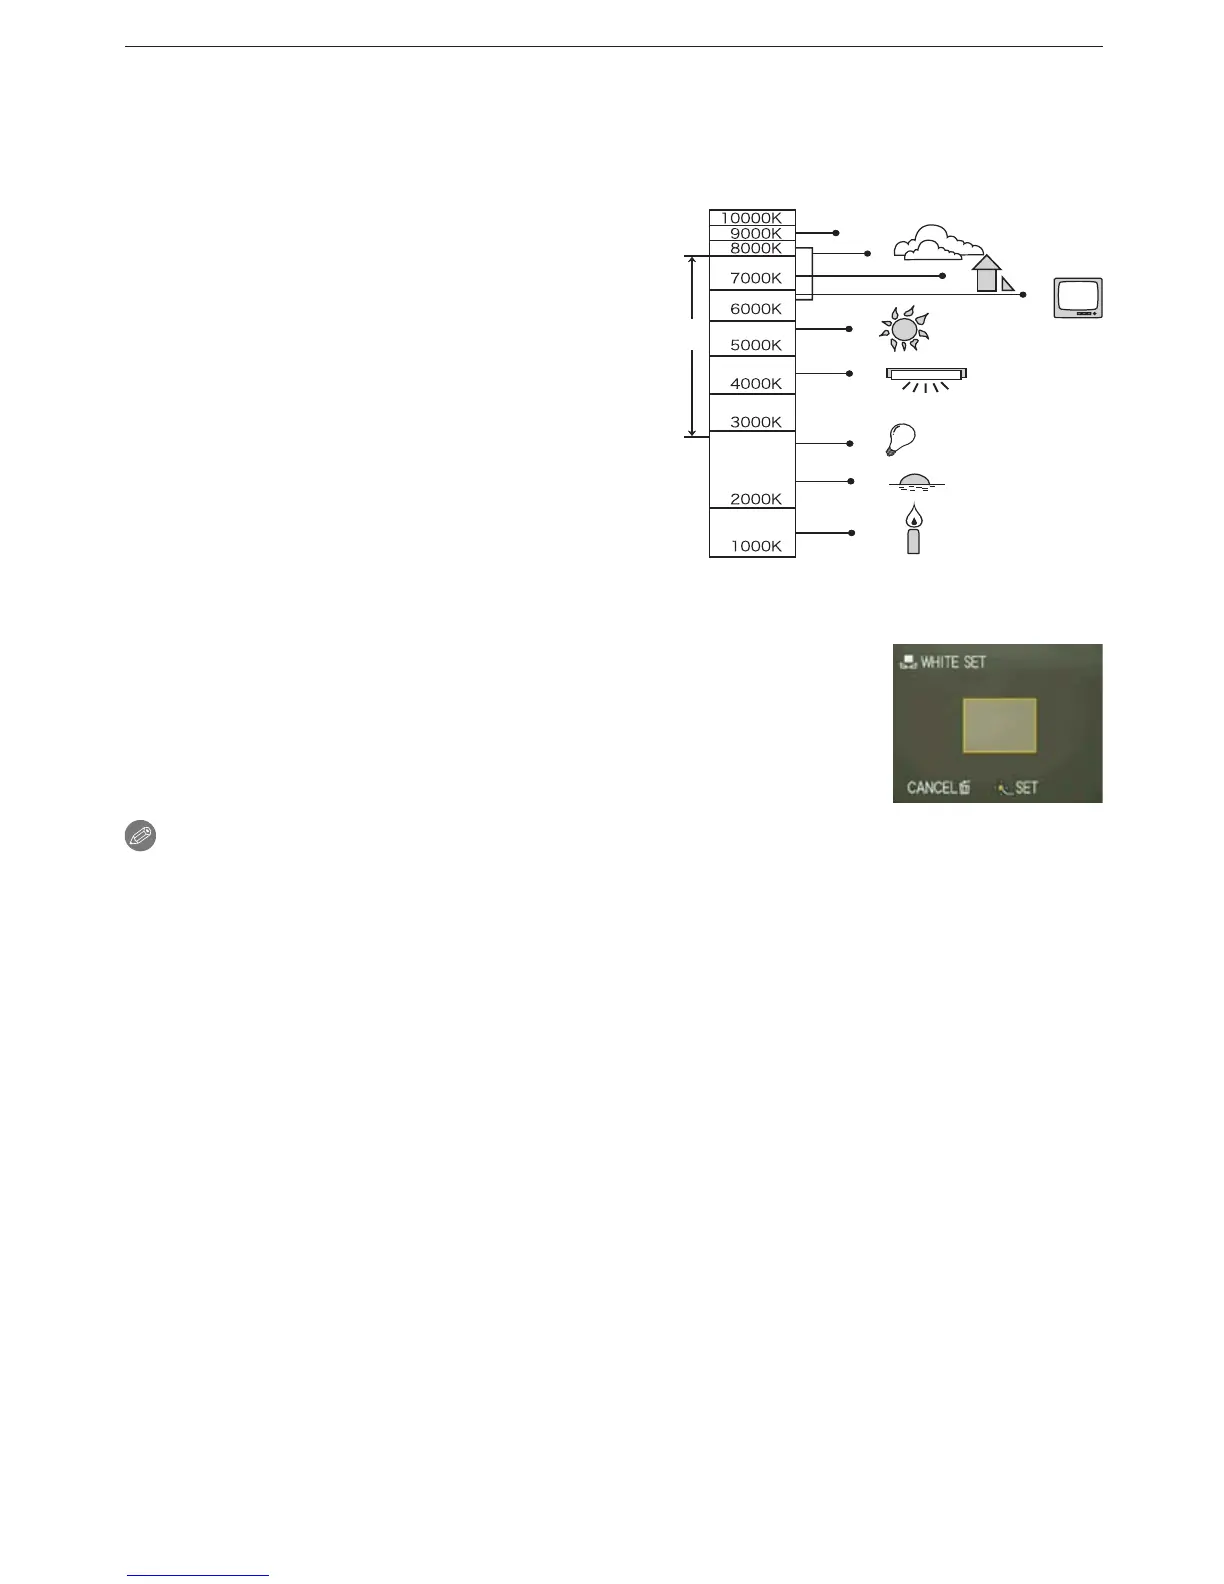
1 The range that is controlled by the Auto White
Balance adjustment mode of this camera
2
Blue sky
3 Cloudy sky (Rain)
4 Shade
5 TV screen
6 Sunlight
7 White uorescent light
8 Incandescent light bulb
9 Sunrise and sunset
10 Candlelight
K=Kelvin Color Temperature
Setting the white balance manually (White set
n
)
1 Select [
n
] and then press [MENU/SET].
2 Aim the camera at a sheet of white paper etc. so that the
frame in the center is lled by the white object only and then
press [MENU/SET].
3 After setting, select [
b
].
Note
• The white balance setting is memorized even if you switch the camera off, but if you change
the Scene Mode, the white balance setting returns to [AWB].
•
[WHITE BALANCE] is xed to [AWB] in the following scene modes.
– [SCENERY], [NIGHT PORTRAIT], [NIGHT SCENERY], [FOOD], [PARTY], [CANDLE
LIGHT], [SUNSET], [FLASH BURST], [STARRY SKY], [FIREWORKS], [BEACH], [SNOW]
and [AERIAL PHOTO] in [SCENE MODE].

 Loading...