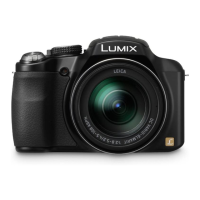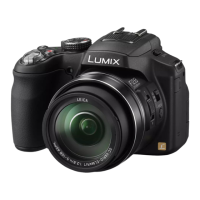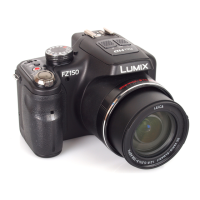
Do you have a question about the Panasonic Lumix DMC-FZ150 and is the answer not in the manual?
| Megapixel | 12.1 MP |
|---|---|
| Camera type | Bridge camera |
| Sensor type | CMOS |
| Image stabilizer | No |
| Image sensor size | 1/2.3 \ |
| Maximum image resolution | - pixels |
| Still image resolution(s) | 480 x 480, 1536 x 1536, 1920 x 1920, 2448 x 2448, 2992 x 2992 |
| Digital zoom | 32 x |
| Optical zoom | 24 x |
| Focal length range | 4.5 - 108 mm |
| Maximum aperture number | 5.2 |
| Minimum aperture number | 2.8 |
| Maximum focal length (35mm film equiv) | 600 mm |
| Minimum focal length (35mm film equiv) | 25 mm |
| Normal focusing range | 30 - 200 m |
| Auto focusing (AF) modes | - |
| Normal focusing range (tele) | 2 - ∞ m |
| Normal focusing range (wide) | 0.3 - ∞ m |
| ISO sensitivity | 100, 200, 400, 800, 1600, 3200, Auto |
| Light exposure modes | Aperture priority AE, Auto, Shutter priority AE |
| ISO sensitivity (max) | 3200 |
| ISO sensitivity (min) | 100 |
| Light exposure control | Program AE |
| Fastest camera shutter speed | 1/2000 s |
| Slowest camera shutter speed | 15 s |
| Flash modes | Auto, Forced on, Red-eye reduction |
| Built-in flash | Yes |
| Power source type | AC, Battery |
| Maximum video resolution | 1920 x 1080 pixels |
| Internal memory | 70 MB |
| Compatible memory cards | SD, SDHC, SDXC |
| Field of view | 100 % |
| Display diagonal | 3 \ |
| Viewfinder type | Optical |
| Viewfinder screen size | 0.2 \ |
| USB version | 2.0 |
| Product color | Black |
| Scene modes | Panorama, Portrait |
| White balance | Auto, Cloudy, Daylight, Flash, Incandescent, Shade |
| Self-timer delay | 2, 10 s |
| Battery voltage | 7.2 V |
| Battery capacity | 895 mAh |
| Battery life (CIPA standard) | 410 shots |
| Depth | 95.2 mm |
|---|---|
| Width | 124.3 mm |
| Height | 81.7 mm |
| Weight | 484 g |
Guidelines for maintaining the camera to prevent damage and ensure proper operation.
List of items supplied with the camera and instructions for checking them.
Identifies and describes the various buttons, dials, and parts of the camera.
Explains the function of cursor buttons for navigation and the MENU/SET button for confirmation.
Details the operation of the rear dial for selection and confirmation of settings.
Instructions on how to attach the lens cap and shoulder strap for camera protection and carrying.
Guidance on attaching the lens hood to minimize lens flare and improve picture quality.
Steps for charging the camera battery and information about charging indicators and time.
Provides estimates for battery life and the number of pictures that can be recorded under specific conditions.
Instructions for safely inserting and removing memory cards and the battery.
Details the camera's built-in memory capacity and compatible memory card types and specifications.
Step-by-step guide to setting the camera's date and time.
Explanation of how to change recording modes using the mode dial and descriptions of basic modes.
Advice on holding the camera correctly and preventing camera shake for better photos.
Guide to using Program AE mode for capturing images with customized settings.
Instructions on how to focus on subjects using the AF system and understanding focus indications.
Guide to using Intelligent Auto Mode for automatic camera adjustments for easy shooting.
Explanation of how the camera automatically detects scenes and selects appropriate shooting modes.
Instructions on how to start and stop recording motion pictures.
Steps to start and finish normal playback of recorded still pictures.
Instructions on how to delete single or multiple pictures from the camera.
Overview of the camera's menu system and the types of settings available.
How to access and use the Quick Menu for fast adjustments to frequently used settings.
Explanation of important settings found in the Setup menu, such as Clock Set and World Time.
Information on how to change the display modes of the LCD monitor and viewfinder.
Guide to using the zoom function for closer or wider shots, including zoom speed and control.
Comparison of Optical, Extended Optical, Intelligent, and Digital zoom features and their characteristics.
How to open, close, and set the appropriate flash mode for different shooting conditions.
How to adjust the flash output level to compensate for subject brightness or reflectivity.
Guidance on how to take close-up photos, including recommended settings and techniques.
Instructions on how to manually set focus using the side lever and understanding focus range.
How to use the self-timer for delayed shots, including different interval settings.
Guide to adjusting exposure compensation to achieve proper brightness in challenging lighting.
How to use Auto Bracket to capture multiple exposures with different compensation ranges automatically.
Instructions on using Burst Mode for continuous shooting and selecting different burst speeds.
How to set ISO sensitivity for optimal exposure, especially in low-light conditions.
Guide to Aperture-Priority AE and Shutter-Priority AE modes for creative control over depth of field and motion blur.
How to manually set both aperture and shutter speed for complete exposure control.
Explanation of Creative Control Mode and its various image effect options.
Guide to using Advanced Scene Modes for specific subjects like portraits and landscapes.
Instructions on how to use Scene Mode to automatically adjust camera settings for various shooting environments.
Guidance on capturing sequential images for creating panorama photos.
Specific mode for capturing photos at parties and indoor events with optimal settings.
Mode optimized for shooting in candle-lit atmospheres.
Mode for taking pictures of babies, with options to record birthday and name information.
Mode for taking pictures of pets, with options to record birthday and name.
Mode optimized for capturing vivid sunset views.
Mode designed to minimize jitter and take pictures in dimly lit rooms.
Mode for taking continuous still pictures with flash, useful in dark places.
Technique for capturing moving subjects with a blurred background effect.
Mode for taking vivid pictures of starry skies or dark subjects with long exposures.
Mode designed to capture beautiful fireworks with prefocusing techniques.
Mode for taking vivid pictures of seascapes and preventing under-exposure in sunlight.
Mode for capturing snow scenes with white as possible.
Mode for taking pictures through an airplane window.
Allows recording images with a frame around them.
Records fast movements at 220 frames/second, capturing details not visible to the naked eye.
How to capture 3D pictures by moving the camera horizontally.
Guide to manually adjusting aperture, shutter speed, and exposure for motion picture recording.
How to save and use custom camera settings for specific shooting conditions.
Explanation of the Face Recognition feature for prioritizing focus and exposure on detected faces.
How to register and manage face images, including names and birthdays.
Configures automatic face registration and adjusts sensitivity for face recognition accuracy.
Guide to entering text for names, locations, or titles, which can be used for stamping or playback.
Details on the various settings within the REC mode menu, such as Photo Style and Aspect Ratio.
Explains the different Photo Style effects for customizing image appearance like color and contrast.
How to select aspect ratios for pictures to match TV or print requirements.
Instructions on setting the number of pixels for different picture sizes and aspect ratios.
How to set image quality and compression rates for storing pictures.
Information about adjusting ISO sensitivity for different lighting conditions.
Sets the maximum limit for ISO sensitivity to prevent excessive noise in low light.
How to adjust White Balance to ensure accurate color reproduction under different lighting conditions.
How to select different autofocus modes based on subject position and number.
Enables faster focus adjustment when the shutter is pressed, useful for capturing fleeting moments.
How to lock focus and exposure on a subject to maintain consistent settings.
Allows changing the method of light measurement for exposure calculation.
Automatically adjusts contrast and exposure for scenes with high brightness differences.
Sets the minimum shutter speed to control motion blur or capture subjects in dark places.
Utilizes Intelligent Resolution Technology for sharp profiles and enhanced resolution.
Enables further magnification of subjects beyond Optical and Extended Optical zoom capabilities.
Automatically compensates for jitter during shooting to achieve stable, blur-free images.
Illuminates the subject in low light to aid autofocusing.
Controls flash synchronization timing, with options for 1st or 2nd curtain sync.
Automatically detects and corrects red-eye in pictures when flash is used.
Allows use of optional conversion lenses for telephoto or close-up photography.
How to play back pictures taken in burst mode, including understanding the burst icon.
Instructions on how to edit burst picture groups or individual pictures within a group.
Overview of different playback options including Normal Play, Mode Play, Category Play, and Slide Show.
How to create and play back slideshows of pictures, optionally with music.
Classifies and plays back pictures based on type: still, motion, or 3D.
Allows searching and sorting images by categories like Scene Mode or Face Recognition.
Enables playback of pictures that have been marked as favorites.
Guide to the Playback mode menu for various editing and management functions.
Displays pictures sorted by recording date, allowing easy browsing through a calendar interface.
Sets up images for uploading to image sharing sites like Facebook and YouTube.
Allows adding text comments or titles to pictures, which can be stamped on prints.
Enables dividing recorded motion pictures into two parts.
Stamps recorded date/time, name, location, or title onto the recorded pictures.
Reduces the picture size (number of pixels) for easier posting to web pages or email.
Allows enlarging and cropping important parts of recorded pictures.
Adjusts the minute tilting of an image to straighten horizons.
Automatically displays pictures vertically if they were recorded holding the camera vertically.
Allows marking pictures as favorites for easier playback and management.
Sets print options for DPOF (Digital Print Order Format) compatible printers.
Protects pictures from accidental deletion.
Allows deletion or modification of Face Recognition information for selected pictures.
Copies picture data between the camera's built-in memory and a memory card.
Instructions for connecting the camera to a TV and playing back recorded content.
How to use VIERA Link for automatic linked operations with compatible Panasonic TVs via HDMI.
Guide to connecting to a 3D TV and playing back 3D pictures, including playback method switching.
Methods for exporting pictures and motion pictures to other devices, including copying to recorders.
Instructions for installing and using PHOTOfunSTUDIO software to transfer images to a PC.
Details on PC compatibility and connection methods for acquiring pictures.
How to use the LUMIX Image Uploader tool to upload images to Facebook and YouTube.
Instructions for connecting the camera to a PictBridge compatible printer and printing pictures.
Guide to selecting one picture and initiating the printing process.
How to select multiple pictures for batch printing.
Options for setting print parameters like date printing and number of copies.
Information on optional accessories like conversion lenses and their usage.
Details on attaching and using tele conversion and close-up lenses for enhanced photography.
Information on optional protectors and filters for lens protection and image enhancement.
How to attach and use an external flash with the camera for improved lighting.
Using the optional remote shutter for stable shooting and burst mode photography.
How to connect and use an external stereo or monaural microphone for better audio recording.
Instructions for connecting the AC adapter and DC coupler for continuous power.
Explains the various icons and information displayed on the camera's screen during recording.
Important safety precautions and guidelines for optimal and safe camera operation.
Guidance on how to resolve common issues related to the camera's operation, battery, and recording.