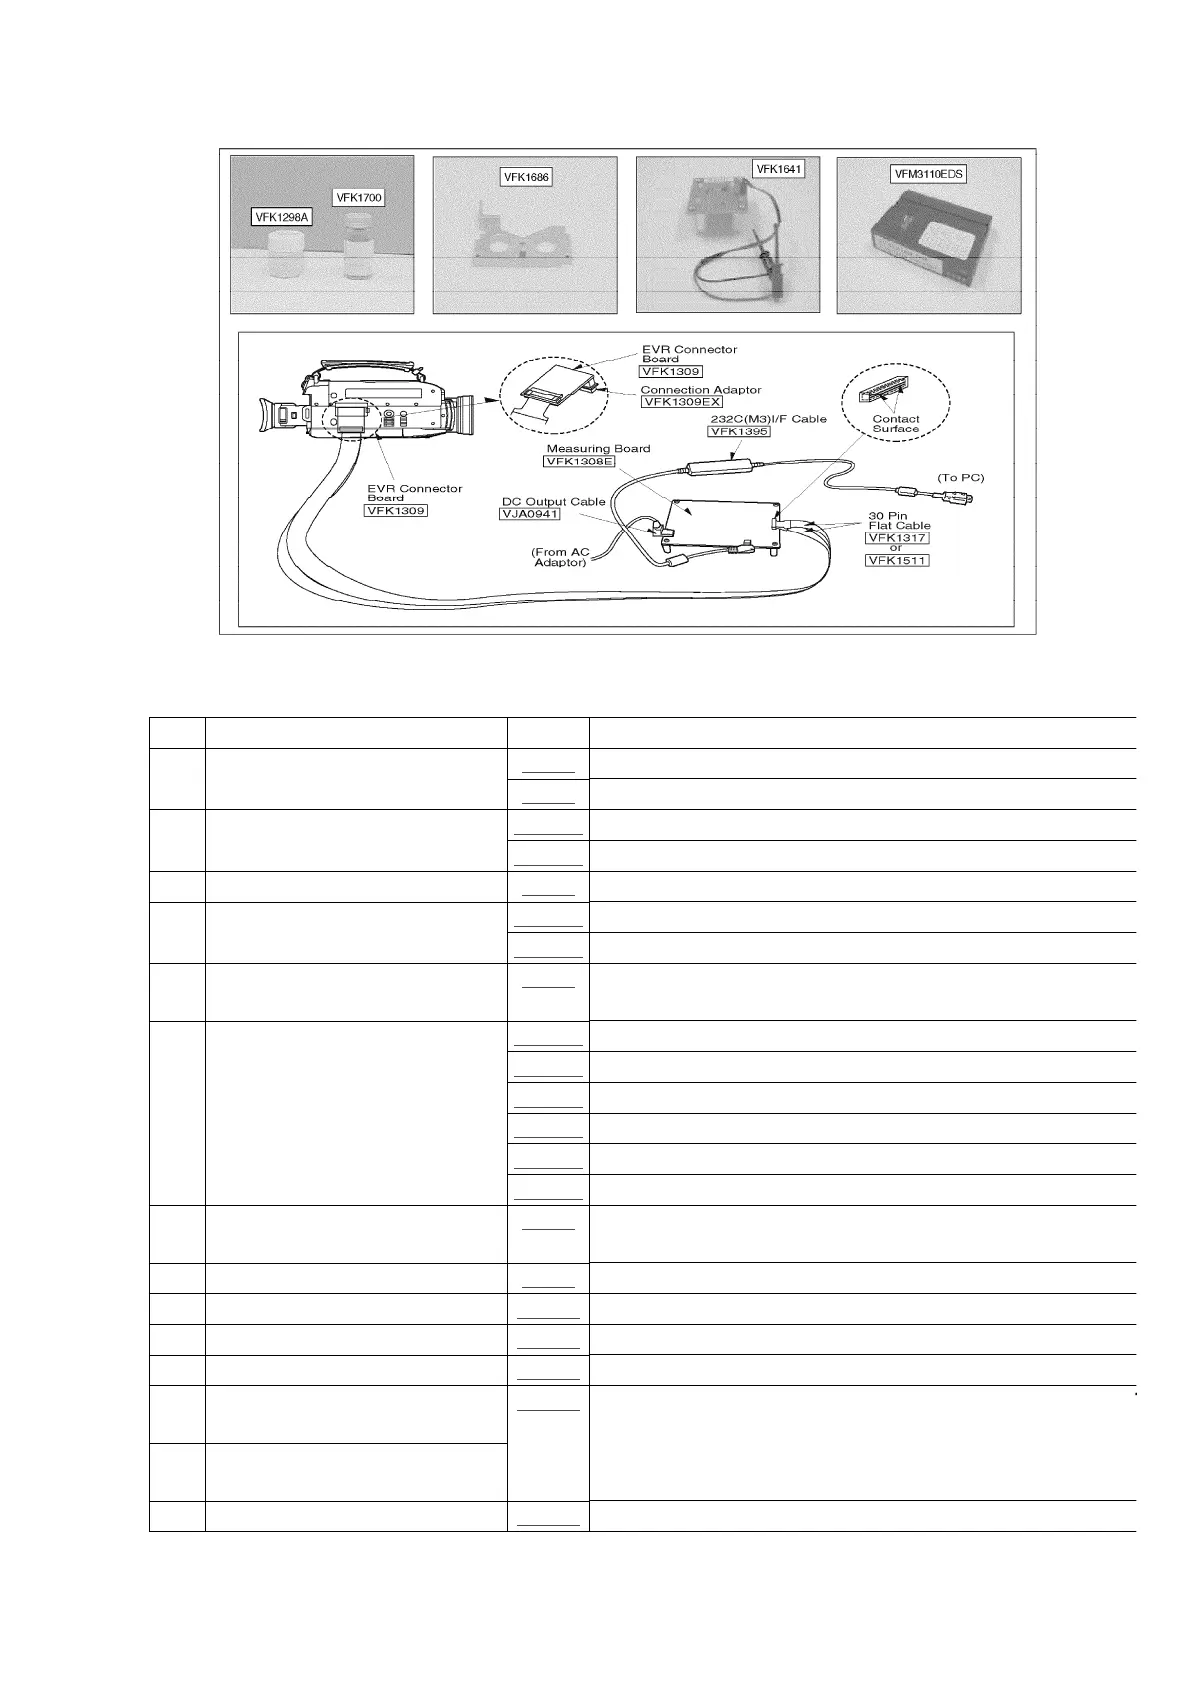
3. DISASSEMBLY PROCEDURE
No. Item Fig. Procedure
1 Dumper Fig. 1 Release Eject Lever
Fig. 2 Release Lock(A)
2 Garage U. Fig. 3-1 Disengage Joints(B) at S and T sides
Fig. 3-2 Disengage Joints(C) at S and T sides (*S side first)
3 Mechanism Flexible Cable Fig. 4 1) Desolder each terminal / 2) Release 6 Hooks(D)
4 Cylinder U. Fig. 5-1 1)Remove 4 Screws(E) / 2)Remove Cylinder Spring
Fig. 5-2 Remove 1 Screw(F)
5 TR Band & TR Arm U. Fig. 6 1)Release Hook(G) / 2)Remove Tension Adj. Screw /
3)Release Lock(H)
6 Reel Plate U. Fig. 7-1 Make full loading condition with 3V battery.
Fig. 7-2 Release Lock(I), (J), (K), (L).
Fig. 7-3 Release Lock(M), (N), (O), (P) (*Lock(M) first)
Fig. 7-4 Release Lock(Q)
Fig. 7-5 Release Lock(R), (S)
Fig. 7-6 Take Reel Plate U. out
7 Pinch Arm U. Fig. 8 1)Make slightly unloading with 3V battery until Pinch
rm
comes off the Capstan / Shaft. / 2)Release Lock(T)
8 T3 Arm U. Fig. 9 Release Lock(U)
9 Loading Motor U. Fig. 10 Release Locks(V)
10 TR Rod Fig. 11 Take TR Rod out
11 Brake Gear Fig. 12 Take Brake Gear out
12 S-Boat U. & S-Post Loading
Band
Fig. 13 Pull out S-Loading Band, S-Boat U., T-Loading Band and
Boat U.
13 T-Boat U. & T-Post Loading
Band
14 Rail Fig. 14 Release Locks(W), (X), (Y), (Z), (a)
3
www.freeservicemanuals.info