Before Use
-13-
ª Using the LCD Monitor
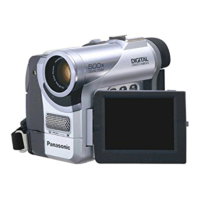
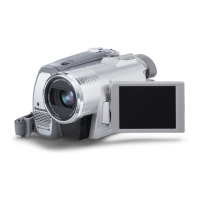
With the LCD Monitor open, you can also record
the picture while watching it.
1 Put a finger on the [OPEN4] Knob (1) and
pull the LCD Monitor
(2) out about 90o in the
direction of the arrow.
≥The Viewfinder goes off.
2 Adjust the LCD Monitor angle according to
the desired recording angle.
≥The LCD Monitor can rotate a maximum of
180o 1 from the vertical position to the
upward direction and a maximum of 90o 2 to
the downward direction. Forcefully rotating
the LCD Monitor beyond these ranges will
damage the Movie Camera.
Closing the LCD Monitor
Push the LCD Monitor until it is securely locked.
ª Adjusting Brightness and Colour
Level
When [LCD/EVF SET] on the [DISPLAY SETUP]
Sub-Menu is set to [YES], the following items are
displayed.
LCD Brightness [LCD BRIGHTNESS]
It adjusts the brightness of the image on the LCD
screen.
LCD Colour Level [LCD COLOUR LEVEL]
It adjusts the colour saturation of the image on
the LCD screen.
Brightness of the Viewfinder
[EVF BRIGHTNESS]
It adjusts the brightness of the image in the
Viewfinder.
To Adjust
Press the [PUSH] Dial and select the item to be
adjusted, and then turn the [PUSH] Dial to raise
(2)
(1)
290o1180o
LCD/EVF SET
PRESS MENU TO RETURN
LCD BRIGHTNESS
[-]||||----[+]
LCD COLOUR LEVEL
[-]||||----[+]
EVF BRIGHTNESS
[-]||||----[+]
or lower the number of vertical bars in the Bar
Indication.
≥A larger number of vertical bars indicates
stronger brightness or colour saturation.
To Increase the Brightness of the Entire LCD
Monitor
Set the [LCD MODE] on the [DISPLAY SETUP]
Sub-Menu to [BRIGHT].
≥These adjustments do not affect the recorded
images.
≥For other notes concerning this item, see
-45-.
Using the Menu Screen
To facilitate the selection of a desired function or
setup, this Movie Camera displays various
function setups on Menus.
1 Press the [MENU] Button (40).
≥The Menu corresponding to the Mode
selected by using the [OFF/ON/MODE]
Switch
(37) is displayed.
2 Turn the [PUSH] Dial (32) to select a desired
Sub-Menu.
≥Turn the [PUSH] Dial
(32) to display the
highlightened item.
3 Press the [PUSH] Dial (32) to display the
selected Sub-Menu.
4 Turn the [PUSH] Dial (32) to select the item
to be set.
5 Press the [PUSH] Dial (32) to set the
selected item to a desired mode.
≥With each press of the [PUSH]
Dial, the
cursor [1] moves to the next mode. Menu
items that cannot be used in combination with
the selected item are displayed in dark blue.
≥While a Menu is displayed, you cannot record or
play back. Menus can be displayed during
playback but not during recording. The above
operations can be done using the [MENU]
Button, [SET] Button and [ITEM] Button on the
Remote Controller. (
-8-)
M
E
N
U
PUSH
MF/VOL/JOG
WB/SHUTTER/IRIS/
(40) (32)
(37)
O
F
F
O
N
M
O
D
E
30B-ENG.book 13 ページ 2003年1月23日 木曜日 午後8時46分
 Loading...

