Notes in chart
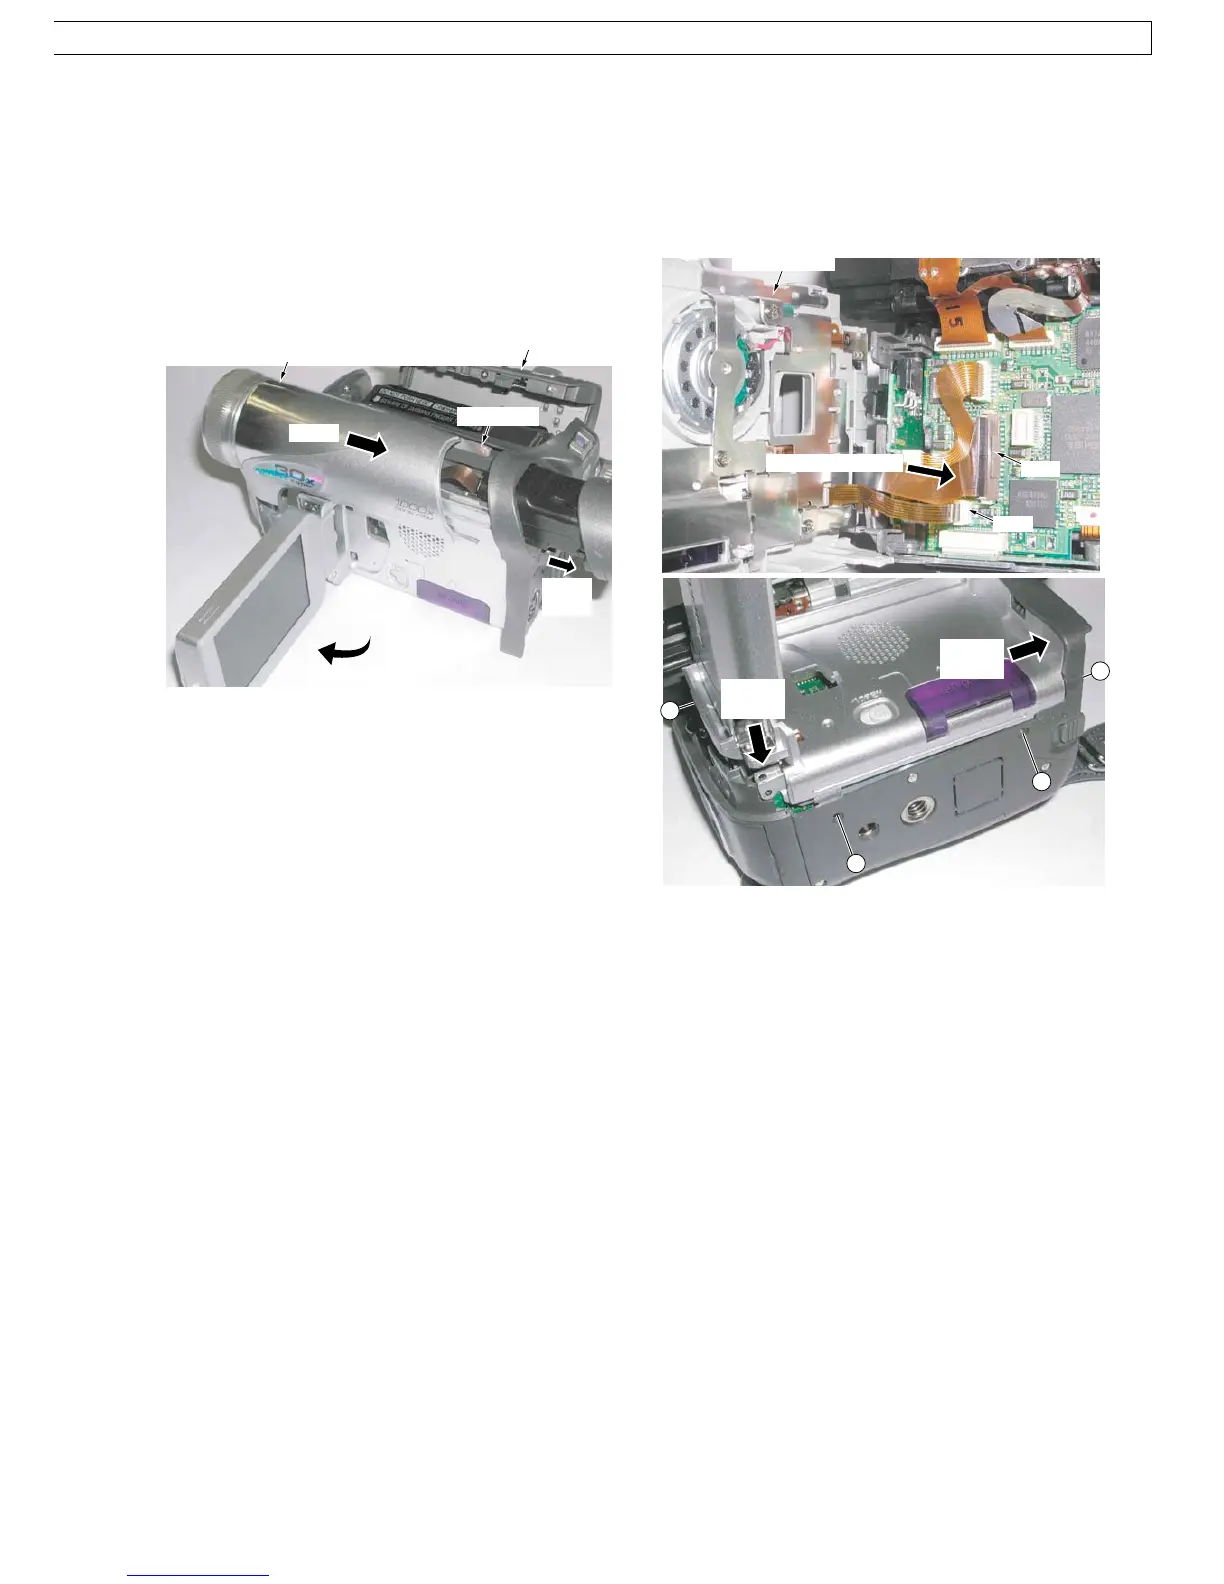
1. Removal of Top Unit
1) Open the LCD and the Cassette Cover, then remove
the 5 Screws (433, 541).
2) Slide to extend the EVF.
3) Pull and slide the Top Unit carefully.
Installation of Top Unit
1) Slide to extend the EVF.
2) Insert Portion A of the Top Unit, and slide firmly to
install.
Fig. D1
Top Unit
Open Cassette Cover
Portion A
Slide
EVF
Open LCD
Slide
FP7
<Bottom View>
Front
Portion
Rear
Portion
Shape the inside
Side Case R
FP8
450
533
533
450
2. Installation of Side Case R & LCD Ass’y
1) Connect the LCD F.P.C. and Side R F.P.C. to the
Connectors FP7 and FP8 so as not to damage the
F.P.C.s.
2) Secure Front Portion and Rear Portion, and tighten 6
Screws (450, 533)
Fig. D2
45
 Loading...