Chapter 3 Basic Operations — Switching on/off the projector
54 - ENGLISH
Making adjustments and selections
It is recommended that images are projected continuously for at least 30 minutes before the focus is adjusted.
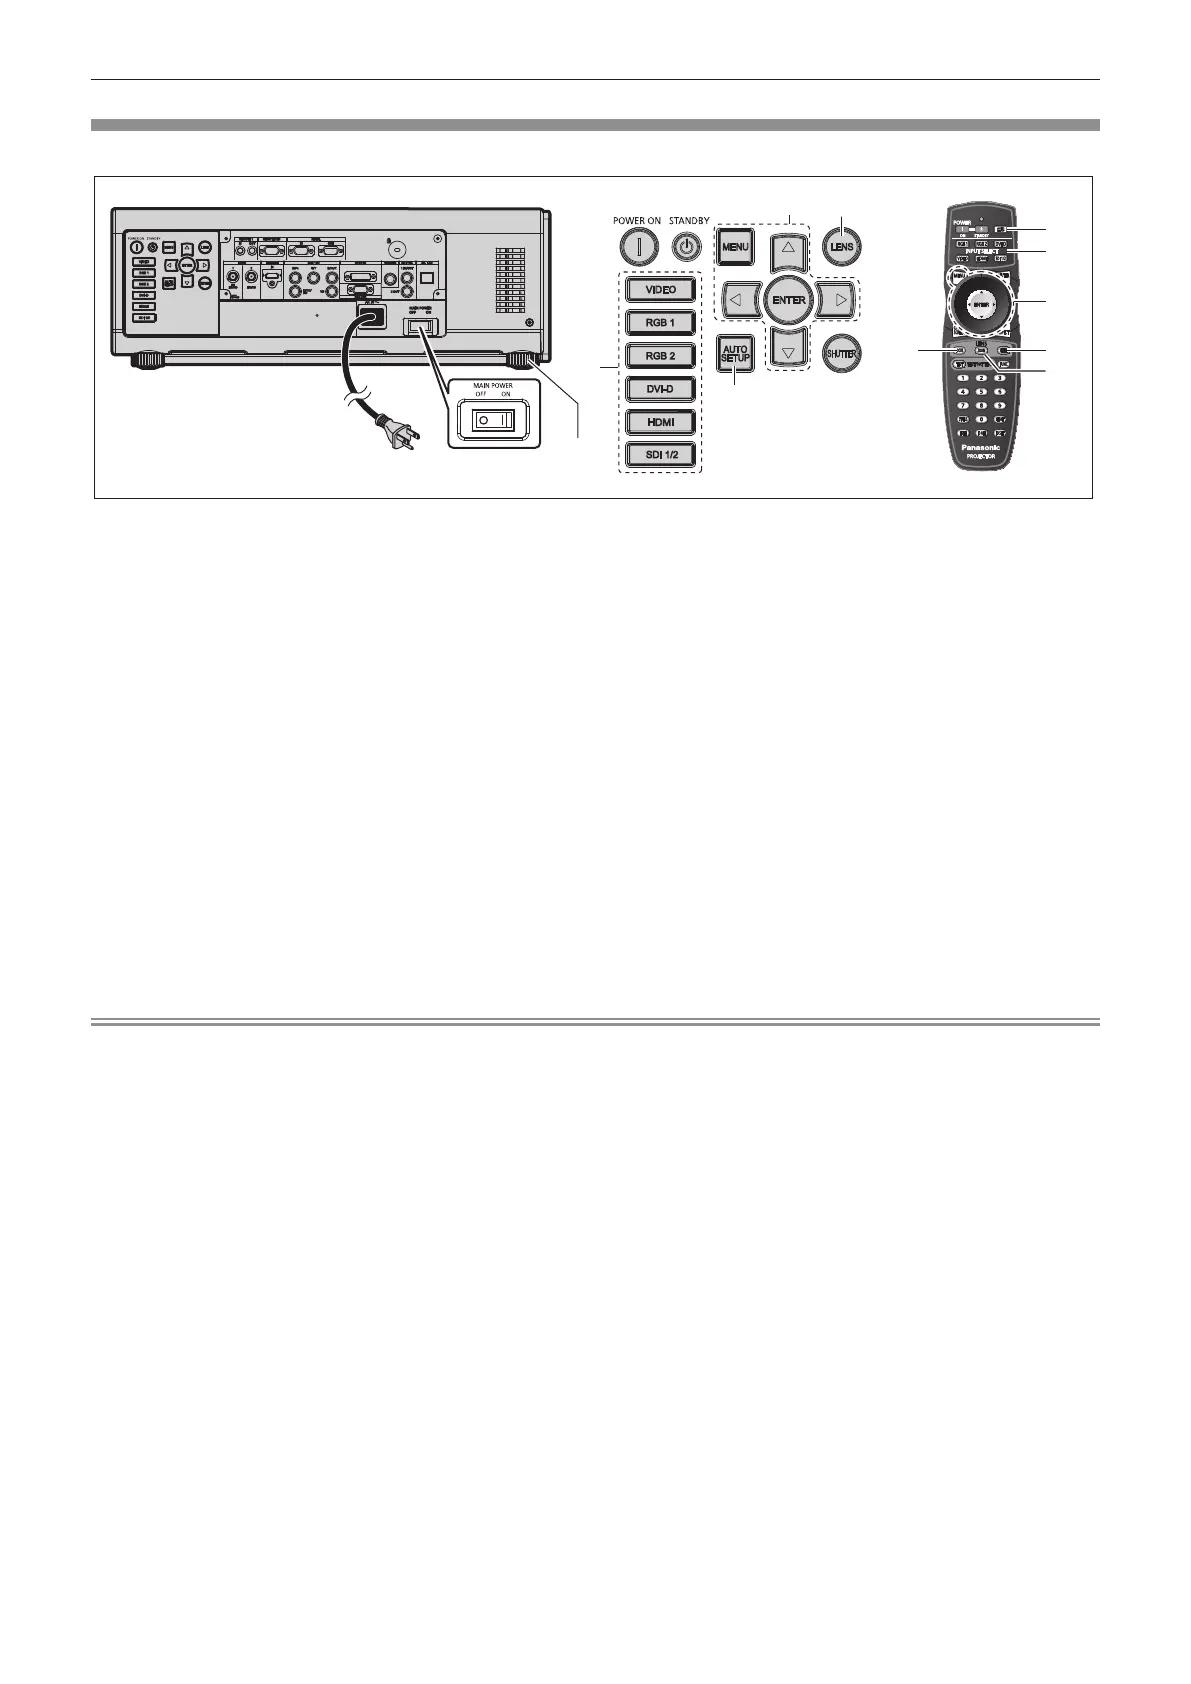
SDI 1/2
VIDEO
ENTER
MENU
LENS
SHUTTER
RGB 1
RGB 2
AUTO
SETUP
DVI-D
HDMI
SDI 1/2
1) 8)
5)
6)
3)
7) 9)
3)
2)
4)
1) 5) 7) 8) 9)2)
6)
1) Press the <FOCUS> button to roughly adjust the focus of the image. (x page 56)
2) Change the settings of the [PROJECTOR SETUP] menu → [PROJECTION METHOD] and [COOLING
CONDITION] depending on the installation mode. (x page 31)
f Refer to “Navigating through the menu” (x page 65) for the operation of the menu screen.
3) Press the input selection (<RGB1>, <RGB2>, <DVI-D>, <VIDEO>, <HDMI>, <SDI 1/2>) buttons to select
the input signal.
(SDI input is only for PT-DZ13KU, PT-DS12KU, PT-DZ10KU)
4) Adjust the front, back and sideway tilt of the projector with the adjustable feet. (x page 45)
5) Press the <SHIFT> button to adjust the position of the image.
6) If the input signal is an RGB signal, press the <AUTO SETUP> button.
7) Press the <ZOOM> button to adjust the size of the image to match the screen.
8) Press the <FOCUS> button again to adjust the focus.
9) Press the <ZOOM> button again to adjust the zoom and the size of the image to match the screen.
Note
f When the projector is switched on for the rst time after purchase as well as when [ALL USER DATA] in the [PROJECTOR SETUP] menu →
[INITIALIZE] is executed, the focus adjustment screen is displayed after projection starts, then the initial setting screen is displayed. Refer to
“Start-up display” (x page 22) for details.

 Loading...