76
Caution: Ensure pins of the Audio Digital Power Amp IC
(IC5000) are properly seated and soldered on D-Amp
P. C.B ..
9.21. Replacement of Audio Digital
Power Amp IC (IC5200)
• Follow the (Step 1) to (Step 5) of Item 9.3
• Follow the (Step 1) to (Step 7) of Item 9.4
• Follow the (Step 1) to (Step 7) of Item 9.19
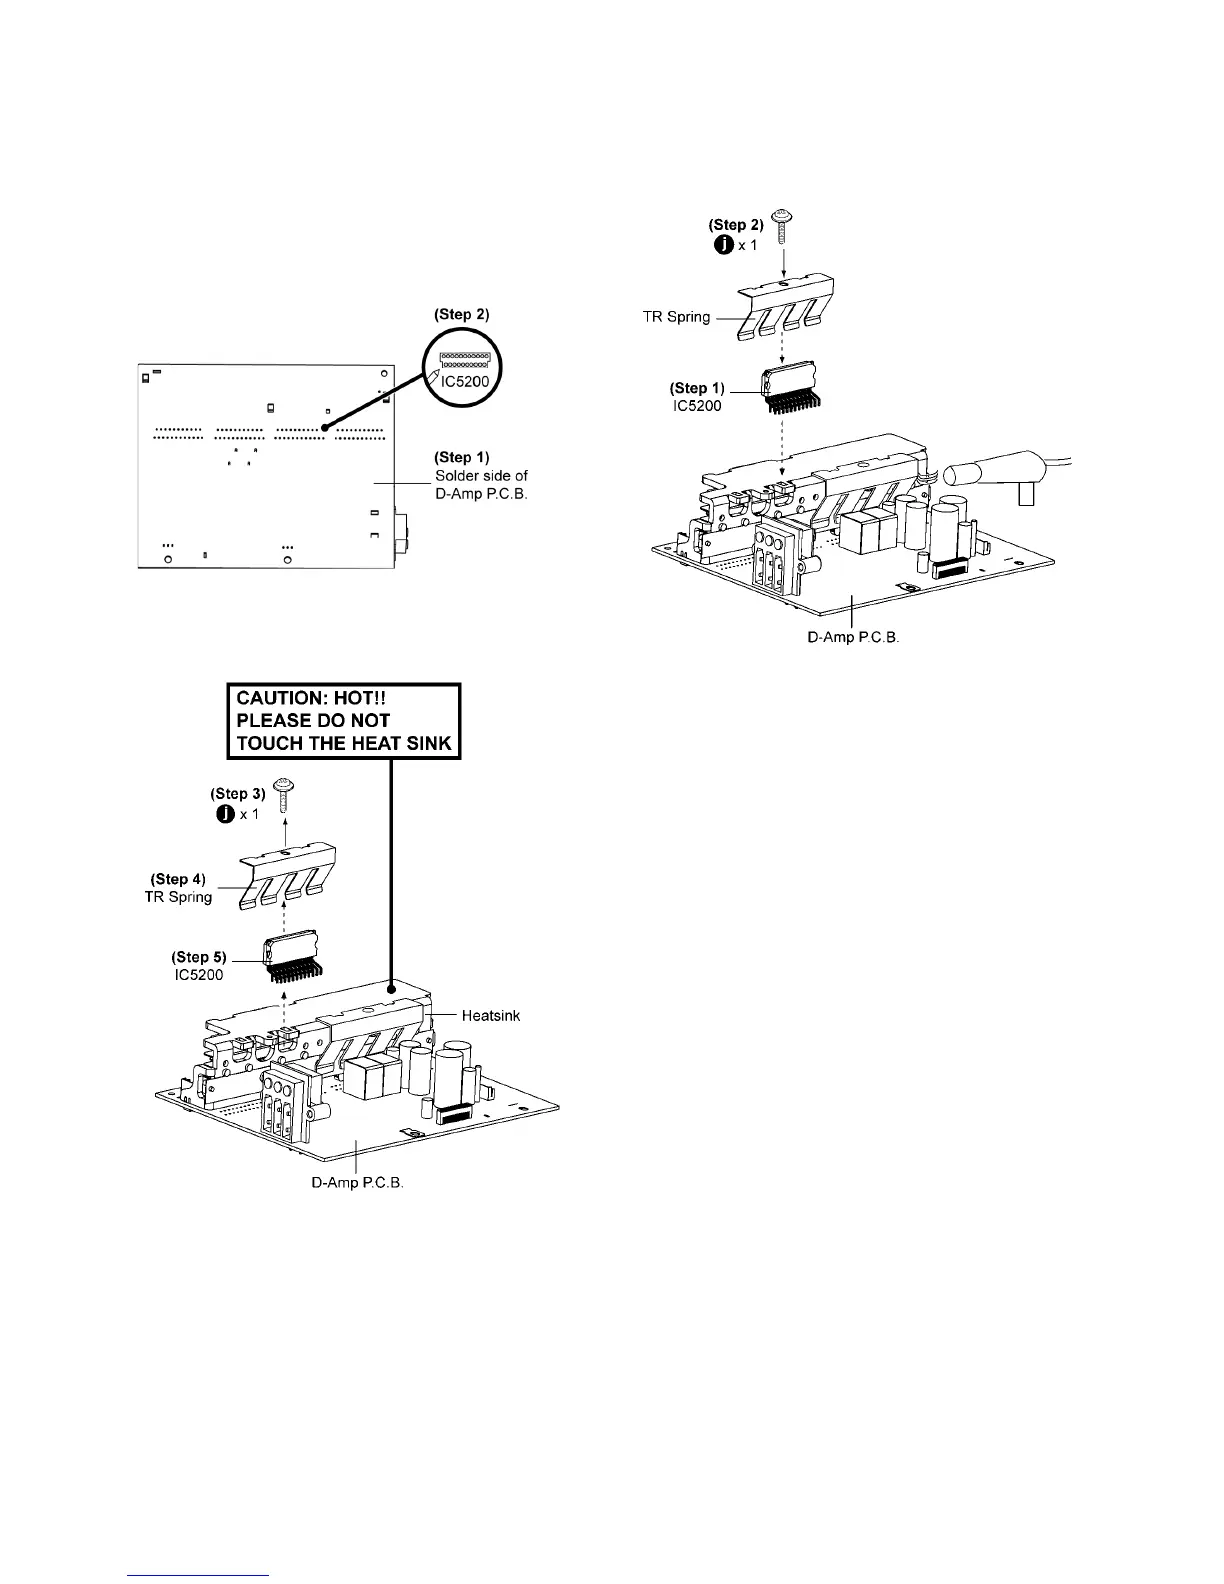
Step 1 Flip over D-Amp P.C.B..
Step 2 Desolder pins of the Audio Digital Power Amp IC
(IC5200) on the solder side of D-Amp P.C.B..
Step 3 Remove 1 screw.
Step 4 Remove TR Spring in the direction of arrow shown.
Step 5 Remove Audio Digital Power Amp IC (IC5200) from the
heat sink unit.
Caution: During replacement of the part, avoid touching
the heatsink, it may lead to injuries.
9.21.1. Assembly of Audio Digital Power
Amp IC (IC5200)
Step 1 Mount the Audio Digital Power Amp IC (IC5200) on to
D-Amp P.C.B..
Step 2 Screw back TR Spring to hold the Audio Digital Power
Amp IC (IC5200) onto the Heatsink Power Unit.
Step 3 Solder the pins of Audio Digital Power Amp IC.
Step 4 Use a blower to remove the minute particles after the
screwing of TR Spring.
Caution: Ensure pins of the Audio Digital Power Amp IC
(IC5200) are properly seated and soldered on D-Amp
P.C.B..
9.22. Disassembly of Main P.C.B.
• Follow the (Step 1) to (Step 5) of Item 9.3
• Follow the (Step 1) to (Step 7) of Item 9.4
• Follow the (Step 1) to (Step 7) of Item 9.7
• Follow the (Step 1) to (Step 5) of Item 9.19



 To Next Page