RQT5891
3
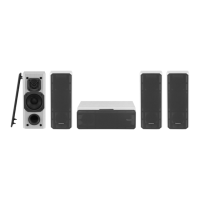
Speaker set-up
Attach the rubber feet to the speaker
The 5 speakers are the same.
The 5 speakers can be set-up either standing or lying down. Attach
these rubber feet to prevent vibration causing the speakers to move
or fall over.
One sheet of 20 rubber feet is included. Use 3 or 4 feet per speaker.
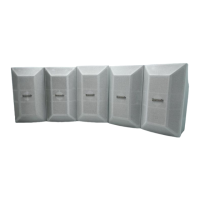
Attaching to the wall
Rubber feet (included)
Screw (not included)
To attach vertically
To attach horizontally
•Attach four rubber feet to each speaker, ensuring they do not cover
the holes.
Screw the wood screw into a thick and hard part of the wall.
The surface you attach the speakers to must be able to support over
10 kg (22 lb.).
Attaching to speaker stands
Speaker stands (not included)
Plate thickness + 7 to 10 mm
Attach the stands with these holes.
Ensure the following conditions are met when you purchase
your speaker stands.
•Observe the diameter and length of the screws and the distance
between screws as shown in the diagram.
Screw; diameter: 5 mm, pitch: 0.8 mm, length: thickness of stand
plate plus between 7 and 10 mm.
Distance between the centers of the holes: 60 mm
•The stands must be able to support over 10 kg (22 lb.).
•The stands must be stable even if the speakers are in a high posi-
tion.
Moving the brand badge
You can rotate the brand badge if you choose to set up the speakers
horizontally.
Rotate the badge to the required position.
Installation des enceintes
Fixation des pieds de caoutchouc
Les 5 enceintes sont identiques.
Elles peuvent être placées soit à l’horizontale ou à la verticale. Fixer
les pieds de caoutchouc sur les enceintes pour prévenir toute vibra-
tion qui pourrait les faire basculer ou tomber.
Une feuille de 20 pieds est incluse avec les enceintes. Utiliser de 3
à 4 pieds par enceinte.
Installation au mur
Pieds de caoutchouc pour enceintes (fournis)
Vis (vendues séparément)
Fixation verticale
Fixation horizontale
•Apposer quatre pieds de caoutchouc à chaque enceinte, en
s’assurant qu’ils ne recouvrent pas les orifices.
Insérer une vis à bois dans une section épaisse et résistante du
mur.
La paroi murale doit pouvoir supporter plus de 10 kg (22 lb).
Fixation des enceintes sur un support
Supports (vendus séparément)
Épaisseur du support : 7 à 10 mm
Fixer le support aux orifices à l’arrière de l’enceinte.
Vérifier les points suivants avant d’acheter des supports pour
enceintes :
•Le diamètre, la longueur des vis ainsi que la distance entre les vis
doivent être comme illustré au schéma.
Les vis doivent avoir un diamètre de 5 mm et un pas de 0,8 mm.
La longueur doit comprendre l’épaisseur du support plus 7 à 10 mm.
La distance entre chaque orifice doit être de 60 mm.
•Les supports doivent pouvoir supporter plus de 10 kg (22 lb).
•Les supports doivent être stables même lorsque les enceintes sont
placées en hauteur.
Déplacement du logotype
Lors d’installation à l’horizontale, le logotype peut être tourné afin
de se trouver dans le même sens que l’installation.
Orienter le logotype selon les besoins.
 Loading...