RQT8808
8
•Do not apply an unreasonable force to the net at the front of the
speaker unit. You cannot remove the front net.
•You can carry out assembly work stably by placing the cushions in
the packing case beneath each speaker. Place the net sides of the
speaker units face up. ( page 6) Use the same cushions as
used for the front speakers.
Be sure to spread a cloth, for example, on the floor to protect it from
damage.
•After each task, tighten the screws securely.
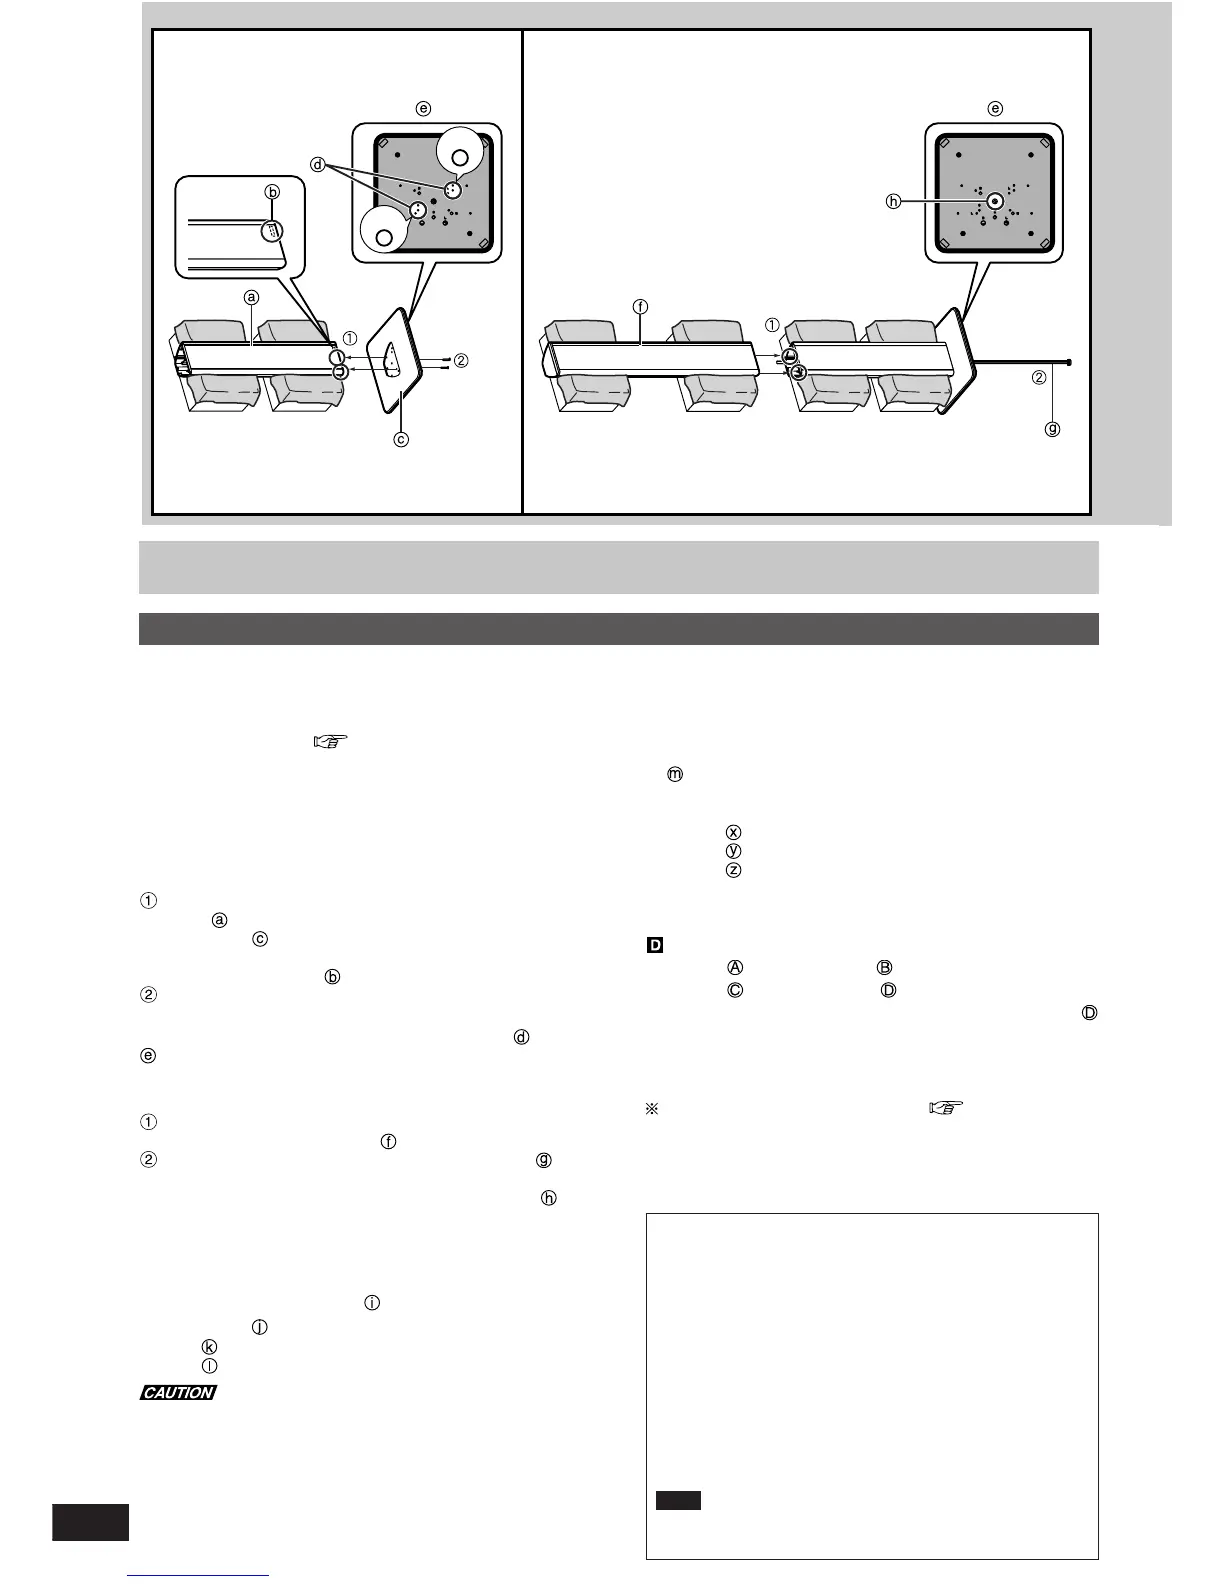
1.Fit the stand bases onto the surround speaker
stands.
Align the two projections in one of the surround speaker
stands (provided) with the two holes in one of the surround
stand bases (provided), and fit together.
Install the stand base at the end where the sticker has been
adhered on the inside.
Attach the stand base using the two stand base mounting
screws (provided).
Use the two screw holes marked “S” to attach the base.
Reverse side of stand base
2.Fit the stands onto the surround speakers.
Align the two projections in the assembled stand with the two
holes in the surround speaker , and fit together.
Attach the stand using the stand mounting screw (pro-
vided).
Use the center screw hole to fit the stand on to the speaker.
3.Connect the speaker cables (not provided) to the
terminals
Before connection, pass the speaker cords through the hole marked
“S” in the back of the stand base.
Speaker cables (approx. 10 m)
(
–
) cable : Connect this to the black negative (
–
) terminal.
(+) cable : Connect this to the red positive (+) terminal.
Never short-circuit positive (+) and negative (–) speaker wires.
Assembly and Installation
Assembling the surround speakers as stand types
4.Fix the speaker cables.
Press the speaker cables into the cable groove provided in
the stand.
The speaker cables must have a thickness of 2.8 mm or less to fit
into the cable groove.
Cable groove
When using speaker cables that are thicker than 2.8 mm, attach
nylon clampers to the speakers and use them to fix the cables.
Example Nylon clamp (provided)
Screw for nylon clamp (provided)
Speaker cables
Repeat steps 1 to 4 and assemble the other surround speaker.
Attaching a stabilizing wire
Example Remove the cover Wire (not included)
Ring (not included) Screw (not included)
The wall on which the speakers are to be mounted and the screws
(not included) used for installing the speakers must be strong enough
to support a weight of at least 65 kg (143 lb.) for the front speakers
and 50 kg (110 lb.) for the surround speakers. Consult the contractor
in charge of the work.
A screw which is at least 35 mm long ( see above) is used
when installing the speaker on a wooden post or pillar. In all other
cases, use a screw which is strong enough to support a weight of at
least 65 kg (143 lb.) or 50 kg (110 lb.).
1
2
S
S
Settings for connecting the recommended amplifier
to the active subwoofer
When using our SA-XR700 AV control receiver (not included)
First make the following settings.
•Refer to “Setting the Amplifier” in the instruction manual for the
SA-XR700 AV control receiver.
Setting the speaker (YES/NO) and its size
Speaker to be set Setting item
SUBW (subwoofer) YES (Connected)
LR (Front) SMALL
C (Center) SMALL
S (Surround) SMALL
Setting the lower region filter
Selection frequency: 80 (Frequencies of 80 Hz and below are
output to the subwoofer.)
Note
To improve the acoustics, it is recommended that the amplifier’s
center speaker output level be set 1 dB to 3 dB higher than usual.
 Loading...