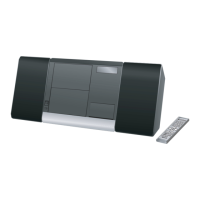
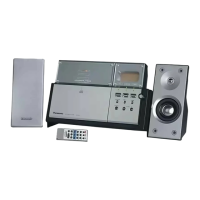
Speakers
Stop
Press [g].
Pause
Press [CD q/h]. Press again to resume play.
Skip/Search
Press [u, 2] or [i, 1] to skip.
Press and hold [u, 2] or [i, 1] to search.
You can search during play or while paused.
You cannot search through MP3 files.
You can only search within the current track during
program play, one track repeat, and random play.
•
•
•
Skip album Press [ or , ALBUM] in the play mode.
Press [ or , ALBUM] once and then the numbered
buttons in the stop mode.
Direct access
play
(Play starts with
the track you
select.)
Press the numbered buttons to select the
desired track.
Press [ or , ALBUM] to select the album.
Press [i, 1] once and then press the numbered
buttons to select the desired track.
Red (+)Black (-)
Red Black
Portable audio equipment (Cords and equipment not included)
Portable audio player Plug type: 3.5 mm stereo
➡
Start playback from the
portable audio source.
Note
MAIN UNIT REMOTE CONTROL
iPod connection
Insert your iPod into the Built-in iPod
Dock.
➡ Refer to page 10 for further information.
Unplug the antenna connector by holding the
taped part.
To prevent hearing damage, avoid
listening for prolonged periods of time.
Excessive sound pressure from
earphones and headphones can cause
hearing loss.
•
•
Adjust the volume and sound quality of this unit and the other equipment.
For details, refer to the instruction manual of the other equipment.
•
•
➡ Page 3 for the buttons position of remote control and main unit.
Connections
PC Sync
Connect your PC to the PC Sync port.
➡ Refer to page 10 for further information.
1
3
USB connection
Connect your USB enabled device to the USB port.
➡ Refer to page 11 for further information.
Bluetooth connection
Connect the Bluetooth Receiver to the option port.
➡ Refer to page 11 for further information.
AC mains lead
To household AC mains socket
If the unit is left unplugged for longer than approximately two weeks, all settings will revert to the
factory settings.
Remember to reset the radio stations and any other memory items before using the unit again.
Connect the AC mains lead after all other connections are complete.
Note
4
DAB “T” antenna
2
The cross bar of the T should be kept firmly stretched.
Find a position with good reception.
There is a function on the unit to check signal quality. (refer to page 9)
For best reception
A DAB outdoor antenna is recommended. (refer to page 7)
Be sure to fully
tighten the screw.
Adhesive
tape
READ THE CAUTION FOR THE AC
MAINS LEAD ON BACK COVER
BEFORE CONNECTION.