RQTV0123
15
Selecting a preset channel
1
Press [PLAY MODE] to select “PRESET TUNE”
Each time you press the button:
“STATION TUNE”
“PRESET TUNE”
2
Press [ /REW/4] or [ /FF/¢] or numeric
buttons to select a channel.
Listening to the secondary service
Listening to the secondary service
Press the [DAB SECONDARY] to select the secondary
service.
“
”is displayed if there is a secondary service broadcast.
The secondary services are selected each time the button
is pressed. The primary service is returned to after the last
secondary service.
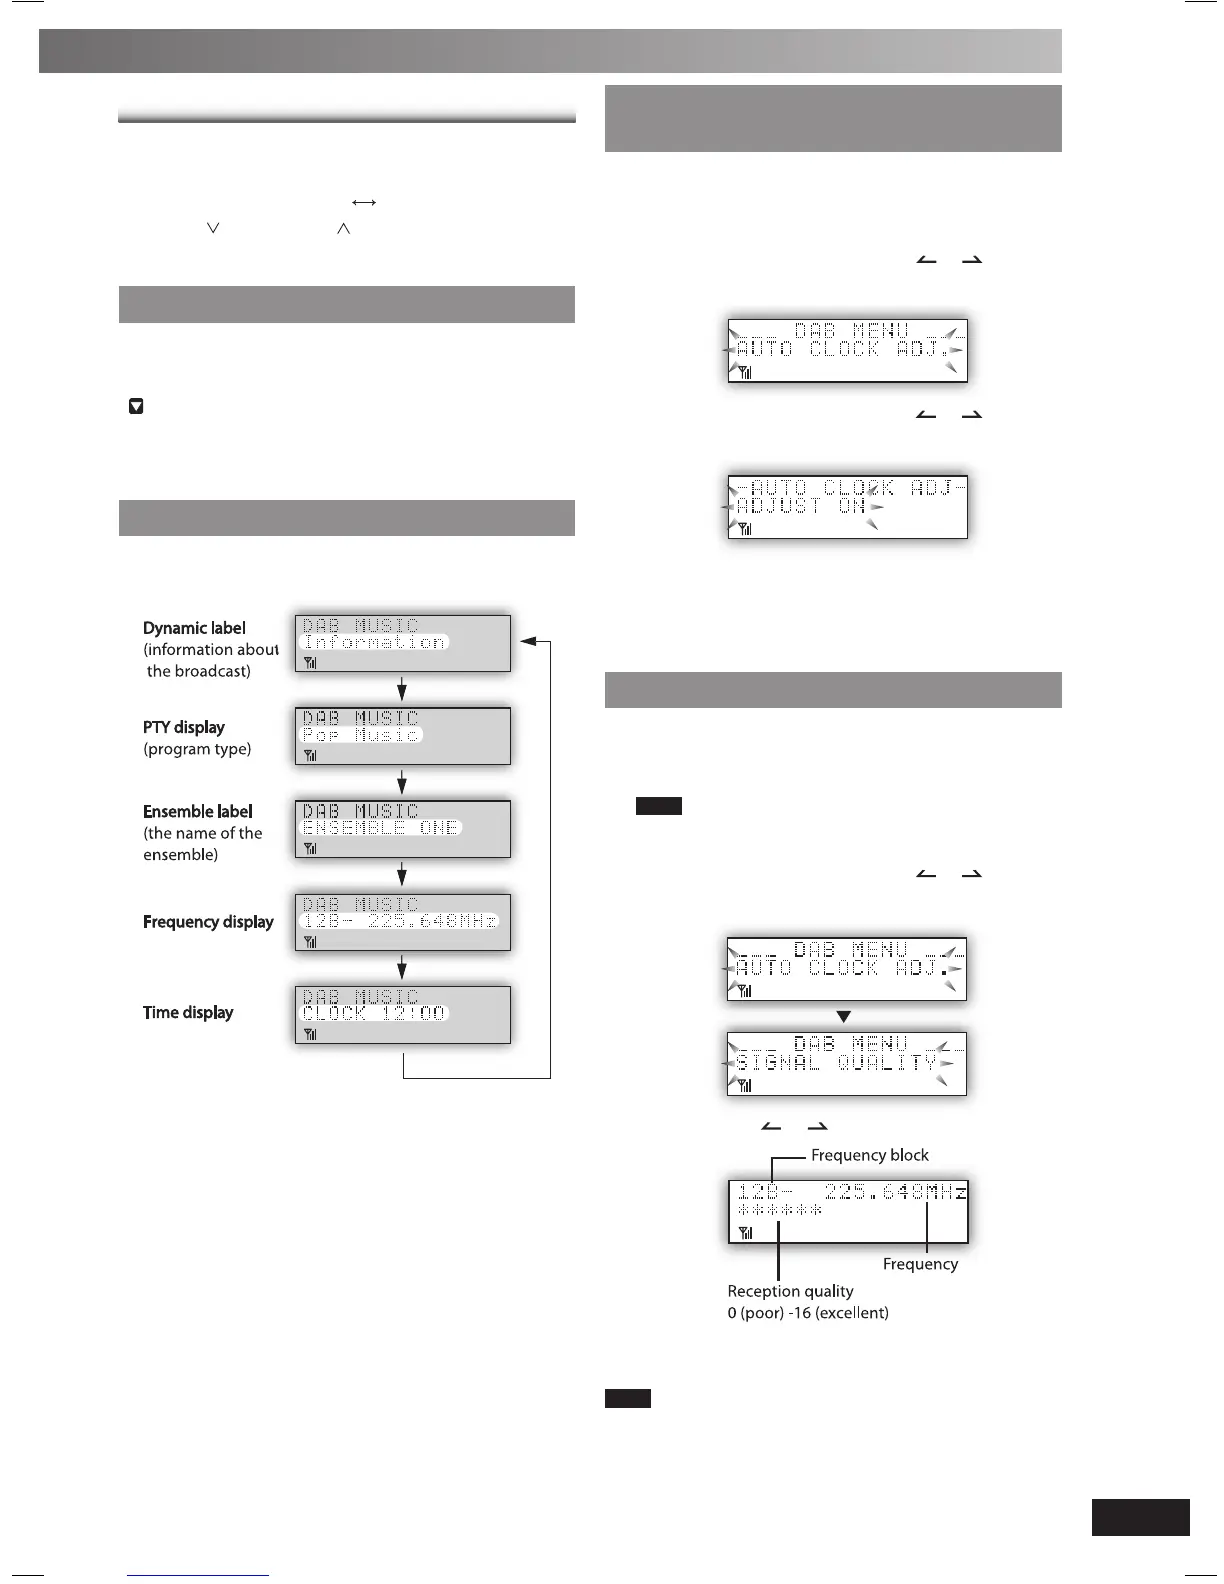
Display
Press [DISPLAY] to select the display.
Each time you press the button:
Turning automatic clock adjustment
Turning automatic clock adjustment
function on
To adjust the time information during DAB broadcasting and
automatic time adjustment.
1
Press [DAB MENU] to enter menu mode.
2
Within 10 seconds, press [ALBUM or ] to select
“AUTO CLOCK ADJ.” and then press [ENTER].
3
Within 10 seconds, press [ALBUM or ] to select
“ADJUST ON” and then press [ENTER].
Select “ADJUST OFF” to turn the automatic clock adjustment
function off.
To cancel
Press [DAB MENU] again.
Checking the DAB signal quality
Checking the DAB signal quality
To improve reception by adjusting the antenna while
monitoring signal quality on the display.
1
Press [DAB MENU] to enter menu mode.
Note
“Scan Failed.”appears if no stations are memorized. If
this occurs, adjust the antenna and try Auto scaning.
2
Within 10 seconds, press [ALBUM or ] to select
“SIGNAL QUALITY” and then press [ENTER].
3
Press [ALBUM or ] to select the frequency.
To cancel
Press [DAB MENU] again
Note
In order to enjoy the new stations after adjusting the antenna, it is
necessary to perform Auto scanning and update the station memory.
PM32-33DB_EB_En.indd 15PM32-33DB_EB_En.indd 15 3/1/06 12:12:34 PM3/1/06 12:12:34 PM