

D
deborahmontgomeryAug 1, 2025
What does it mean when my Panasonic LCD TV power LED blinks 13 times?
- MMatthew HillAug 2, 2025
A power LED blinking 13 times on your Panasonic LCD TV signals an EMERGENCY_SOS situation.
What does it mean when my Panasonic LCD TV power LED blinks 13 times?
A power LED blinking 13 times on your Panasonic LCD TV signals an EMERGENCY_SOS situation.
What does 4 blinks on the power LED mean for my Panasonic TC-L32X2?
A blinking power LED that blinks 4 times on your Panasonic LCD TV suggests a DTV12V_SOS issue.
What does it mean if the power LED is blinking 7 times on my Panasonic LCD TV?
If the power LED on your Panasonic LCD TV is blinking 7 times, it means there is SUB 3.3V_SENSE issue.
General guidelines for safe servicing procedures and precautions.
Procedure to check leakage current with the unit unplugged.
Procedure to check leakage current while unit is powered on.
Techniques to reduce component damage from static electricity.
Information regarding the use and handling of lead-free solder.
General tips and board identification for service navigation.
Lists input signal types and supported frequencies for display.
Instructions on accessing the service mode via remote control and unit buttons.
Explanation of buttons used for navigation within Service Mode.
Details of adjustable parameters and their sample data in Service Mode.
Instructions for exiting the Service Mode.
Information on accessing and using the SRV-TOOL service function.
Explanation of SOS History display and its meaning.
Information on displaying and interpreting power on time and count.
Configuration options for hotel mode to restrict functions.
Procedure for checking IIC bus lines status and display.
Example of the screen display during the IIC bus line check.
Component check points for identified NG (No Good) statuses.
Chart indicating abnormality based on power LED blinking patterns.
Troubleshooting steps for scenarios where the unit has no power.
Instructions for dressing the AC power cord.
Steps for installing the AC cord and its bracket.
Instructions for assembling PCBs and related clampers.
Steps for installing VESA mounting metal parts.
Procedures for assembling the control panel components.
Instructions for assembling the side AV bracket.
Steps for installing the side AV assembly.
Instructions for installing the LCD panel into the cabinet.
Steps for mounting the LCD panel with metal brackets.
Instructions for installing PB metal brackets.
Steps for installing metal support structures.
Instructions for installing the bracket IP.
Procedures for installing and fitting the LED panel assembly.
Steps for installing the speaker (SP) units.
Instructions for installing EMI shielding and LVDS harness.
Steps for assembling the back cover with VESA metal.
Instructions for removing the pedestal.
Steps for removing the rear cover.
Table of voltage test points and specifications on the A-board.
Procedure for adjusting picture levels using RF signals.
Procedure for adjusting picture levels using VIDEO signals.
Procedure for adjusting picture levels using YUV signals.
Overall block diagram of the TV system.
Detailed block diagram section 1 of 2.
Detailed block diagram section 2 of 2.
Notes and symbols used in schematic diagrams.
Schematic diagram for A-Board, part 1 of 11.
Schematic diagram for A-Board, part 2 of 11.
Schematic diagram for A-Board, part 3 of 11.
Schematic diagram for A-Board, part 4 of 11.
Schematic diagram for A-Board, part 5 of 11.
Schematic diagram for A-Board, part 6 of 11.
Schematic diagram for A-Board, part 7 of 11.
Schematic diagram for A-Board, part 8 of 11.
Schematic diagram for A-Board, part 9 of 11.
Schematic diagram for A-Board, part 10 of 11.
Schematic diagram for A-Board, part 11 of 11.
Schematic diagram for the K-Board.
Schematic diagram for the P-Board.
Schematic diagram for the V-Board.
Location of components on the A-Board (A Side).
Location of components on the A-Board (B Side).
Location of components on the K-Board (A Side).
Location of components on the K-Board (B Side).
Location of components on the P-Board (A Side).
Location of components on the P-Board (B Side).
Location of components on the V-Board (A Side).
Information on exploded views and mechanical parts.
List of electrical replacement parts and their details.
Notes regarding part abbreviations and retention time.
Detailed list of electrical replacement parts.
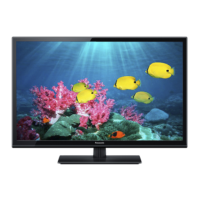
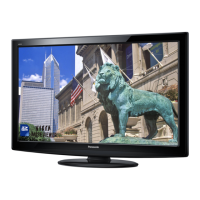
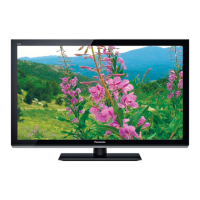
| Screen Size | 32 inches |
|---|---|
| Resolution | 1366 x 768 |
| Display Type | LCD |
| Backlight Type | LED |
| HDMI Ports | 3 |
| USB Ports | 1 |
| Display Technology | LCD |
| Component Video Input | 1 |
| Composite Video Input | 1 |
| PC Input | 1 |
| Refresh Rate | 60 Hz |
| Aspect Ratio | 16:9 |
| Inputs | HDMI, USB, Component, Composite, PC |
| Audio Output | 10 W |
| Sound Output | 10W (2 x 5W) |