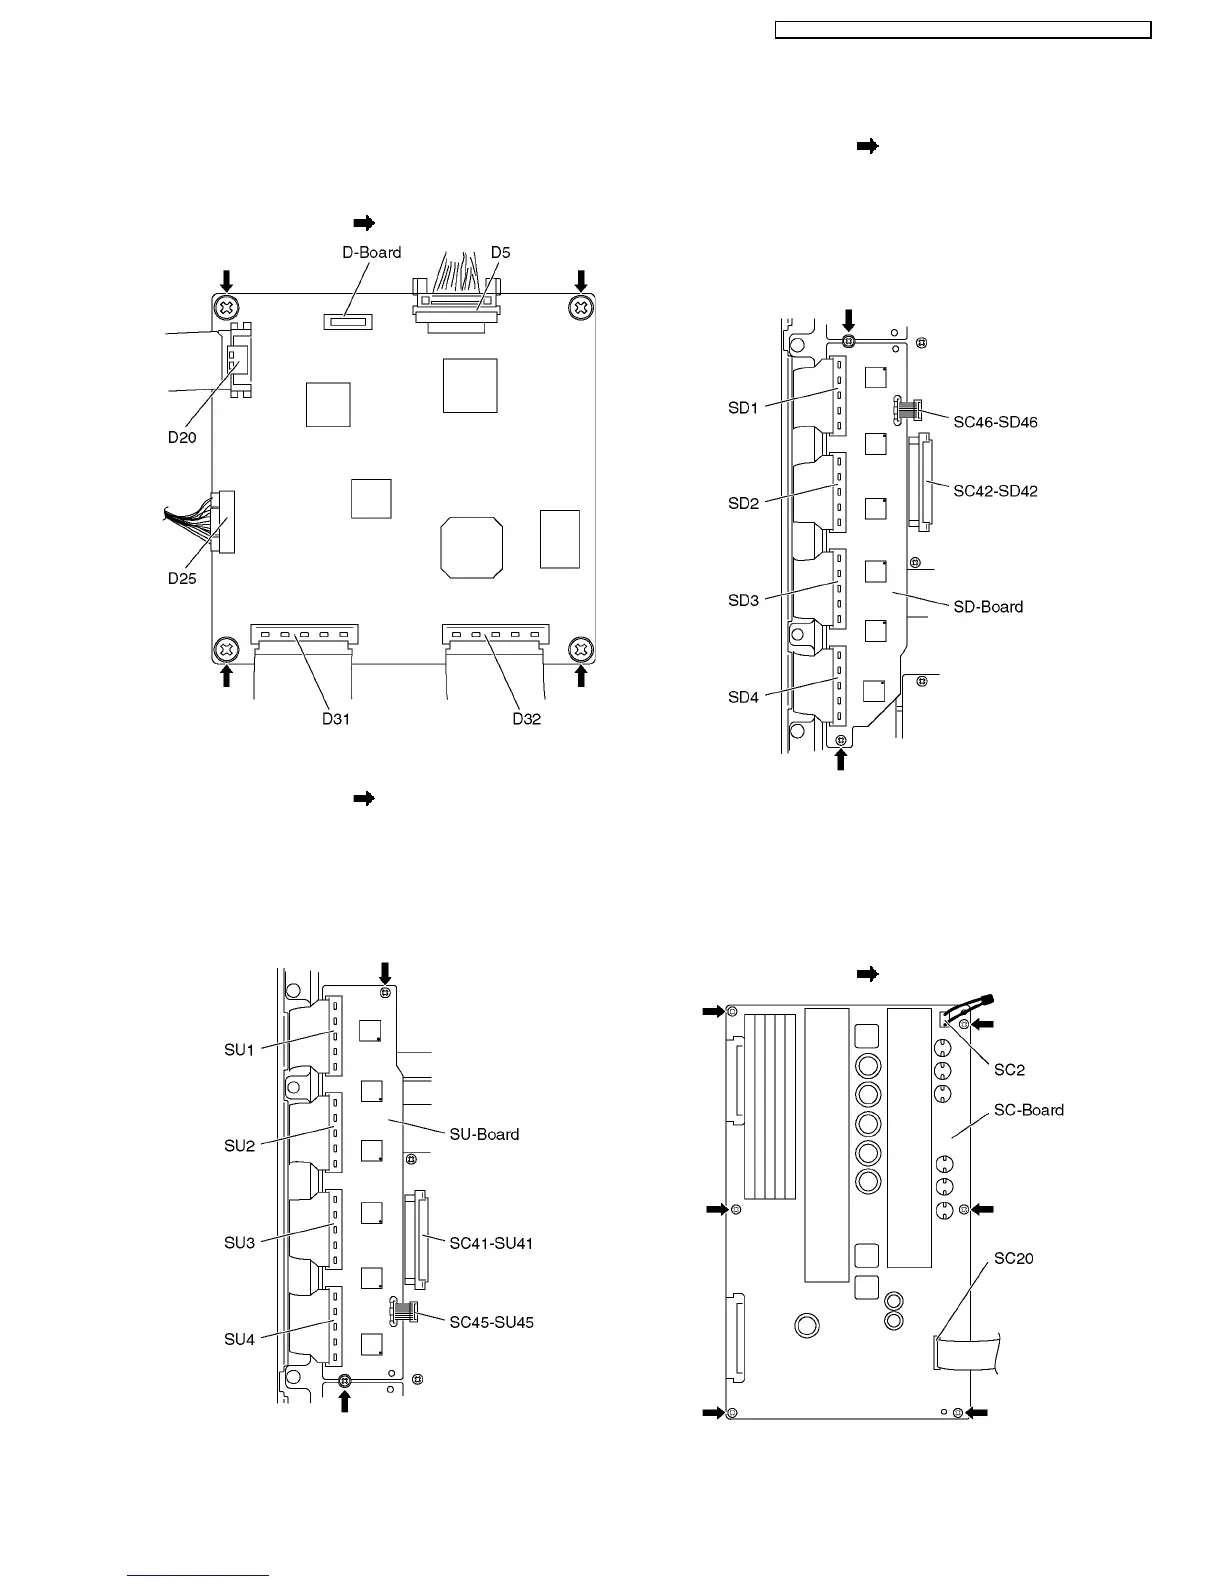
6.6. Remove the D-Board
1. Remove the tuner unit. (See section 6.4.)
2. Disconnect the connectors (D5 and D25).
3. Disconnect the flexible cables (D20, D31 and D32).
4. Remove the screws (×4
) and remove the D-Board.
6.7. Remove the SU-Board
1. Remove the screws (×2 ).
2. Remove the flexible cables (SU1, SU2, SU3 and SU4)
connected to the SU-Board and remove the bridge
connector (SC45-SU45).
3. Slide the SU-Board to the left to disconnect from a
connector (SC41-SU41) on the SC-Board and remove the
SU-Board.
6.8. Remove the SD-Board
1. Remove the screws (×2 ).
2. Remove the flexible cables (SD1, SD2, SD3 and SD4)
connected to the SD-Board and remove the bridge
connector (SC46-SD46).
3. Slide the SD-Board to the left to disconnect from a
connector (SC42-SD42) on the SC-Board and remove the
SD-Board.
6.9. Remove the SC-Board
1. Remove the SU-Board and SD-Board. (See section 6.7.
and 6.8.)
2. Unlock the cable clampers to free the cable.
3. Disconnect the connector (SC2).
4. Disconnect the flexible cable (SC20).
5. Remove the screws (×6
) and remove the SC-Board.
11
TH-42PX7A / TH-42PV7AZ / TH-42PV7HS / TH-42PV7M / TH-42PV7MR
 Loading...