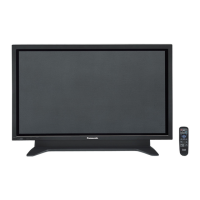
Basic controls
1. Connect the AC cord to the Display.
2. Connect the cord to an AC outlet.
Notes
●
The control button referred to in this section is the one
on the remote control unless specified otherwise.
●
Mains plug types vary between countries. The power
plug shown here may not be the same as the one on
your set.
●
When disconnecting the AC cord, be sure to always
disconnect the cord at the AC socket outlet first.
3. Switch the <Main power switch>.
4. Turn the power ON/OFF with the remote control or
<Power button (Unit)>.
Watch the Connected Video Source
See page 18 for external equipment connections.
1. Press the
[SOURCE]
button.
2. Press
[ ]
or
[ ]
to choose a device, then press
[ENTER]
.
Change Picture Format
You can change the picture format to suit the video
source. Each video source has available picture formats.
The available picture formats depend on the video
source:
1. Press the
[FORMAT]
button.
2. Press
[ ]
or
[ ]
to choose a picture format, then
press
[ENTER]
.
• {Autozoom}:Enlargepicturetollthescreen.
Recommended for minimal screen distortion
but not for HD or PC.
• {Movie expand 16:9}: Scale 4:3 format to 16:9.
Not recommended for HD or PC.
• {Wide screen}: Shows wide screen format
unstretched. Not recommended for HD or PC.
• {Unscaled}: Provides maximum detail for PC.
• {4:3}: Displays classic 4:3 format.
Choose your Preferred Picture
Settings
1. Press the
[ADJUST]
button while a video is being
played.
2. Press the
[ ]
or
[ ]
button to choose
Picture style
, then press
[ENTER]
.
3. Press the
[ ]
or
[ ]
button to choose an option, then
press
[ENTER]
:
• {Personal}: Apply your personalised picture
settings.
• {Vivid}: Rich and dynamic settings, ideal for
daytime viewing.
• {Natural}: Natural picture settings.
• {Standard}: Default settings that suit most
environments and types of video.
• {Movie}: Ideal settings for movies.
• {Photo}: Ideal settings for photos.
• {Energy saving}: Settings that conserve the
most energy.
Choose your Preferred Sound
Settings
1. Press the
[ADJUST]
button while a video is being
played.
2. Press the
[ ]
or
[ ]
button to choose
Sound style
, then press
[ENTER]
.
3. Press the
[ ]
or
[ ]
button to choose an option, then
press
[ENTER]
:
• {Personal}: Apply your personalised sound
settings.
• {Original}: Settings that suit most environments
and types of audio.
• {Movie}: Ideal settings for movies.
• {Music}: Ideal settings for listening to music.
• {Game}: Ideal settings for games.
• {News}: Ideal settings for spoken audio, such
as the news.
Play multimedia files from a USB
device
1. Connect your USB device to the USB port on the
Display.
2. Press the
[SOURCE]
button, choose
USB
, and
press
[ENTER]
.
Note
●
When it display the menu, it returns to the previous
input.
English
26
 Loading...