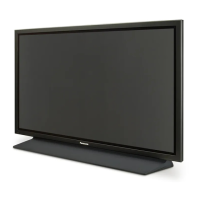
Do you have a question about the Panasonic TH-85PF12U and is the answer not in the manual?
Provides instructions for operating the High Definition Plasma Display.
Emphasizes reading and adhering to all safety instructions and warnings.
Details precautions for using the apparatus near water, cleaning, and handling power cords.
Advises referring servicing to qualified personnel and ensuring proper grounding.
Details compliance with FCC rules for digital devices and potential interference.
States compliance of the digital apparatus with Canadian ICES-003.
Lists registered trademarks used in the manual, including HDMI.
Guidelines for safe operation, ventilation, and handling of the display.
Lists compatible Panasonic accessories that must be used for stability.
Precautions regarding display placement, ventilation, and transport.
Instructions for cleaning and maintaining the AC power cord for safety.
Guidance for immediate actions if smoke, abnormal odor, or damage occurs.
Lists all items included with the product for initial setup and use.
Instructions for battery replacement and important precautions for battery use.
Details how to connect audio output terminals to external audio equipment.
Explains how to connect a computer via the Mini D-sub 15P PC input terminal.
Details connecting the display for computer control via the RS-232C serial terminal.
Explains how to connect the display using HDMI terminals.
Details connecting component or RGB signals to the display.
Guides through initial setup steps like OSD language and time settings after first power-on.
Describes the buttons and indicators located on the main unit of the plasma display.
Explains the layout and basic functions of the remote control transmitter.
Explains different picture aspect ratio settings and their effects.
Details the automatic aspect ratio adjustment feature for various program materials.
Describes how the extended aspect mode functions and its selection.
Guides on configuring the two-screen display function via the setup menu.
How to change screen layouts (PIP, P&P, P in P) for PIP operation.
Explains composite screen display and transparent/insertion functions for PIP.
Describes how to exchange the main and sub picture screens during PIP operation.
How to choose the active screen (main or sub) for operations.
Details how to change the sub-screen's location within the display.
Explains how to access and use the digital zoom feature for image enlargement.
Steps for selecting zoom levels and returning to the normal display.
How to display and navigate through the various menu screens.
Process for choosing and adjusting specific menu options and settings.
Methods for closing menus or returning to the previous screen.
Overview of settings for picture, sound, and input signal adjustments.
Overview of setup, position/size, and advanced settings menus.
Important notes on adjustments and operating via remote control.
Details on the auto setup feature for picture positioning.
Adjusting horizontal/vertical position, size, dot clock, and phase.
Options for over scan and image rotation control.
Explains 1:1 pixel mode for high-resolution signals and normalization.
Basic picture adjustments like brightness, color, tint, and sharpness.
Fine-tuning picture adjustments for professional-level control.
Details the effects of picture adjustments like contrast and color saturation.
Details the effects of advanced settings like gamma and white balance.
How to save and load custom picture settings combinations.
How to edit, delete, or rename saved picture profiles.
Step-by-step guide to saving current picture settings as a profile.
Guide to applying saved picture adjustments to the display.
Instructions for deleting or renaming saved picture profiles.
Steps to lock or unlock saved picture profiles and set passwords.
Explains limitations on menu operations when profiles are locked.
Guide to changing the password for profile locking and unlocking.
How to set the 'isf Mode' which affects Picture Menu display.
Adjusting sound parameters like bass, treble, balance, and surround.
Configuring audio output settings specifically for SDI signals.
How to set the current date and time for timer functions.
Configuring power on/off times and functions for the display.
Explains functions like Negative Image, Scrolling Bar, and modes like Interval, Time of Day.
How to start, stop, and activate the screensaver function.
Setting start time, finish time, and duration for the screensaver operation.
Settings to reduce image retention and extend the display's lifespan.
Adjusting side bars to prevent image retention on static content.
Features that slightly move the image or suppress peak brightness.
Applying recommended image retention reduction settings quickly.
Individually setting image retention reduction parameters.
Restoring image retention settings to factory defaults.
Explains Power Save, Standby Save, and Power Management functions.
How the display automatically turns off when no signal is detected.
Changing the displayed names for input signals for easier identification.
Selecting the preferred language for the on-screen display menus.
Standard horizontal installation setup for the display.
Setup for vertical installation, including fan control and menu rotation.
Steps for setting up multiple displays to show a single enlarged image.
Assigning a unique ID to the remote control for multi-display operation.
How to cancel or remove the assigned remote control ID.
Explains different screen layouts like PIP, P&P, P in P, and P out P.
Setting transparency level and insertion level for sub-screen images.
Guides on setting up the portrait orientation and related functions.
Configuring seam hiding and basic options for portrait mode.
Dividing the image and selecting the display area for portrait mode.
Equalizing brightness across multiple displays in portrait mode.
Selecting the correct signal type for component/RGB input terminals.
Selecting the correct signal type for DVI input terminals.
Provides a general overview of the signal settings menu structure.
Adjusting the 3D Y/C filter for NTSC AV signals.
Setting the color system and utilizing Panasonic Auto aspect ratio.
Configuring 3:2 pulldown for movies and XGA signal settings.
Setting the display's refresh rate for optimal picture quality.
Adjusting levels for video, mosquito, and block noise reduction.
Configuring sync signal options for RGB input signals.
Functionality for SDI through and displaying input signal information.
Settings for timers, memory lock, and onscreen display options.
Settings for initial input, volume levels, and button lock functions.
Configuring the off-timer function and initial power recovery modes.
Settings for remote ID, serial control, and image display size.
Studio WB/Gain, slot power, and power-on screen delay settings.
Features for automatic setup, image rotation, and normalization.
How to set up a 7-day timer schedule with commands.
Creating and modifying commands for the weekly timer programs.
Step-by-step instructions to reset the unit to its factory default settings.
Common problems and checks for picture/sound.
Specific issues related to the plasma panel, including image retention.
Details for various video signal formats applicable via HDMI input.
Technical details on power, panel characteristics, and signal compatibility.
Information about input/output terminals and supplied accessories.
Details of the limited warranty period and coverage for parts and labor.
Specifies conditions and damages not covered by the warranty.
Lists specific items and conditions excluded from the Canadian warranty.
Procedures for warranty service and general warranty exclusions.
Contact information and web resources for customer service in Latin America.
Contact details and support resources for customers in Mexico.
Space to record product model and serial numbers for reference and warranty.
