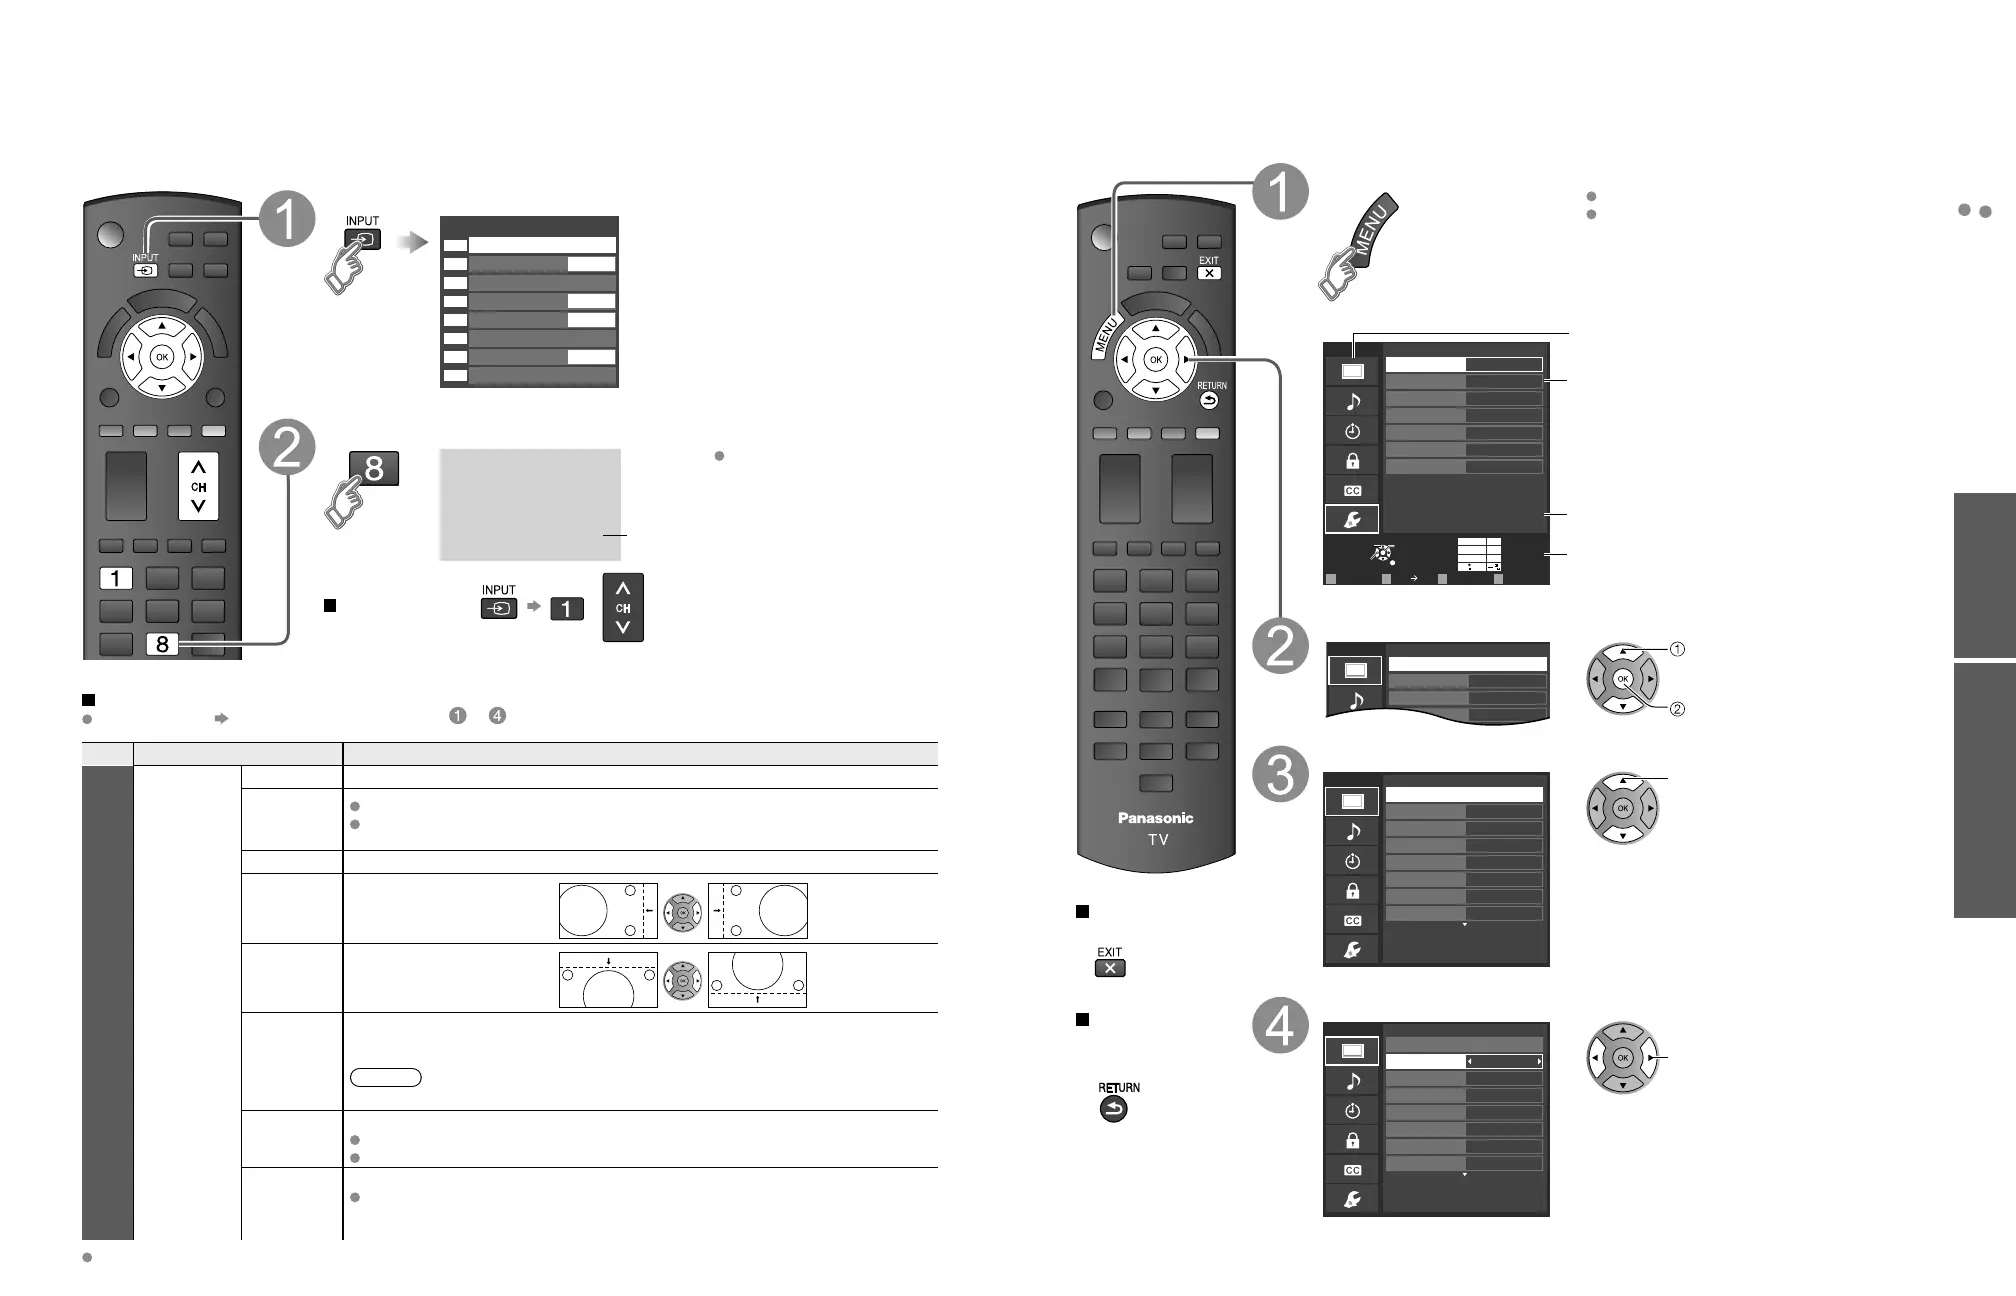
How to Use Menu Functions
Displaying PC Screen on TV
Viewing
How to Use Menu Functions
Various menus allow you to make settings for the picture, sound, and other functions so that you can enjoy
watching TV best suited for you.
Press to exit from
a menu screen
Press to return
to the previous
screen
Display the menu
Shows the functions that can be adjusted.
Some functions will be disabled depending on
the type of input signal.
picture”.
Selects from preset picture modes.
(example: Picture menu)
adjust
or
select
Displaying PC Screen on TV
The screen of the PC connected to the unit can be displayed on the TV.
You can also listen to PC sound with the audio cable connected. To connect PC (p. 43)
PC menu setting (change as desired)
Making settings “How to Use Menu Functions” to (p. 27)
Menu Item Adjustments/Configurations (options)
Picture
PC
adjustments
Reset to defaults
Resets PC adjust. Confirmation screen is displayed. Select “Yes” and press OK to reset.
Sync
H & V
: The H and V sync signals are input from the HD/VD connector. (p. 49)
On green: Uses a synchronized signal on the Video G signal, which is input from the
G connector. (p. 49)
Dot clock
Alleviates the problem if a picture appears to be vertically-striped, flickers partially or is blurred.
H-position
Adjusts the horizontal position.
V-position
Adjusts the vertical position.
Clock phase
Alleviates the problem if the whole picture appears to flicker or is blurred.
First adjust the Dot Clock to get the best possible picture, then adjust the
Clock Phase so that a clear picture appears.
Note
It may not be possible to display a clear picture due to poor input signals.
Input
resolution
Switches to wide display.
Input signal switched from 640×480 to 852×480
Input signal switched from 1024×768 to 1280×768 or 1366×768
H-frequency
V-frequency
Displays the H (Horizontal)/V (Vertical) frequencies.
Display range
Horizontal: 15 - 110 kHz
Vertical: 48 - 120 Hz
Audio menu (p. 28)
Display the Input select menu
 Loading...