RGB
VIDEO
RGB
VIDEO
S VIDEO
P
B
P
R
L
R
L
R
Y
HDMI1
AUDIO
OUT
AUDIO
IN
COMPONENT
AV1 AV2
HDMI2
DIGITAL
AUDIO
OUT
10
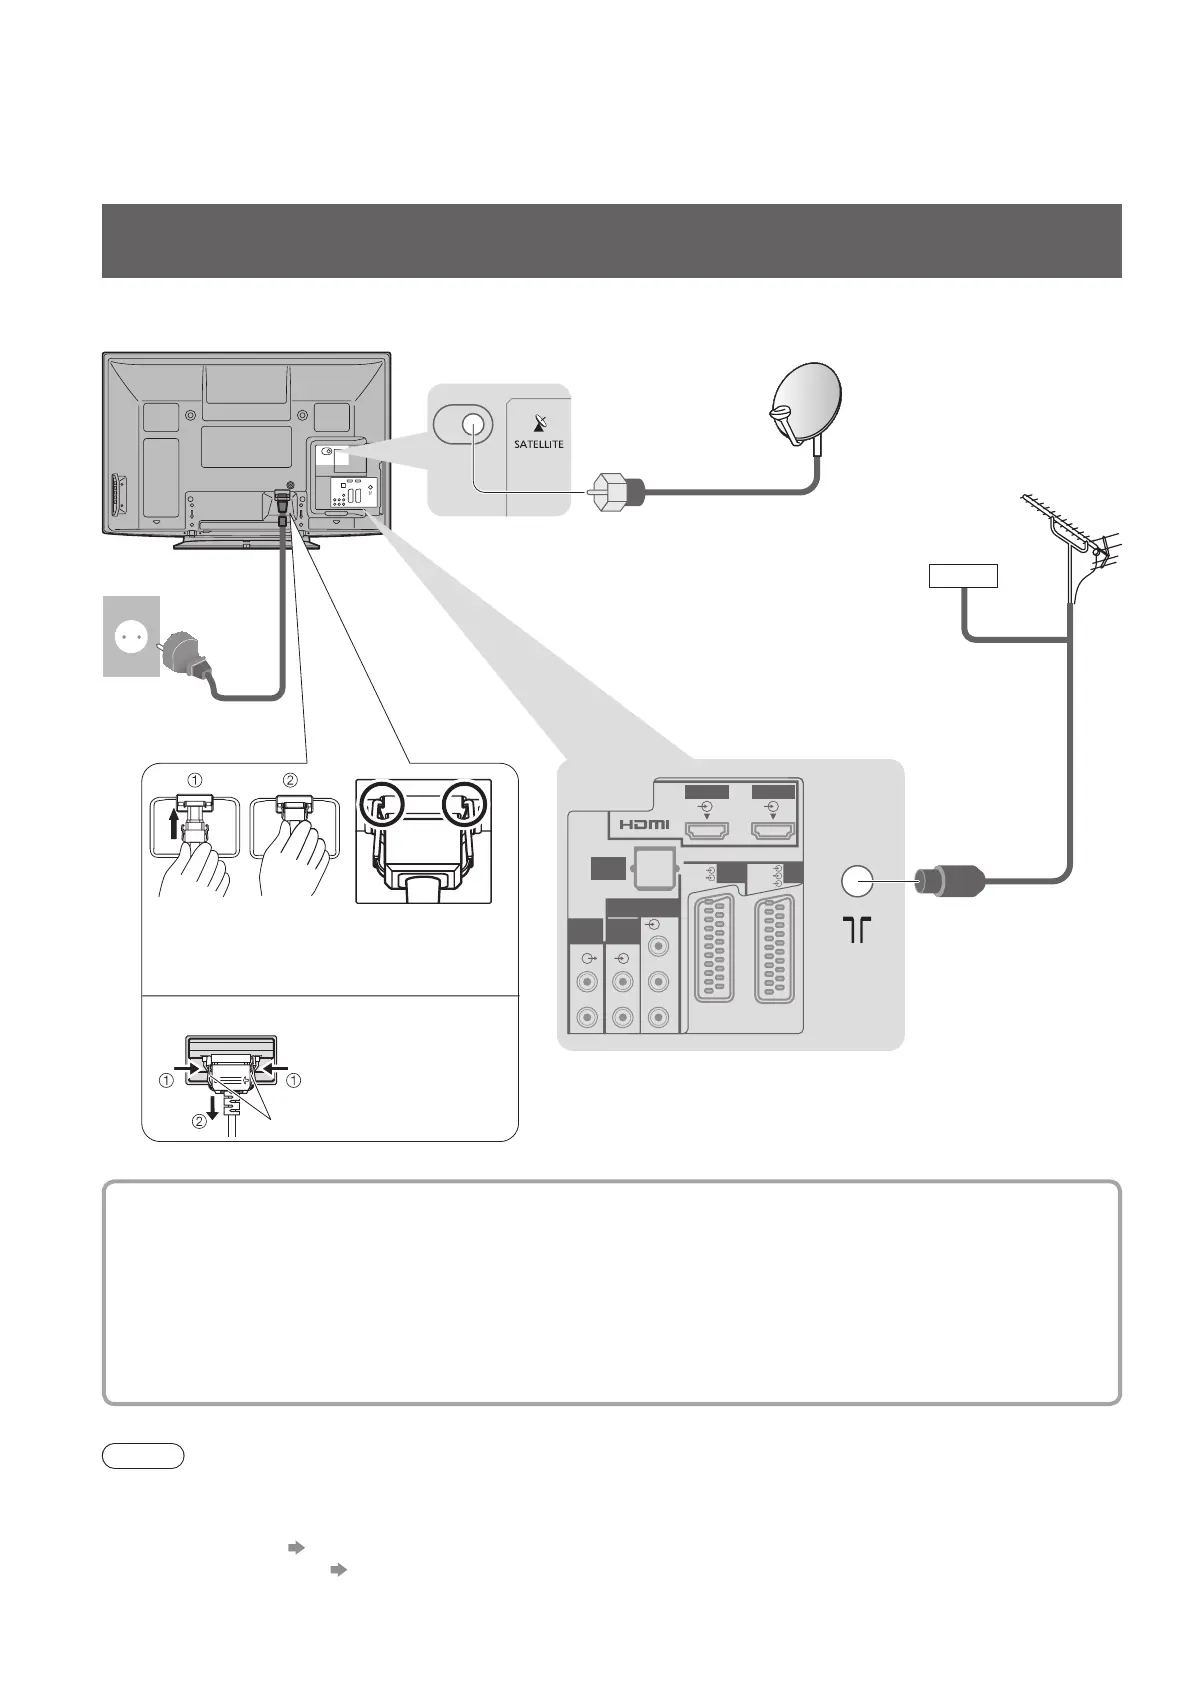
Basic Connection
Note
Connect to the TV’s AV1 / AV2 for a DVD Recorder / VCR supporting Q-Link (p. 52). ●
For HDMI-compatible equipment, possible to connect to HDMI terminals (HDMI1 / HDMI2 / HDMI3) by using ●
HDMI cable (p. 58).
Q-Link connection ● p. 50
VIERA Link connection ● p. 50 and p. 51
Read the manual of the equipment too. ●
External equipment and cables shown are not supplied with this TV.
Please ensure that the unit is disconnected from the mains socket before attaching or disconnecting any leads.
When disconnecting the mains lead, be absolutely sure to disconnect the mains plug at the socket outlet first.
Example 1
Connecting dish or aerial
TV only
Rear of the TV
RF cable
Terrestrial
aerial
Mains lead
(supplied)
AC 220-240 V
50 / 60 Hz
Satellite
dish
Satellite cable
For digital satellite ●
broadcasts
For digital cable, ●
digital terrestrial
and analogue
broadcasts
Cable
Selectable satellites and dish alignment to tune DVB-S channels: ■
Turksat at 42° East•
Hellas at 39° East•
Astra at 28.2° East•
Arabsat at 26° East•
Astra at 23.5° East•
Astra at 19.2° East•
Eutelsat at 16° East•
Hot Bird at 13° East•
Eutelsat at 10° East•
Eurobird at 9° East•
Eutelsat at 7° East•
Sirius at 5° East•
Intelsat at 1° West•
Amos at 4° West•
Atl. Bird at 5° West•
Atl. Bird at 7° West•
Atl. Bird at 8° West•
Hispasat at 30° West•
To ensure your satellite dish is correctly installed, please consult your local dealer. ●
Also please consult the received satellite broadcasting companies for details. ●
To remove from the TV: ●
Push until both
side tabs click
Press both tabs
and pull on
mains connector to
release
tabs
Make sure that
the mains lead is
securely fixed.

 Loading...