3. Preparation
9
M Antenna (built-in)
Do not cover the antenna with your hand when
using the sub monitor. (Radio waves may weaken.)
N Charge contacts (Metallic parts)
Charger
R To assemble the charger stand, see page 10.
3.2 Using the display
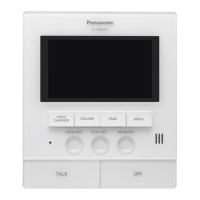
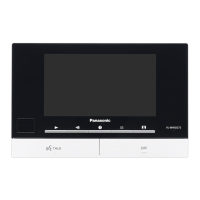
3.2.1 Main monitor - display information
Image viewing screen
A Status icons (page 9)
B Soft key icons (page 8)
Status icons (main monitor)
3.2.2 Sub monitor - monitor display
Image viewing screen
A Battery level
B Indicates which doorphone calling, monitoring, or in
a call. Also indicates which doorphone took the
image while viewing it.
C Indicates which doorphone is calling while talking or
monitoring.
D Indicates that the door is opened when the Electric
lock (sold separately) is connected to the main
monitor.
E Indicates that the "Press-to-talk" mode is on.
F Indicates the voice changer mode is on.
G Indicates the level of the reception.
H Indicates the registration number of the sub monitor.
I Indicates that the ringer volume for the doorphone is
set to "OFF".
J Indicates the operation of the navigation key.
(The display varies depending on the operation.)
Example: Menu setting
3.3 Charging the sub monitor
Only connect the charger with the supplied Panasonic
AC adaptor (page 2).
1 Insert the battery.
A Remove the battery cover, align the terminals
and insert.
A Charger
B Charge contacts
(Metallic parts)
C Charger stand
Indicates which doorphone is calling,
monitoring, or on a call.
("1" indicates the device number.)
Indicates there is a call from the
doorphone when monitoring or on a call
with another device.
Indicates that the main monitor is on a
call.
Indicates that a doorphone and a PBX
extension are talking.
Indicates that the main monitor is
monitoring.
Indicates that images are being recorded.
Indicates that the doorphone's LED lights
are on.
Indicates that "Press-to-talk" mode is on.
A
C
B
H
I
J
A B CDEFG
Press{f}
(BACK).
Press{D}(OK).
SW274_IIQG.book Page 9 Friday, September 15, 2017 6:34 PM
 Loading...