69
This product contains fluorinated greenhouse gasses.
Refrigerant type: R410A (GWP=2088)
Amount: For SXC09*3E8/SXC12*9E8 2.85 kg (5.9508
ton CO
2 equivalent)
For SXC16*9E8 2.90 kg (6.0552 ton CO
2
equivalent)
For SDC09*3E8/SDC12*9E8/SDC16*9E8
2.55kg (5.3244 ton CO
2 equivalent)
(The amount do not include the additional refrigerant
when refrigerating piping length extended. Please
refer to adhered label on outdoor unit for exact
amount of refrigerant used and actual tonnes of CO
2
equivalent.)
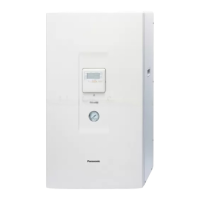
11.1.9 Test Run
1. Fill up the Tank Unit with water. For details refer to
Tank Unit installation instruction and operation
instruction.
2. Set ON to the Indoor Unit and RCCB/ELCB. Then,
for control panel operation please refers to air-to-
water heatpump operation instruction.
3. For normal operation, pressure gauge
14
reading
should be in between 0.05 MPa and 0.3 MPa.
4. After test run, please clean the Water Filter Set
15
.
Reinstall it after finish cleaning.
11.1.9.1 Reset Overload Protector
11
Overload Protector
11
serves the safety purpose to
prevent the water over heating. When the Overload
Protector
11
trip at high water temperature, take
below steps to reset it.
1. Take out the cover.
2. Use a test pen to push the centre button gently in
order to reset the Overload Protector
11
.
3. Fix the cover to the original fixing condition.
Use test pen to push
this button for reset
Overload protector .
11
11.1.10 Maintenance
In order to ensure safety and optimal performance
of the unit, seasonal inspections on the unit,
functional check of RCCB/ELCB, field wiring and
piping have to be carried out at regular intervals.
This maintenance should be carried out by
authorized dealer. Contact dealer for scheduled
inspection.
11.1.10.1 Maintenance for Water Filter
Set
15
1. Turn OFF power supply.
2. Set the two valves for the Water Filter Set
15
to
“CLOSE”.
3. Take off the clip, then gently pull out the mesh.
Beware of small amount water drain out from it.
4. Clean the mesh with warm water to remove all the
stain. Use soft brush if necessary.
5. Reinstall the mesh to the Water Filter Set
15
and
set back the clip on it.
6. Set the two valves for the Water Filter Set
15
to
“OPEN”.
7. Turn ON power supply.
11.1.10.2 Check Items
Is there any gas leakage at flare nut connections?
Has the heat insulation been carried out at flare nut
connection?
Is the connecting cable fixed to terminal board firmly?
Is the connecting cable clamped firmly?
Is the earth wire connection properly done?
Is water pressure higher than 0.05 MPa?
Is the pressure relief valve operation normal?
Is the RCCB/ELCB operation normal?
Is the Indoor Unit properly hooked to the installation plate?
Is the power supply voltage within the rated voltage range
Is there any abnormal sound?
Is the heating operation normal?
Is the thermostat operation normal?
Is the remote controller LCD operation normal?
Is the Indoor Unit water leak free on test run?
13
3
 Loading...