70
12.2.3 Piping Installation
12.2.3.1 Water Quality Requirement
Must use water that complies with European water quality
standard 98/83 EC. The lifespan of the Tank Unit will be shorter if
groundwater (include spring water and well water) is used.
The Tank Unit shall not be used with the tap water containing
contaminants such as salt, acid, and other impurities which may
co
rode the tank and its component.
12.2.3.2 Typical Piping Installation
Faucet
2-Way Valve
ir-to-Water Heatpump
Outdoor Unit
Pressure
Relief
Valve
Drainage
Tank Water
Discharge
Tundish
T&P Valve Drainage
Tundish
Fan Coil Unit
Radiator /
Floor Heater
Drain
Water
Expansion
Vessel
Check
Valve
Tab /
Shower
Main
Water
Supply
Shut
Off
Valve
Pressure
Reducing
Valve
12.2.3.3 Access to Internal Components
WARNING
This section is for authorized and licensed electrician/water
system installer only. Work behind the front plate secured by
screws must only be carried out under supervision of qualified
contractor, installation engineer or service person.
CAUTION
Hook
2X (screw)
Open or close the Front Plate carefully.
The heavy Bottom Front Plate may injures
the fingers.
Open and Close Front Plate
1 Remove the 2 mounting screws of Bottom
Front Plate.
2 Slide it upwards to unhook the Bottom Front
Plate hook.
3 Reverse above steps 1~2 for close it.
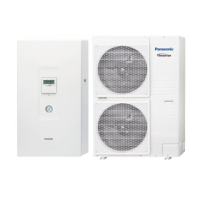
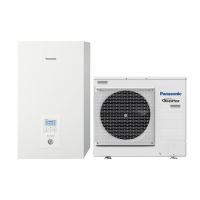
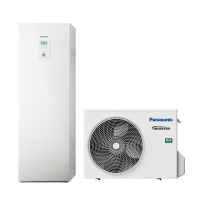
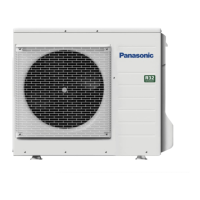
12.2.3.4 Refrigerant Piping Installation
This Tank Unit is designed for combination with
Panasonic Air-to-Water Heat Pump Outdoor Unit. If
Outdoor Unit from other manufacturer are being used
in combination with Panasonic Tank Unit, optimum
operation and reliability of the system is not
guaranteed. Thus warranty cannot be given in such
case.
1 Connect Tank Unit to Air-to-Water Heatpump
Outdoor Unit with correct piping size. Use
Reducing Adapter
2
for Outdoor Unit
WH-UD03JE5 and WH-UD05JE5 Refrigerant
Gas
e
piping connection.
Model Piping size (Torque)
Use
Reducing
Adapter
2
Tank Unit Outdoor Unit Gas Liquid
WH-
ADC0309J3E5UK
WH-
UD03JE5,
WH-
UD05JE5
ø12.7mm
(1/2")
[55 N•m]
ø6.35mm
(1/4")
[18 N•m]
Yes
WH-
UD07JE5,
WH-
UD09JE5
ø15.88mm
(5/8")
[65 N•m]
ø6.35mm
(1/4")
[18 N•m]
No
Sp
r
Torque
wrench
CAUTION
Do not overtighten, overtightening may cause gas leakage.
Do not pull and push refrigerant piping excessively, deformed
pipe may cause refrigerant leak.
2 Please make flare after inserting flare nut
(located at joint portion of tube assembly) onto
the copper pipe. (In case of using long piping)
3 Do not use pipe wrench to open refrigerant
piping. Flare nut may be broken and cause
leakage. Use proper spanner or ring wrench.
4 Connect the piping:
o Align the centre of piping and sufficiently
tighten the flare nut with fingers.
o Further tighten the flare nut with torque
wrench in specified torque as stated in
the table.
Additional Precautions For R32 Models when
connecting by flaring at indoor side
Ensure to do the re-flaring of pipes before connecting to
units to avoid leaking.
Connections made between components of refrigerant
s
stem shall be accessible fo
ease of maintenance.
Seal sufficiently the flare nut (both gas and liquid sides)
with neutral cure (Alkoxy type) & ammonia-free
silicone sealant and insulation material to avoid the
gas leak caused by freezing.
 Loading...