31
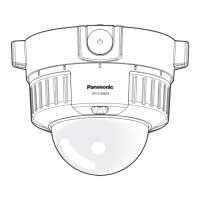
5 Mount the enclosure and inner
dome.
Tighten the screws that have been loos-
ened in Step 2 in page 27 using the supplied
driver bit.
(Recommended tightening torque:
0.78 N·m {0.58 lbf·ft})
Important:
• Attach the inner dome in accordance with
the lens direction to not to change the lens
direction.
• Check if the tabs of the inner dome are
firmly fit.
• Remove the cushioning (pink sheet) from
the inside of the dome and the protection
sheet from the outside of the dome.
Note:
• Defocus may be caused by the reinstalled enclosure. When using a system controller (option),
adjust the back-focus on the setup menu after attaching the enclosure. (+ Operating Instruc-
tions (PDF))
• When not using a system controller, by using the [ABF2] button back-focus adjustment is avail-
able after attaching the enclosure. The procedure for the use of the [ABF2] button is as speci-
fied below.
q Press the [ABF2] button. → The ABF operation indicator will start blinking.
w While the indicator is blinking (for around 3 minutes), attach the enclosure to the camera.
e When the indicator changes to steady light, back-focus will be adjusted automatically. After
the back-focus is adjusted, the indicator will go out.
* Do not aim the camera to objects continuously moving.
* If the indicator blinks again after changing to steady light, back-focus adjustment may have
failed. In this case, check the back-focus on the LCD monitor.
To adjust the back-focus again, perform Step q to e again.
Cutout for
mounting
Groove for
mounting
 Loading...