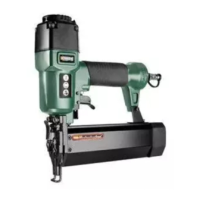
PDT 40 D3
■ 6
│
GB
│
IE
│
NI
Before use
NOTE
► Put on the supplied protective goggles before
each use. Remove the protective film from the
goggle lenses before first use.
Connecting the compressed air supply
NOTE
► In order to achieve the full power available
from your compressed air tool, always use
compressed air hoses with an internal diame-
ter of at least 9 mm. A lower internal diameter
can considerably reduce the power.
► The appliance may be operated only with
cleaned, atomised-oil air and must not exceed
the maximum working pressure of 8 bar on
the appliance. The compressor must be fitted
with a pressure reducer to regulate the
working pressure.
CAUTION!
► Do not use a compressed air line that contains
any condensate.
► The tool must be sufficiently supplied with
pneumatic oil to ensure long service life. This
can take place as follows:
– Use oiled compressed air by fitting a mist
lubricator.
– Without a mist lubricator: Add oil manu-
ally via the threaded nipple
every
day. Approx. 1–2 drops of pneumatic
oil for every 15 operating minutes during
continuous use.
► If the tool has been out of operation for sev-
eral days, add around 5 drops of pneumatic
oil manually via the threaded nipple
.
♦ Connect the appliance to a suitable compressed
air source.
♦ 1.) For this purpose, press the quick-release
connection of the compressed air hose (not
included) onto the ¼" threaded nipple
of the compressed air stapler.
The connection locks automatically.
♦ 2.) Now connect the other end of the com-
pressed air hose to the (filter) pressure
reducer on the compressor.
Filling the magazine
♦ Press the magazine lever and pull back the
magazine cover until it stops.
♦ Place the appropriate fastener material (nails,
see fig. B or staples, see fig. C) in the magazine
. The staples must be placed on the bar of
the magazine .
♦ Slide the magazine cover forwards until it clicks
into place.
Operation
♦ Load the magazine of the compressed air
stapler, as described in the section "Filling the
magazine".
♦ Set the correct working pressure using the
pressure reducing valve (not supplied).
NOTE
■ Make sure that you do not exceed the
maximum working pressure of 8 bar on the
appliance. An excessive working pressure
does not mean increased output; it merely
increases the compressed air consumption
and accelerates appliance wear.
♦ Switch on the compressor.
Run the compressor once until the maximum
tank pressure has been reached and then
switch off the appliance.
♦ Place the appliance on the workpiece and pull
the trigger
.
NOTE
■ The compressed air stapler is
equipped with a trigger lock
.
The fastener material does not leave
the appliance until the opening of the
compressed air stapler is pressed against the
workpiece and the trigger is pressed.

 Loading...