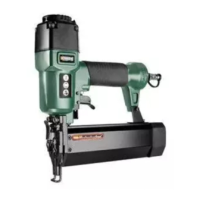
PDT 40 D3
GB
│
IE
│
NI
│
7 ■
■ Check whether the fastener is properly driven in
according to requirements.
– If the fastener protrudes, increase the air
pressure in steps of 0.5 bar.
– If the fastener is too deep, reduce the air
pressure in steps of 0.5 bar.
■ Alternatively, you can speed up the work, by
holding in the trigger
.
♦ Apply the compressed air stapler to the work-
piece.
♦ Press the appliance onto the workpiece till the
opening
is touching it. The fastener material
leaves the appliance.
♦ As long as you pull the trigger
a piece of
fastener material leaves appliance each time
the opening touches the workpiece.
♦ Alternatively, you can keep the opening
of
the appliance permanently pressed onto the
workpiece.
♦ Each time you pull the trigger
a fastener
leaves the appliance.
NOTE
■
Fine adjustment is also possible with the
knurled screw
.
♦ Turn the knurled screw
down to sink the
fastener deeper into the workpiece.
♦ Turn the knurled screw
up to sink the fastener
less deeply into the workpiece.
♦ Turn the exhaust cover
to direct the escaping
air in the desired direction.
♦ Disconnect the appliance from the compressor
after completing your work.
Removing jammed staples
If a staple/nail gets stuck in the magazine shaft, im-
mediately remove the compressed air supply line.
♦ Open the magazine
as described in the sec-
tion "Filling the magazine".
♦ Open the face plate
by pulling the face
plate quick release lever in the direction of
the trigger lock .
♦ Remove the food.
♦ Close the face plate
by pulling the face
plate quick release lever in the direction of
the exhaust panel .
♦ Close the magazine
of the compressed air
stapler, as described in the section "Filling the
magazine".
Maintenance and cleaning
WARNING! RISK OF INJURY!
Disconnect the appliance from the
compressed air supply.
WARNING!
► Have the power tool repaired by the Service
Centre or a qualified technician and only
using genuine replacement parts. This will
ensure that the safety of the appliance is
maintained.
CAUTION!
► Any service or repair work over and above
that described in this section may only be
carried out by specialists.
♦ Maintain the compressor tool regularly to
ensure safe operation.
♦ Check bolted connections for a tight fit,
retighten if necessary.
♦ We recommend fitting a pressure reducer with
a water separator and an oiler in front of the
compressed air tool.
♦ If there is increased oil or air discharge, check
the compressed air tool and have it serviced if
necessary.

 Loading...

