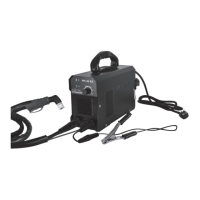
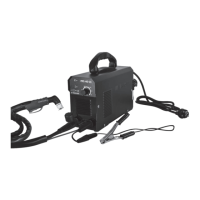
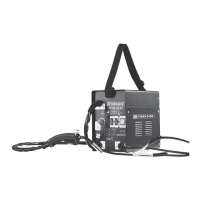
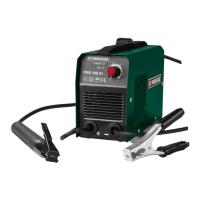
This document describes the PARKSIDE Inverter Welder PTMI 180 A1, a versatile welding machine suitable for both electrode welding (MMA) and tungsten inert gas welding (TIG).
Function Description
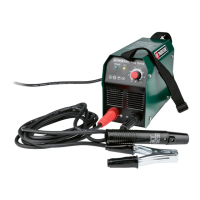
The inverter welder is designed for welding various metals, including carbon steel, steel alloy, stainless steel, and other premium steels. It operates as a single-phase static frequency converter-transformer-commutator, providing direct current for welding. The device features a control button and a control wheel for adjusting welding parameters. An ON/OFF switch controls power to the unit.
For MMA welding, the device uses encased rod electrodes. The electrode holder connects to the positive output, and the earthing clamp connects to the negative output of the inverter welder. The control wheel allows for setting the welding current, while the control button enables selection of convenient functions such as Hot Start, Arc Force, and Anti Stick. The electrode thickness (1.6–4 mm) can also be selected, which then presets the current and convenient functions.
For TIG welding, the TIG torch connects to the negative output, and the earthing clamp connects to the positive output. Argon is recommended as the inert gas, with a gas flow of 4–8 l/min. The welding current is adjusted via the control wheel. The device also offers a "LiftTIG 6/6" menu item for specific TIG welding settings.
Important Technical Specifications
- Mains connection: 230 V ~ 50 Hz (alternating current)
- Max. welding current and standardised operating voltage: 20 A/18.8 V – 180 A/25.2 V
- Rated value of the mains voltage: U₁: 230 V
- Greatest rated value of the mains power: I₁max: 32.8 A
- Maximum effective input current: I₁eff: 13.4 A
- Rated value of the no-load voltage: U₀: 70 V
- Protection class: IP21S
- Insulation class: H
- Weight: approx. 3 kg
- Material thicknesses which can be welded: max. 3.0 mm
- EMC Device Classification: Class A (intended for industrial environments; may cause electromagnetic interference in sensitive systems in other environments).
- Short circuit power (Ssc): Must be ≥ 6106.5 kW at the interface point between the operator's supply and the public supply.
- Permissible mains Zmax impedance: ≤ 0.225 Ω.
Usage Features
The welder is designed for ease of use with clear controls.
Before use:
- Unpack the device and accessories, checking for transport damage.
- Connect the appropriate welding cables (electrode holder for MMA, TIG torch for TIG) and the earthing clamp to the welder.
- For MMA welding, insert an electrode into the holder.
Operation:
- Ensure the ON/OFF switch is in the "OFF" position and the mains cable is disconnected before making connections.
- Connect welding cables according to polarity specified by the electrode manufacturer. For MMA, electrode holder to "+" and earth terminal to "-". For TIG, TIG torch to "-" and earth terminal to "+".
- Wear appropriate protective clothing.
- Connect the earth terminal to the workpiece.
- Switch the device "ON".
- Adjust welding current using the control wheel.
- Select additional functions (Hot Start, Arc Force, Anti Stick for MMA; LiftTIG for TIG) via the control button and control wheel.
Welding techniques:
The manual describes two main welding techniques: push welding and drag welding, highlighting their impact on weld seam properties:
- Push welding: Smaller burn, larger weld seam width, flatter weld bead, larger weld seam fault.
- Drag welding: Larger burn, smaller weld seam width, higher weld bead, smaller weld seam fault.
The user is advised to test both methods on a sample piece to determine suitability. Electrodes must be replaced once fully worn.
Safety considerations:
- Avoid direct contact between the earth terminal and electrode holder/electrode.
- Do not rub the electrode on the workpiece; maintain the correct gap after ignition.
- A voltage 10% below the rated input voltage can reduce power and make the arc unstable.
- Arc radiation can cause eye inflammation and skin burns; wear tinted safety goggles or a protective mask (EN175 standard).
- Welding sparks can cause explosions or fires; keep flammable substances away.
- Inhalation of welding fumes can endanger health; ensure adequate ventilation.
- Do not weld on containers that have held flammable substances.
- Do not use the welder in rain or moist environments.
- Only operate on a level surface.
- The device is rated at an ambient temperature of 20 °C; welding time may be reduced at higher temperatures.
- In environments with increased electrical hazard (restricted movement, electrically conductive spaces, wet/humid/hot conditions), use insulated mats/pads, gauntlet gloves, and head protection. The welding power source must be outside the working area.
- For rapid electrical isolation, an emergency stop device should be easily accessible.
- When welding in tight spaces, ensure trained individuals are nearby to intervene and assess risks.
- If multiple welding power sources are used simultaneously, their no-load voltages can add up, increasing electrical hazard; ensure proper connection and clear marking.
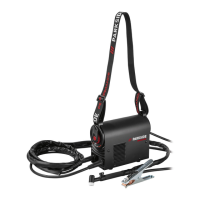
- Do not weld while carrying the power source with a shoulder strap to prevent loss of balance or increased electric shock risk.
Maintenance Features
Regular maintenance and cleaning are crucial for proper function and safety compliance.
- Before cleaning, disconnect the mains cable from the power outlet.
- Clean the exterior of the welder and accessories regularly using compressed air, cotton waste, or a brush to remove dirt and dust.
- Only suitably-qualified personnel should perform specific maintenance tasks:
- Regularly service the current regulator, earthing device, and internal cables.
- Regularly check the insulation resistance levels of the welder using an appropriate measuring device.
- Contact qualified personnel for defects or necessary replacement of parts.
Recycling and disposal:
- The device, accessories, and packaging should be recycled in an environmentally friendly manner according to European Directive 2012/19/EU.
- Do not dispose of electrical appliances with household waste.
- Packaging materials are marked for separate recycling (plastics 1–7, paper/cardboard 20–22, composite materials 80–98).