Wireless Smart Gate Port 3, Auxiliary Port Setup
26
013-16123A
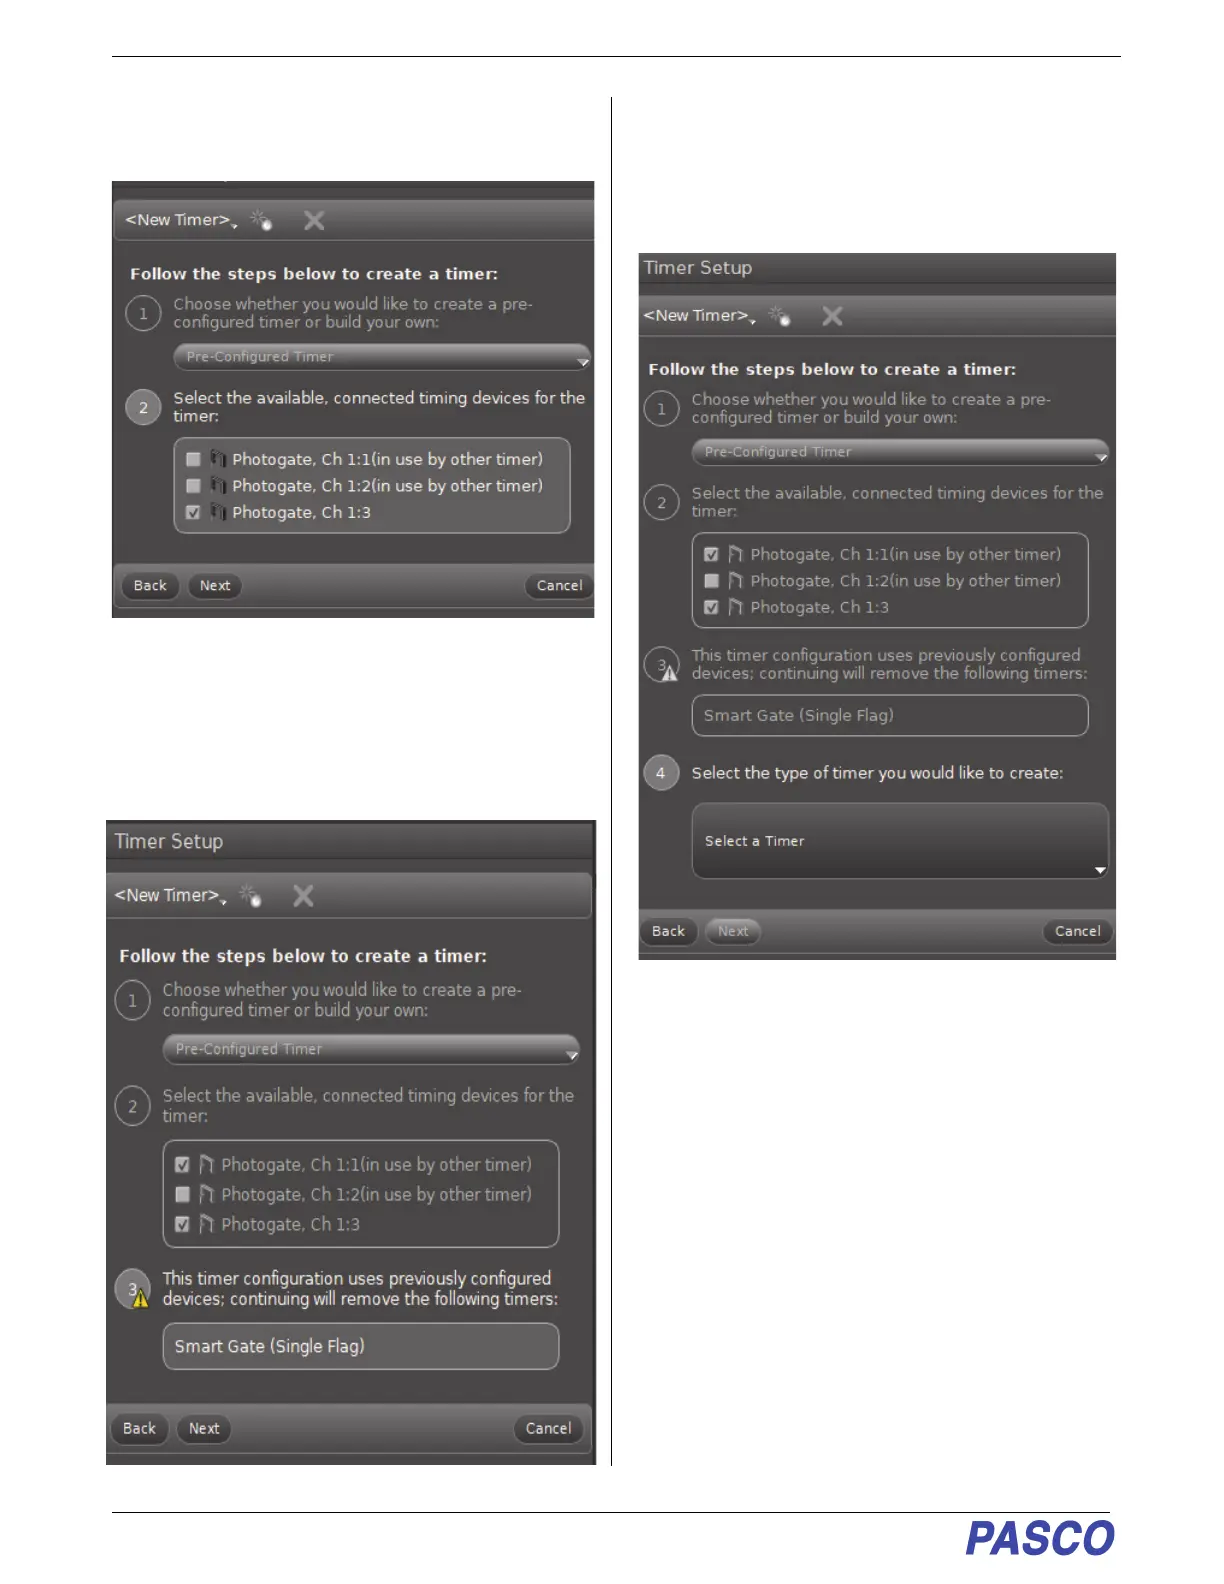
7. Step 2 is now active. Also, the new photogate
(Photogate, Ch 1:3) has a checkmark.
.
8. Put a checkmark in front of the first photogate
(
Photogate, Ch 1:1). Click Next.
• Step 3 becomes active and it shows a warning
message about “previously configured devices”.
9. Ignore the warning and click “Next” to open Step 4.
10. Step 4 allows you to select the type of timer you
would like to create. Step 4 also reveals the “Select
a Timer” menu.
11. Click the “Select a Timer” menu.