Getting Started
Getting Started
Meter Functions
-
AC
or
DC
Current
(A)
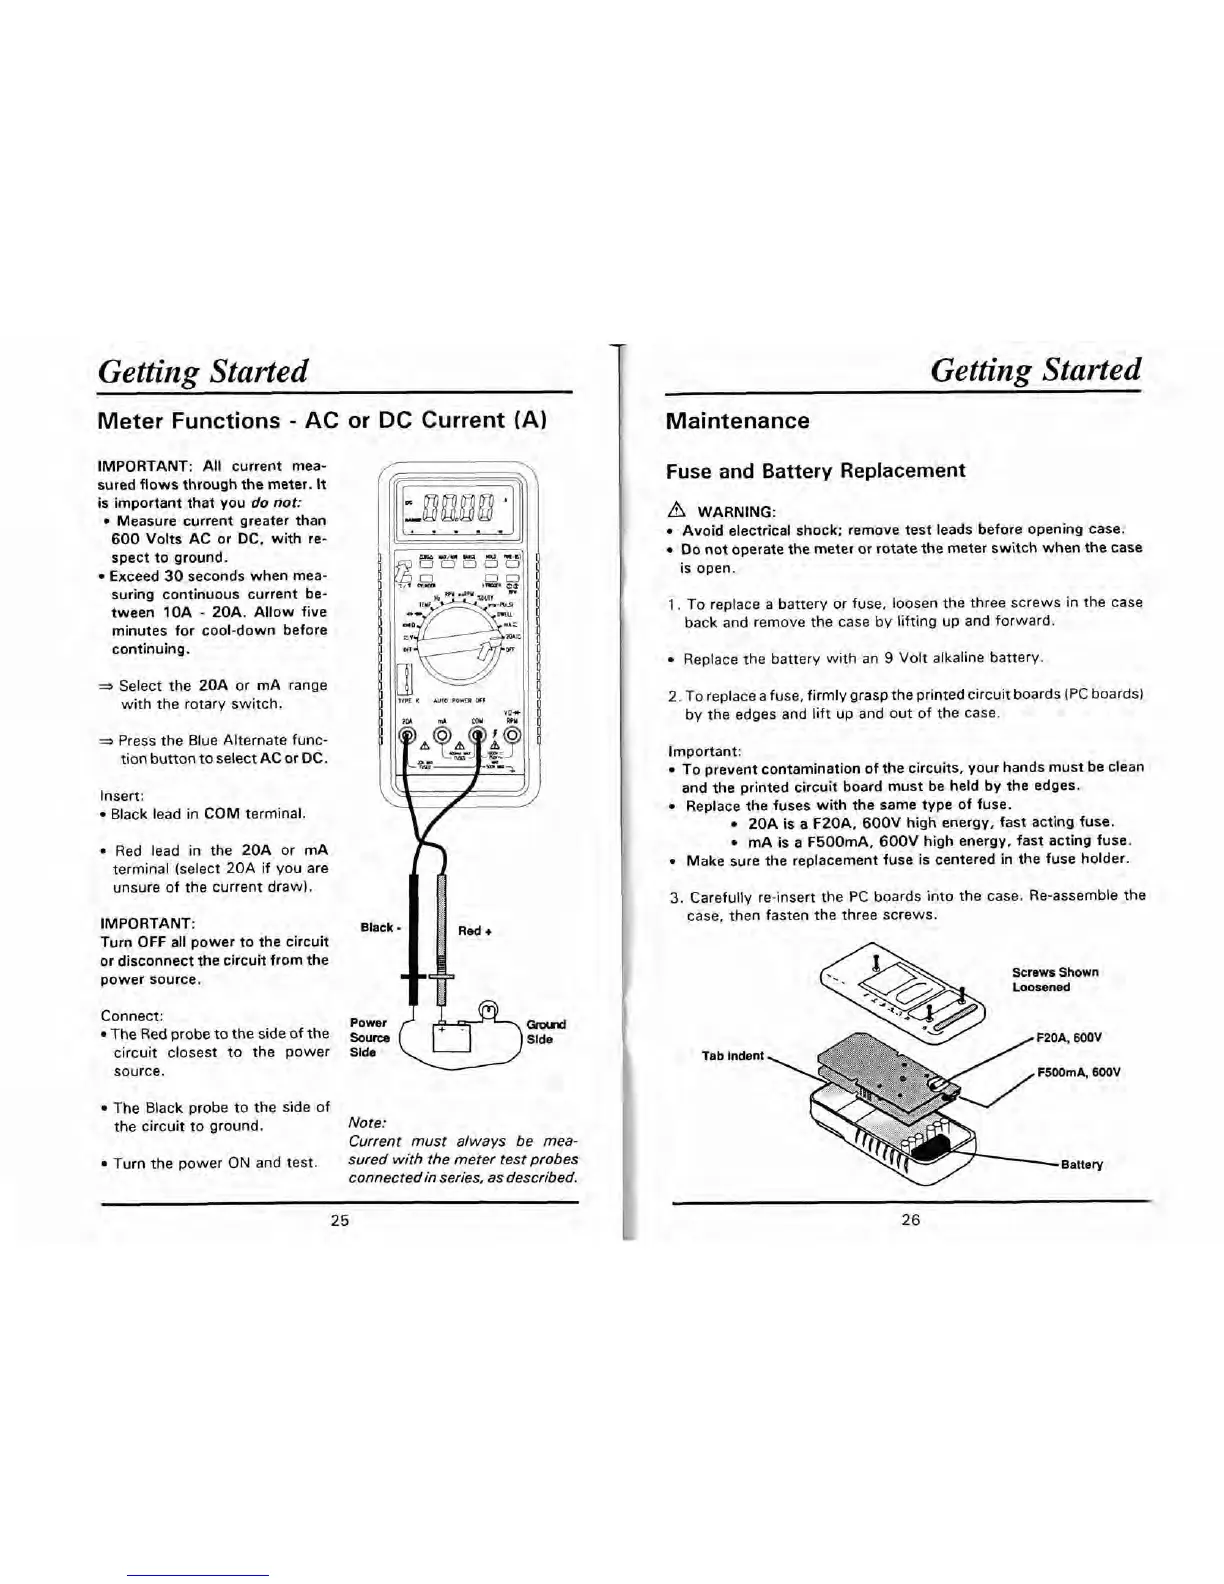
IMPORTANT: All current mea-
sured flows through the meter.
It
is important that you
do not:
Measure current greater than
600 Volts AC or
DC,
with re-
spect to ground.
Exceed 30 seconds when mea-
suring continuous current be-
tween
10A
-
20A. Allow five
minutes for cool-down before
continuing.
*
Select the 20A or mA range
with the rotary switch.
=,
Press the Blue Alternate func-
tion button to select AC or DC.
Insert:
Black lead in COM terminal.
Red lead in the 20A or mA
terminal (select 20A if you are
unsure of the current draw).
IMPORTANT:
Black
Turn OFF all power to the circuit
or disconnect the circuit from the
power source.
Red
+
A
Connect:
power
{
,&rw-7~
The Red probe to the side of the
Slde
circuit closest to the power
Slde
\
-
)
source.
-
The Black probe to the side of
the circuit to ground.
Note:
Current must always be mea-
Turn the power
ON
and test.
sured with the meter test probes
connectedin series, as described.
Maintenance
Fuse and Battery Replacement
WARNING:
Avoid electrical shock; remove test leads before opening case.
Do
not operate the meter or rotate the meter switch when the case
is open.
1.
To replace a battery or fuse, loosen the three screws in the case
back and remove the case by lifting up and forward.
Replace the battery with an
9
Volt alkaline battery.
2. To replace a fuse, firmly grasp the printed circuit boards (PC boards)
by the edges and lift up and out of the case.
Important:
To prevent contamination of the circuits, your hands must be clean
and the printed circuit board must be held by the edges.
Replace the fuses with the same type of fuse.
20A is a F20A, 600V high energy, fast acting fuse.
mA is a F500mA. 600V high energy, fast acting fuse.
Make sure the replacement fuse is centered in the fuse holder.
3.
Carefully re-insert the PC boards into the case. Re-assemble the
case, then fasten the three screws.
Screws Shown
Loosened
Tab
Indent
Battery