3.3. Recording the maximum and minimum measurements
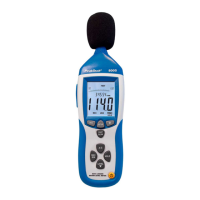
MAX/MIN button: Maximum and Minimum hold
Press this button for one time to enter MAX/MIN measurement, ‘MAX’ will appear on LCD,
maximum sound level will be captured and held until higher sound level is captured. Press the
button again, ‘MIN’ will appear on LCD and minimum sound level will be captured and held until
new lower sound level is captured. Press the button one more time to exit MAX/MIN measurement.
HOLD button: Press “HOLD” button, The hold function freezes the reading in the display.
Power button: Turn the meter power ON/OFF
External DC 9V power
supply terminal: For connection with DC 9V power supply.
Aperture size: external diameter: 3.5mm, internal diameter: 1.35mm
USB interface: USB signal output is a 9600 bps serial interface.
AC/DC signal output:
AC: Output voltage: 1Vrms corresponding to each range step.
Output impedance: 100Ω
DC: Output voltage: 10mv/dB
Output impedance: 1KΩ
3.4. Selecting automatic and manual ranging
The meter features 4 measurement ranges:
AUTO: 30 ... 130 dB
LO: 30 ... 80 dB
MED: 50 … 100 dB
HI: 80 … 130 dB.
When you turn the meter on, it will be in manual range mode. This is helpful when you know the
measurement range in advance. The meter will be able to take readings more quickly, because the
unit does not need to first establish the range before displaying the measurement.
You can also set the range automatically. In this mode, the meter will adjust the measurement
range automatically for accuracy. The two digit number to the left of the bar graph on the LCD will
show the low end of the current range. This is helpful when you know the measurement range in
advance. The meter will be able to take readings more quickly, because the unit does not need to
first establish the range before displaying the measurement.
-19-
OUTPUT
GROUND
OUTPUT
AC
DC

 Loading...