This document is an instruction manual for the Pegasus W2600 Series sewing machine.
Function Description
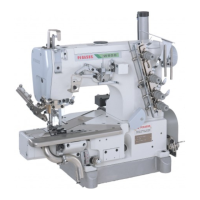
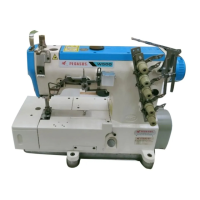
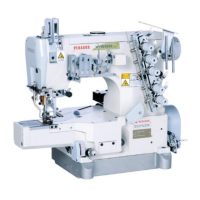
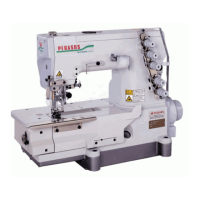
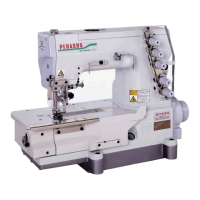
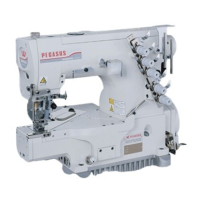
The Pegasus W2600 Series is a 2 or 3-needle cylinder bed interlock stitch machine. It is designed for industrial use to increase quality and production in the sewing industry. The manual provides detailed instructions for operation, adjustment, and maintenance to ensure the machine remains in optimal condition.
Important Technical Specifications
- Stitch Type: 602, 605
- Needle Size: UY128GAS #9S, UY128GAS #10S
- Machine Size (WxDxH): 460mm x 270mm x 392mm
- Net Weight (head only): 41.2Kg
- Gross Weight (with accessories): 47.2Kg
- Working Noise Level: n=6,300rpm: LpA≤83.5dB (Noise measurement according to DIN 45635 48A-1)
- Needle Space (mm): Varies by subclass, e.g., 3.2-4, 4.8, 5.6-6.4, 5.6, 6.4.
- Max. Stitch Length (mm): 4.5
- Differential Feed Ratio: 0.9~1.3 (standard), 0.6~1.1 (for specific subclasses), 1.3~1.8 (for specific subclasses).
- Presser Foot Lift (mm): Varies by subclass and stroke type (Standard/High lift), e.g., 5.6, 6.8, 6, 7, 6.5.
- Max. Speed (rpm): Varies by subclass and stroke type (Standard/High lift), e.g., 6,500, 6,000, 7,000.
- Oil Type: HIGHSPEED SEWING MACHINE OIL (ISO Viscosity Grade 22).
Usage Features
The manual emphasizes safe and correct operation.
- Initial Setup: Includes assembling the machine rest board (non-submerged and semi-submerged installations), installing the sewing machine, and attaching the belt cover. The machine pulley rotates clockwise.
- Threading: Detailed instructions for threading the machine, including opening guards and covers, pressing a button to release the bracket, and knotting threads for rethreading.
- Adjustments:
- Presser Foot Pressure: Adjusted by loosening a nut and turning a screw to ensure proper fabric feeding and uniform stitch formation.
- Differential Feed Ratio: Adjusted by loosening a nut and raising/lowering a lever to control fabric shrinkage or stretching. Specific instructions are provided for ratios of 1:1.3~1:1.8 and 1:0.6~1:1.1, noting potential damage if feed dogs strike the needle plate at higher ratios.
- Stitch Length: Adjusted by loosening a nut and turning a knob clockwise for coarse stitches or counterclockwise for fine stitches.
- Thread Tension: Adjusted by turning needle, top cover, and looper thread tension knobs clockwise to tighten or counterclockwise to loosen, aiming for balanced and beautiful stitches.
- Needle Thread Guard: Adjusted by loosening a screw and moving the guard up or down to control the size of the needle thread loop, depending on thread type (stretchable, woolly, spun).
- Needle Thread Guides: Adjusted by loosening screws to ensure the left needle thread is horizontal within a specified range when needles are at the top of their stroke.
- Looper Thread Take-up: Instructions for removing, reinstalling, and adjusting the looper thread take-up to ensure proper thread release from point A on the take-up.
- Looper Thread Guides: Adjusted by loosening screws and aligning eyelets with a mark to control the supply of looper thread.
- Spreader: Adjustments for spreader height (distance from needle plate to spreader bottom), front-to-back position (clearance to left needle), and left-to-right position (distance from left needle center to spreader).
- Spreader Thread Guide: Adjustments for clearance between spreader thread guide and spreader, and alignment of the slot with point B on the spreader.
- Thread Guide: Adjustments for positioning the thread guide above the front end of the slot on the spreader thread guide and clearance between the two.
- Top Cover Thread Guide: Adjusted by loosening a screw to set a specific distance between the spreader thread guide and the top cover thread guide, and fine-tuned with a knob to control thread supply.
- Feed Dog Height: Adjusted by loosening screws and moving feed dogs up or down to achieve a specified distance from the needle plate when at their highest point of travel.
- Presser Foot Lift: Adjusted by lowering a lever and adjusting a screw to set the distance from the needle plate to the presser foot bottom when raised.
- Needle Height: Adjusted by loosening a screw and moving the needle holder up or down to set the distance from the left needle point to the needle plate when the needle is at the top of its stroke.
- Looper: Adjustments for looper-needle setting distance (from right needle to looper point) and looper avoiding distance (front-to-back clearance between left/middle needle and looper point).
- Needle Guard (Rear): Adjustments for distance from the needle guard to the right needle and front-to-back clearance between the right/middle needle and the looper point.
- Needle Guard (Front): Adjustments for clearance between needles and the front needle guard when the looper is moving to the left.
- Needle Bar Stroke: Instructions for changing the needle bar stroke (standard or high) by adjusting an eccentric, with warnings to readjust needle height, looper, and needle guard if changed.
- Oil Supply for Needle Bar Chamber: Adjustment of oil amount by turning a screw, with a warning not to exceed a 45° range.
Maintenance Features
The manual outlines routine maintenance and safety precautions.
- Safety First: Emphasizes turning off power and unplugging the machine before any maintenance, adjustment, or repair. Only well-trained personnel should perform these tasks.
- Lubrication:
- Oil Type: Use "HIGHSPEED SEWING MACHINE OIL" (ISO Viscosity Grade 22).
- Filling: Remove cap, add oil until the level reaches (H) on the oil gauge, then replace cap.
- Manual Lubrication: Apply 2-3 drops of oil to the needle bar and looper shaft when the machine is first used or after being unused for some time.
- Oil Circulation Check: After filling, run the machine and check the oil gauge window to ensure oil is flowing. If not, check the oil filter.
- Silicone Oil for H.R. Device: Fill silicone oil tanks to prevent thread breakage or fabric damage.
- Cleaning:
- Open covers, loosen screws, and remove the needle plate bracket.
- Clean grooves of the needle plate and around the feed dogs.
- Replace the needle plate bracket and close covers.
- Remove the rubber plug, clean the inside, and replace the plug.
- Replacing the Needle:
- Loosen screws, remove old needles with pincette.
- Fix new needles with the scarf facing the rear, insert fully, then tighten screws.
- Replacing the Oil Filter:
- Remove screws, cover, O-ring, and filter.
- Check and replace the filter if necessary.
- Reassemble in reverse order.
- Check and clean the oil filter every six months to prevent improper lubrication.
- Oil Replacement: Replace oil one month after first use, then every six months. Drain old oil by removing a screw on the oil pan, then tighten.
Safety Precautions
The manual includes a dedicated section on safety, using DANGER, WARNING, and CAUTION labels.
- General Safety: Read the manual carefully, be aware of moving parts, and take necessary safety measures.
- Symbols and Messages: Explains various safety symbols, including electrical shock, injury, burn, "never do this," unplugging, grounding, and normal rotating direction of the pulley.
- Applications and Purpose: Machines are for industrial sewing only; do not use for other purposes.
- Circumstances: Avoid using the machine near high-frequency welders, in chemical vapor, outdoors, in high temperatures/humidity, or with voltage fluctuations exceeding ±10%.
- Safety Measures (Maintenance): Always turn off power and unplug before maintenance. If power is needed, establish and follow specific safety procedures.
- Before Starting: Visually check cables, connectors, and machine for damage. Ensure the machine pulley rotates clockwise. Run at less than 3/4 maximum speed for the first month.
- While Running: Never operate without safety devices (eye guard, finger guard, pulley cover). Keep hands away from needles, pulley, V-belt, motor pulley, thread take-up, and needle bar. Be careful with clutch motors as they run for a while after power-off. Do not place tools on the machine table. Wear appropriate clothing.
- Training: Operators and service personnel must have proper knowledge and skills for safe operation.